今回も更にWebアプリケーションを作り込みます。
以下、今までの作業です。
【さくらVPS】【Python】Django で Web アプリを作る【Part.1】
【さくらVPS】【Python】Django で Web アプリを作る(Let’s Encrypt SSL証明書設定)【Part.2】
【さくらVPS】【Python】Django で Web アプリを作る(Djangoインストール&設定)【Part.3】
【さくらVPS】【Python】Django で Web アプリを作る(Webアプリ構築編)【Part.4】
【さくらVPS】【Python】Django で Web アプリを作る(Webアプリ構築編)【Part.5】
【さくらVPS】【Python】Django で Web アプリを作る(Webアプリ設定編)【Part.6】
Webアプリを作る場合はレンタルサーバーより「VPS」 の方が自由度が高いのでお勧めです。
ちなみに、「さくらのVPS」
さくらのVPSのスペックです。
[test@SAKURA_VPS ~]$ cat /proc/cpuinfo | grep processor processor : 0 cat /proc/meminfo | grep MemTotal MemTotal: 500208 kB
月額 : 685円~
ディスク: SSD 20GB
CPU : Intel Xeon CPU E5-2650v2 @ 2.60GHz 1個
メモリ : 512MB
まだまだWebアプリケーションの基本的な部分ですが少しずつ進めていきます。
通しで Web アプリケーションを勉強したい場合は、淵上喜弘著の「」
当記事で勉強&作成する Web アプリケーションは以下の著書を参考にしています。
Amazonの「Kindle Unlimited」 で購入しました。
1日で理解するDjango超基礎入門
初めに Django のバージョン確認手順を紹介します。
Django のバージョンは「1.11.7」 であることが分かります。
(pyenv) [test@SAKURA_VPS helloworld]$ python import django django.get_version() ← Djangoのバージョンを確認します。 ‘1.11.7’ django.VERSION ← Djangoのバージョンを確認します。 (1, 11, 7, ‘final’, 0)
初めに仮想環境に切り替えます。
[test@SAKURA_VPS ~]$ ls cd pyenv/ ls source ./bin/activate ← 仮想環境に切り替えます。 (pyenv) [test@SAKURA_VPS pyenv]$ ← (pyenv)が表示され、仮想環境に切り替わったことが分かります。
「/home/test/pyenv/site01/helloworld/admin.py」 を編集します。
以下のコードで helloworld アプリケーションのモデルを表示させます。
(pyenv) [test@SAKURA_VPS helloworld]$ pwd vi admin.py
# Register your models here.from .models import Add_Word
admin.site.register(Add_Word)
ファイルを修正したら開発用 Django サーバーを起動します。
(pyenv) [test@SAKURA_VPS site01]$ pwd /home/test/pyenv/site01 python manage.py runserver
System check identified no issues (0 silenced).
You have 1 unapplied migration(s). Your project may not work properly until you apply the migrations for app(s): helloworld.
November 04, 2017 – 16:52:24
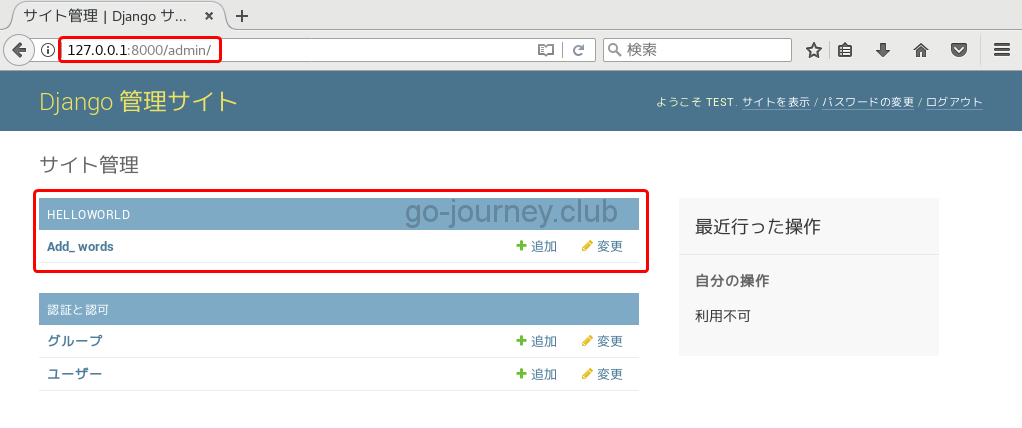
ブラウザを起動して「http://127.0.0.1:8000/admin」 にアクセスをします。
以下のように「HELLOWORLD」 に「Add_words」 が表示されていれば成功です。
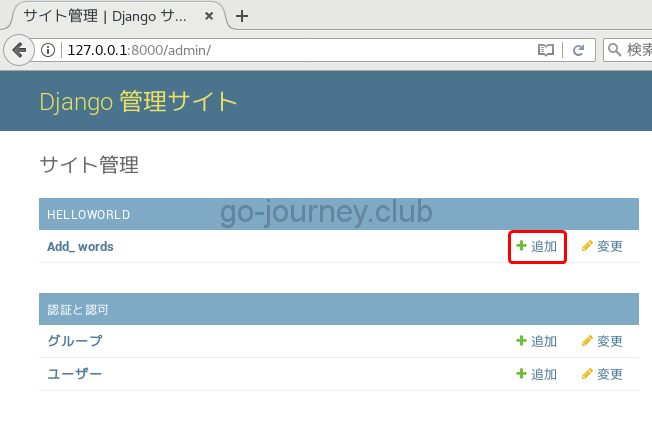
文字を登録してみます。
「HELLOWORLD」 –「Add_words」 より「追加」 をクリックします。
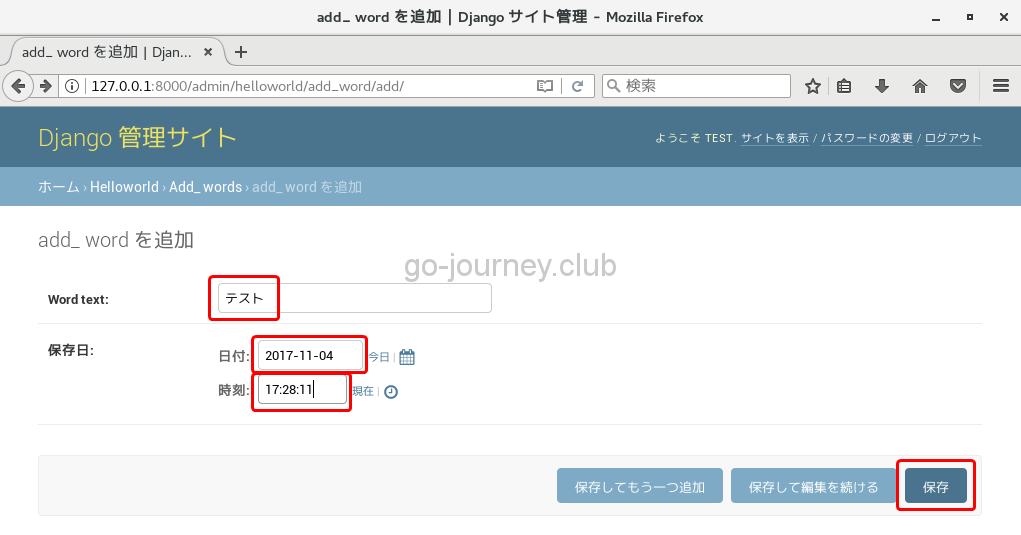
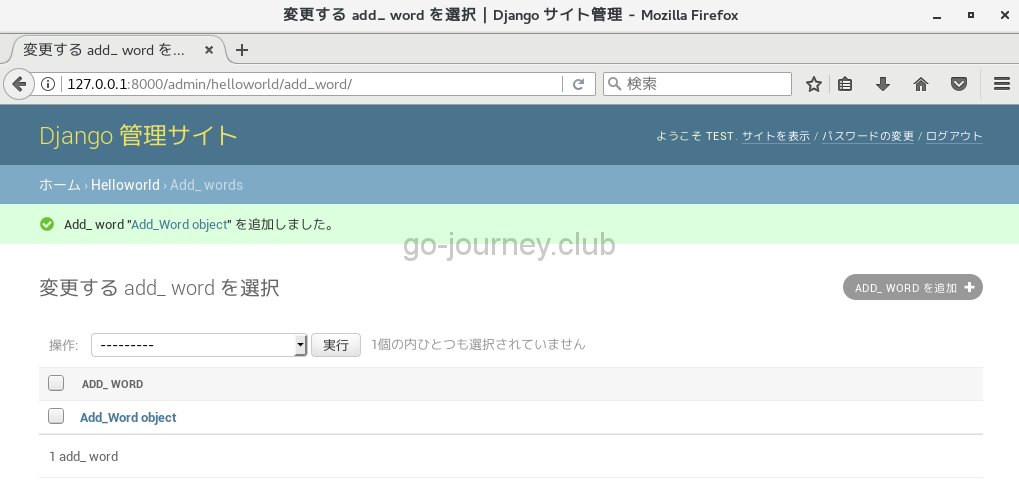
「add_word」 を追加画面で文字を追加し、「保存」 ボタンをクリックします。
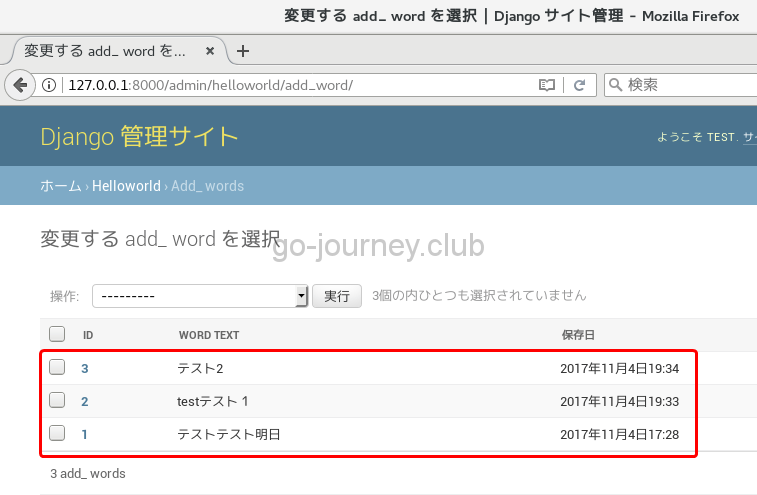
以下のように追加されます。
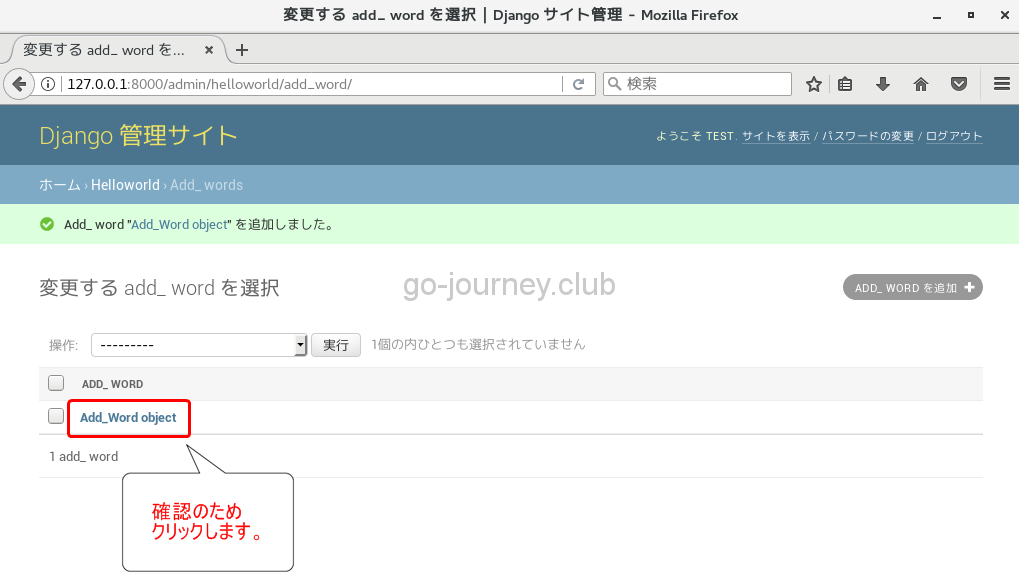
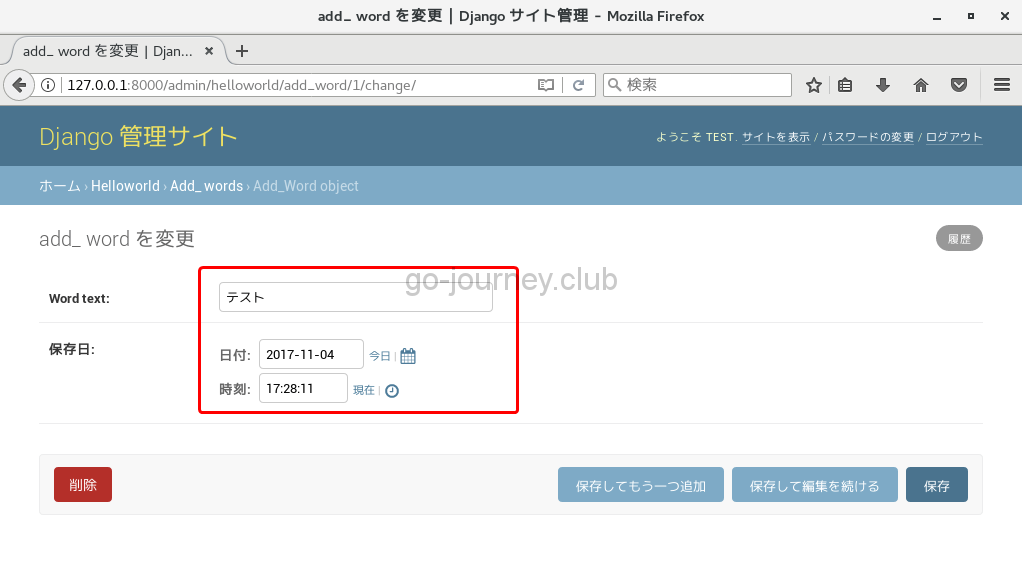
追加した文字列を確認します。
追加した文字列を確認します。
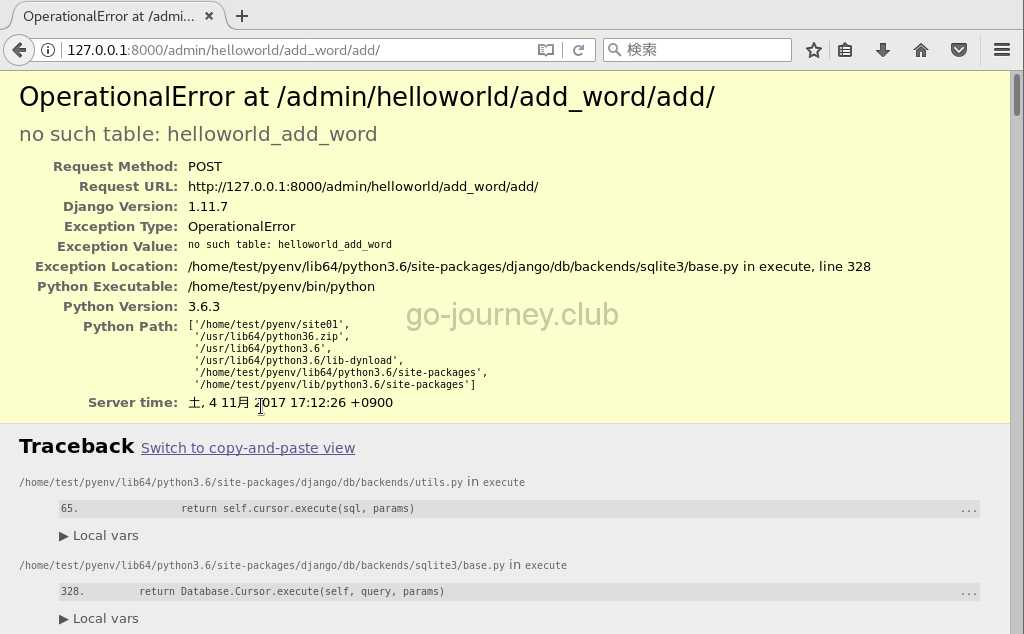
画面操作をした際に以下のエラーが出力される場合があります。
OperationalError at /admin/helloworld/add_word/add
no such table: helloworld_add_word
その場合は一旦開発用 Django サーバーを「Ctrl」+「C」で停止して、再度マイグレーションしてから起動するとうまくいきます。
^C (pyenv) [test@SAKURA_VPS site01]$ ← 「Ctrl」+「C」で開発用 Django サーバーを停止します。 python manage.py migrate ← マイグレーションします。 Operations to perform: Apply all migrations: Running migrations: OK python manage.py runserver ← マイグレーションが完了したら再度開発用 Django サーバーを起動します。
System check identified no issues (0 silenced). http://127.0.0.1:8000/
「python manage.py migrate」 コマンドで何をしているのかと言うと、settings.pyファイルの設定に基づきデータベースのテーブルを作成しています。
ちなみに「/home/test/pyenv/site01/site01/settings.py」 のデータベース部分の抜粋です。
(pyenv) [test@SAKURA_VPS site01]$ pwd cat settings.py
~ 省略 ~
# Database # https://docs.djangoproject.com/en/1.11/ref/settings/#databases
DATABASES = { ‘default’: { ‘ENGINE’: ‘django.db.backends.sqlite3’, ‘NAME’: os.path.join(BASE_DIR, ‘db.sqlite3’), } }
~ 省略 ~
(pyenv) [test@SAKURA_VPS site01]$
データベースに保存されているテストデータを確認する設定手順です。
(pyenv) [test@SAKURA_VPS helloworld]$ pwd /home/test/pyenv/site01/helloworld vi views.py
# Create your views here.
def index(request):
「/home/test/pyenv/site01/helloworld/admin.py」 ファイルを編集します。
(pyenv) [test@SAKURA_VPS helloworld]$ pwd /home/test/pyenv/site01/helloworld vi admin.py
# Register your models here.
class Add_WordAdmin(admin.ModelAdmin): list_display=(‘id’, ‘word_text’, ‘date_time’)
admin.site.register(Add_Word, Add_WordAdmin)
管理画面よりデータを追加します。
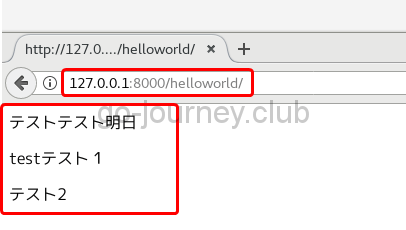
「http://127.0.0.1:8000/helloworld」 にアクセスをします。
登録した情報すべてが表示されることを確認します。
「/home/test/pyenv/site01/site01/settings.py」 ファイルを編集します。
下の設定を入れることで「helloworld/css/style.css」 を読み込むようになります。
(pyenv) [test@SAKURA_VPS site01]$ pwd vi settings.py
~ 省略 ~
STATIC_URL = ‘/static/’ ← staticディレクトリが基点となります。
STATICFILES_DIRS = ( ← ファイルの一番最後に追加します。 os.path.join(BASE_DIR, ‘static’), )
「/home/test/pyenv/site01/helloworld/ 」 ディレクトリに「static」 ディレクトリを作成します。
「/home/test/pyenv/site01/helloworld/static 」ディレクトリに 「css」「images」ディレクトリを作成します。
(pyenv) [test@SAKURA_VPS site01]$ cd helloworld/
(pyenv) [test@SAKURA_VPS helloworld]$ pwd /home/test/pyenv/site01/helloworld/ mkdir static cd static/ pwd /home/test/pyenv/site01/helloworld/static mkdir css mkdir images
(pyenv) [test@SAKURA_VPS static]$ ls css images
現在のディレクトリ構成は以下のようになっています。
(pyenv) [test@SAKURA_VPS site01]$ pwd /home/test/pyenv/site01 LANG=C tree helloworld static css images templates helloworld index.html
11 directories, 31 files
更に「css」 ディレクトリに「style.css」 を作成します。
(pyenv) [test@SAKURA_VPS css]$ pwd /home/test/pyenv/site01/helloworld/static/css vi style.css @charset “UTF-8”;
p{ font-size: 20px; color: #0000FF; ← 青色文字に変更します。 }
「index.html」ファイルを編集します。
(pyenv) [test@SAKURA_VPS helloworld]$ pwd /home/test/pyenv/site01/helloworld/templates/helloworld vi index.html
{% extends ‘helloworld/base.html’ %}
{% block body %}
{% for list in lists %}
「base.html」ファイルを作成します。
(pyenv) [test@SAKURA_VPS helloworld]$ pwd /home/test/pyenv/site01/helloworld/templates/helloworld vi base.html
<head>← static ディレクトリを起点として style.css ファイルの場所を指定します。
</head>
<body>
</body>
ブラウザを起動して以下の URL にアクセスします。
http://127.0.0.1:8000/helloworld
style.css ファイルを読み込んで文字をカスタマイズできています。
コンソールログを確認します。
(pyenv) [test@SAKURA_VPS site01]$ python manage.py runserver
System check identified no issues (0 silenced).http://127.0.0.1:8000/ “GET /static/css/style.css HTTP/1.1” 304 0
参考文献 今回構築したDjango環境の参考文献です。
Amazonの「Kindle Unlimited」 で購入しました。
1日で理解するDjango超基礎入門
【さくらVPS】【Python】Django で Web アプリを作る【Part.1】
【さくらVPS】【Python】Django で Web アプリを作る(Let’s Encrypt SSL証明書設定)【Part.2】
【さくらVPS】【Python】Django で Web アプリを作る(Djangoインストール&設定)【Part.3】
【さくらVPS】【Python】Django で Web アプリを作る(Webアプリ構築編)【Part.4】
【さくらVPS】【Python】Django で Web アプリを作る(Webアプリ構築編)【Part.5】
【さくらVPS】【Python】Django で Web アプリを作る(Webアプリ設定編)【Part.6】