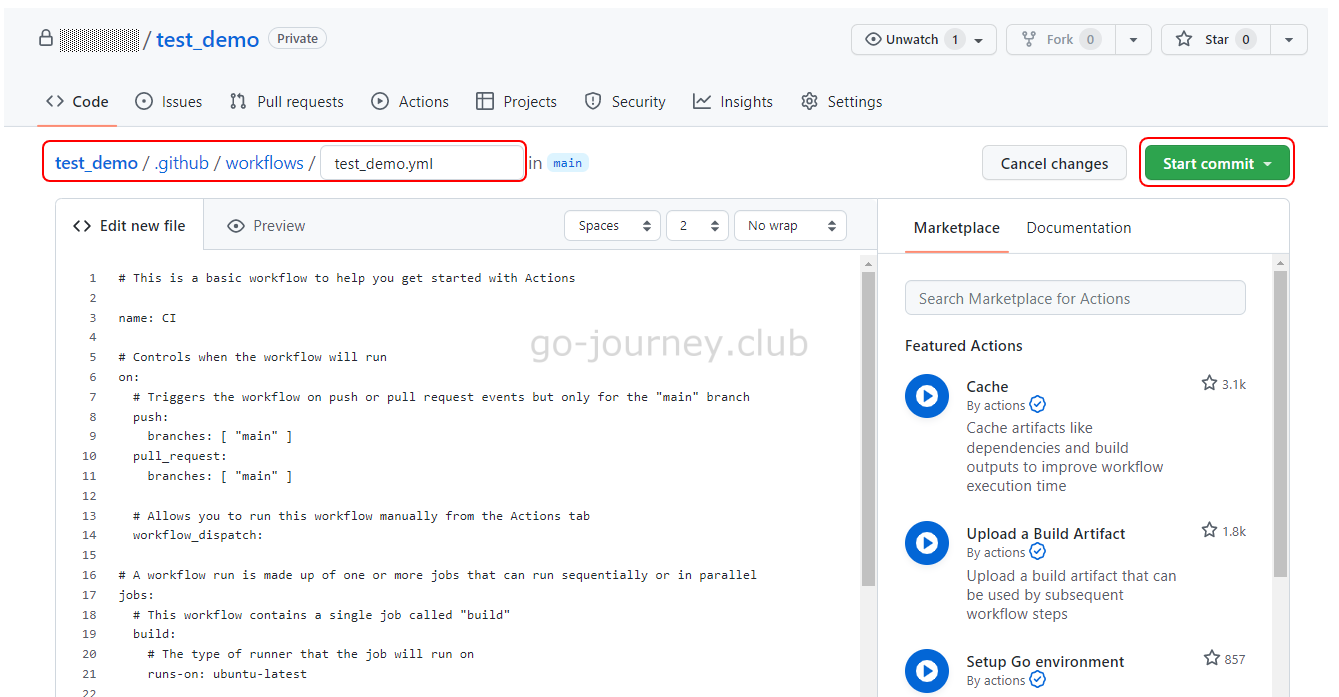
# This is a basic workflow to help you get started with Actions
name: CI
# Controls when the workflow will run
on:
# Triggers the workflow on push or pull request events but only for the “main” branch
push:
branches: [ “main” ]
pull_request:
branches: [ “main” ]
# Allows you to run this workflow manually from the Actions tab
workflow_dispatch:
# A workflow run is made up of one or more jobs that can run sequentially or in parallel
jobs:
# This workflow contains a single job called “build”
build:
# The type of runner that the job will run on
runs-on: ubuntu-latest
# Steps represent a sequence of tasks that will be executed as part of the job
steps:
# Checks-out your repository under $GITHUB_WORKSPACE, so your job can access it
– uses: actions/checkout@v3
# Runs a single command using the runners shell
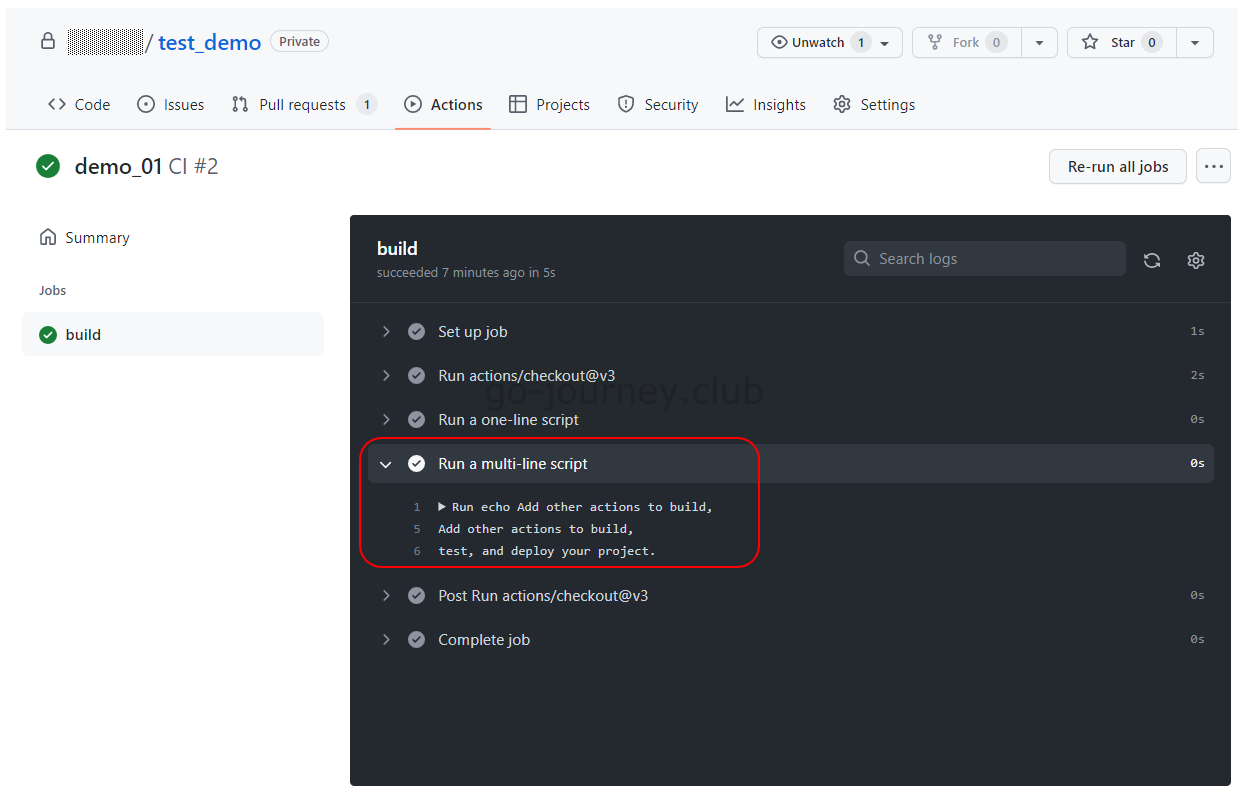
– name: Run a one-line script
run: echo Hello, world!
# Runs a set of commands using the runners shell
– name: Run a multi-line script
run: |
echo Add other actions to build,
echo test, and deploy your project.
$ git pull
remote: Enumerating objects: 6, done.
remote: Counting objects: 100% (6/6), done.
remote: Compressing objects: 100% (3/3), done.
remote: Total 5 (delta 0), reused 0 (delta 0), pack-reused 0
Unpacking objects: 100% (5/5), 1.28 KiB | 657.00 KiB/s, done.
From github.com:xxxxxxxx/test_demo
fdb7857..402c5b3 main -> origin/main
There is no tracking information for the current branch.
Please specify which branch you want to merge with.
See git-pull(1) for details.
git pull
If you wish to set tracking information for this branch you can do so with:
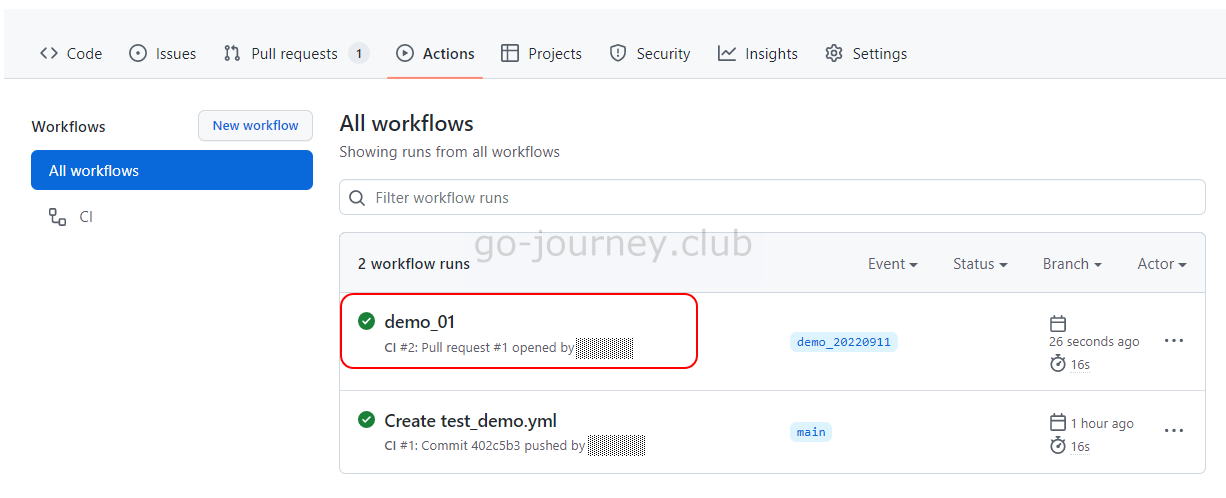
(demo_20220911) $ ls
test.txt
sasagawam@gmail.com:~/environment/test/test_demo (demo_20220911) $ git status
On branch demo_20220911
Untracked files:
(use “git add …” to include in what will be committed)
test.txt
nothing added to commit but untracked files present (use “git add” to track)
(demo_20220911) $ git add .
(demo_20220911) $ git status
On branch demo_20220911
Changes to be committed:
(use “git restore –staged …” to unstage)
new file: test.txt
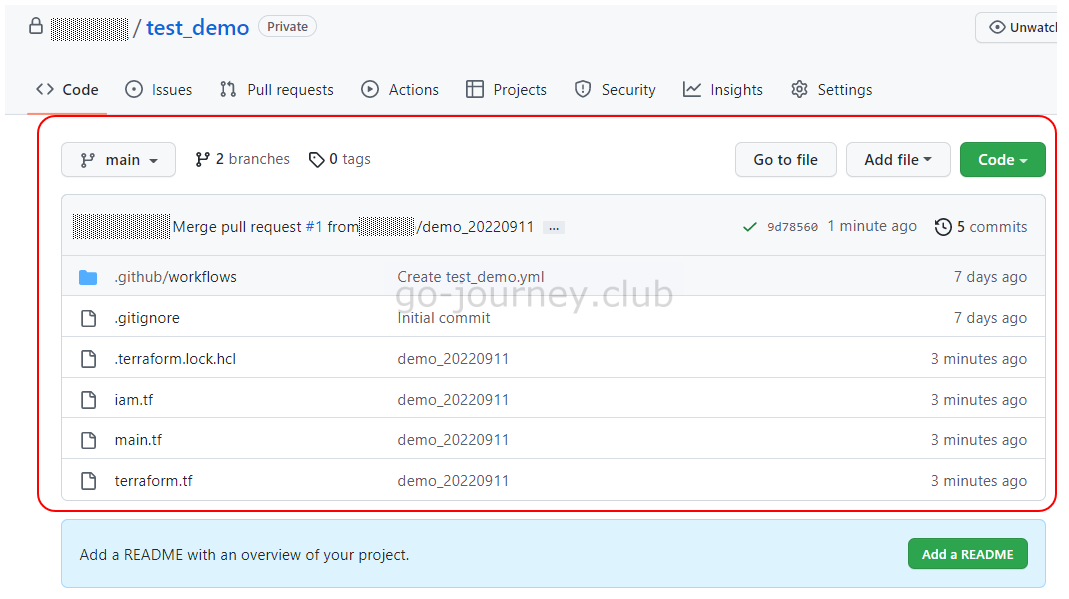
(demo_20220911) $ git commit -m “demo_01”
[demo_20220911 1603f9a] demo_01
Committer: EC2 Default User <ec2-user@ip-172-31-44-157.ap-northeast-1.compute.internal>
Your name and email address were configured automatically based
on your username and hostname. Please check that they are accurate.
You can suppress this message by setting them explicitly:
Successfully configured the backend “s3”! Terraform will automatically
use this backend unless the backend configuration changes.
Initializing provider plugins…
– Finding latest version of hashicorp/aws…
– Installing hashicorp/aws v4.30.0…
– Installed hashicorp/aws v4.30.0 (signed by HashiCorp)
Terraform has created a lock file .terraform.lock.hcl to record the provider
selections it made above. Include this file in your version control repository
so that Terraform can guarantee to make the same selections by default when
you run “terraform init” in the future.
Terraform has been successfully initialized!
You may now begin working with Terraform. Try running “terraform plan” to see
any changes that are required for your infrastructure. All Terraform commands
should now work.
If you ever set or change modules or backend configuration for Terraform,
rerun this command to reinitialize your working directory. If you forget, other
commands will detect it and remind you to do so if necessary.
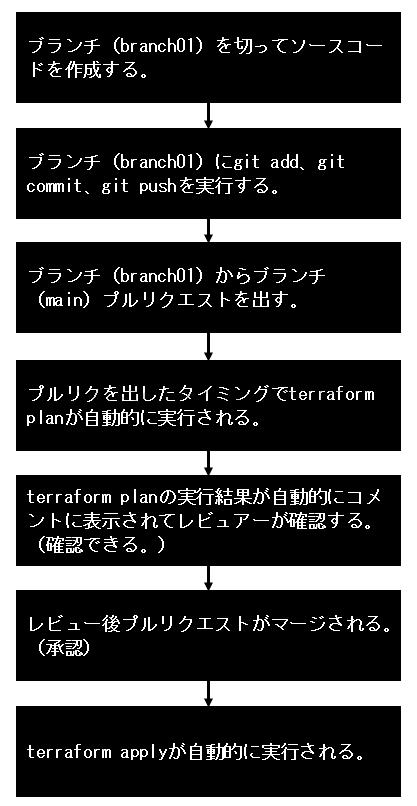
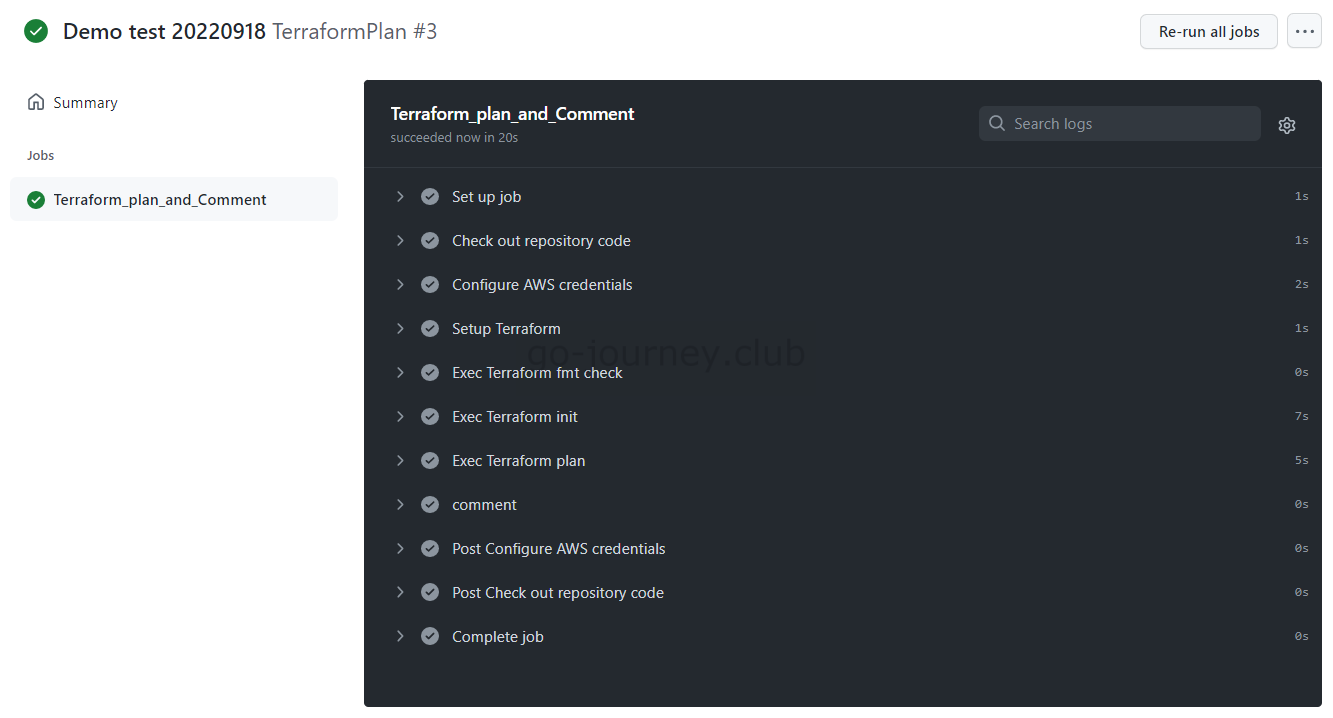
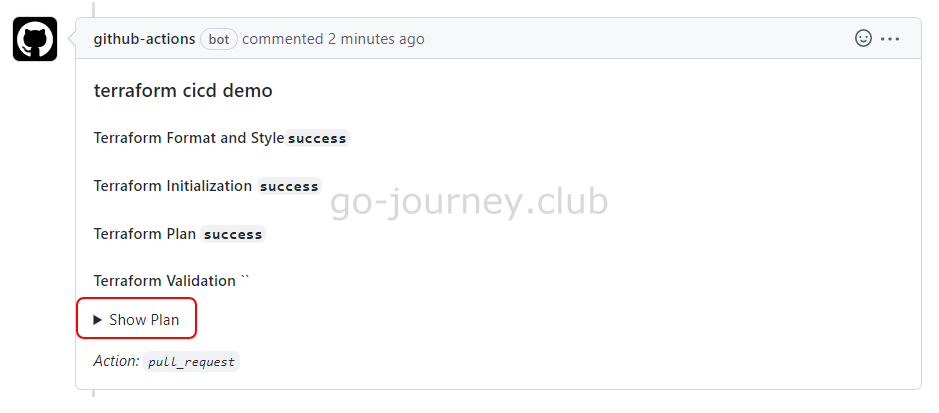
terraform plan コマンドを実行する
terraform plan コマンドを実行してみます。
■terraform plan コマンド実行
$ terraform plan
Terraform used the selected providers to generate the following execution plan. Resource actions are indicated with the following
symbols:
+ create
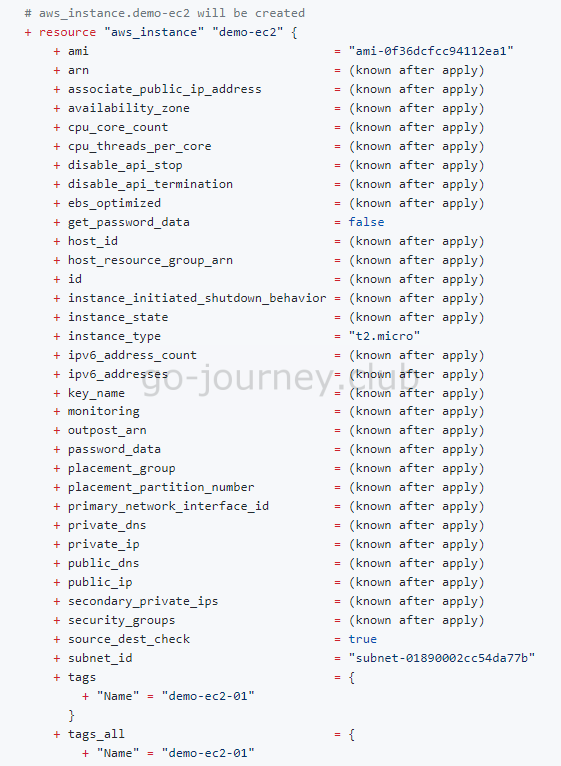
Terraform will perform the following actions:
# aws_iam_openid_connect_provider.terra_cicd_demo will be created
+ resource “aws_iam_openid_connect_provider” “terra_cicd_demo” {
+ arn = (known after apply)
+ client_id_list = [
+ “sts.amazonaws.com”,
]
+ id = (known after apply)
+ tags_all = (known after apply)
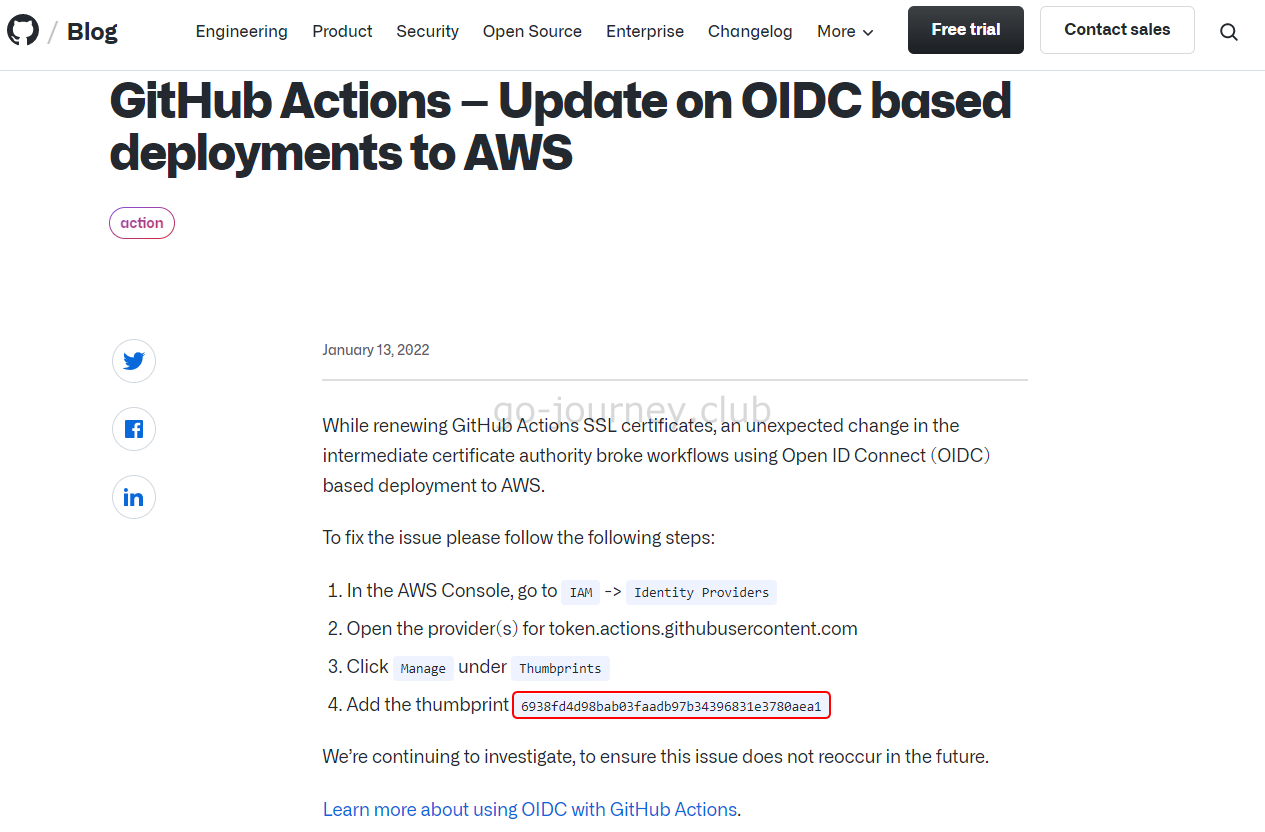
+ thumbprint_list = [
+ “6938fd4d98bab03faadb97b34396831e3780aea1”,
]
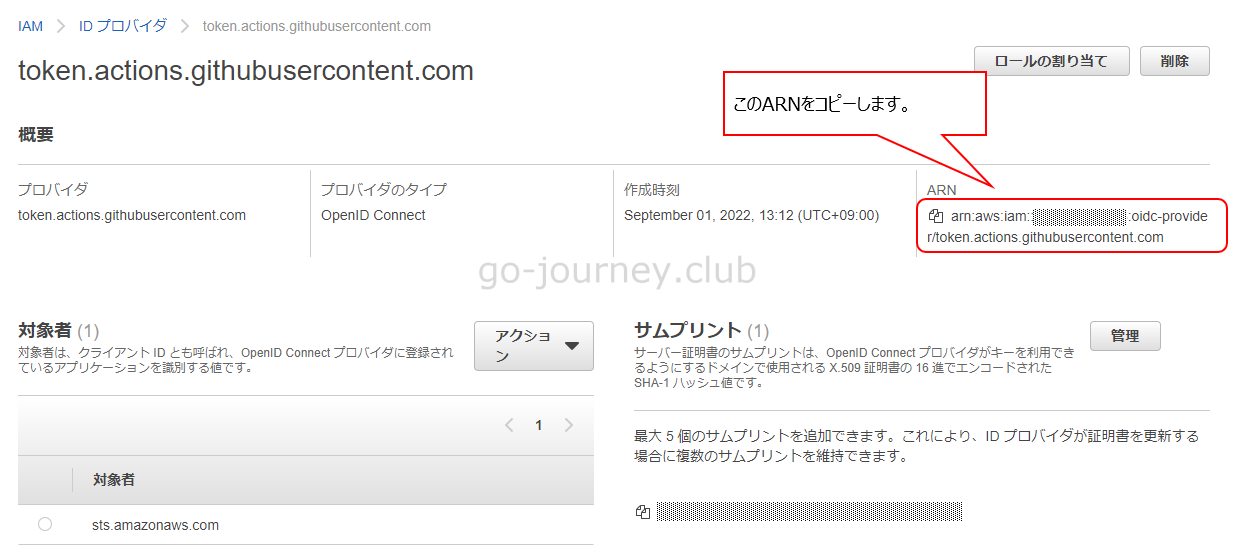
+ url = “https://token.actions.githubusercontent.com”
}
# aws_iam_role.terra_cicd_demo_oidc_role will be created
+ resource “aws_iam_role” “terra_cicd_demo_oidc_role” {
+ arn = (known after apply)
+ assume_role_policy = jsonencode(
{
+ Statement = [
+ {
+ Action = “sts:AssumeRoleWithWebIdentity”
+ Condition = {
+ StringLike = {
+ “token.actions.githubusercontent.com:sub” = [
+ “repo:xxxxx/test_demo:ref:refs/heads/demo_20220911”,
]
}
}
+ Effect = “Allow”
+ Principal = {
+ Federated = “arn:aws:iam::xxxxxxxx:oidc-provider/token.actions.githubusercontent.com”
}
},
]
+ Version = “2012-10-17”
}
)
+ create_date = (known after apply)
+ force_detach_policies = false
+ id = (known after apply)
+ managed_policy_arns = (known after apply)
+ max_session_duration = 3600
+ name = “TerraCICDDemoOIDCRole”
+ name_prefix = (known after apply)
+ path = “/”
+ tags_all = (known after apply)
+ unique_id = (known after apply)
+ inline_policy {
+ name = (known after apply)
+ policy = (known after apply)
}
}
# aws_iam_role_policy_attachment.AdministratorAccess_attachment will be created
+ resource “aws_iam_role_policy_attachment” “AdministratorAccess_attachment” {
+ id = (known after apply)
+ policy_arn = “arn:aws:iam::aws:policy/AdministratorAccess”
+ role = “TerraCICDDemoOIDCRole”
}
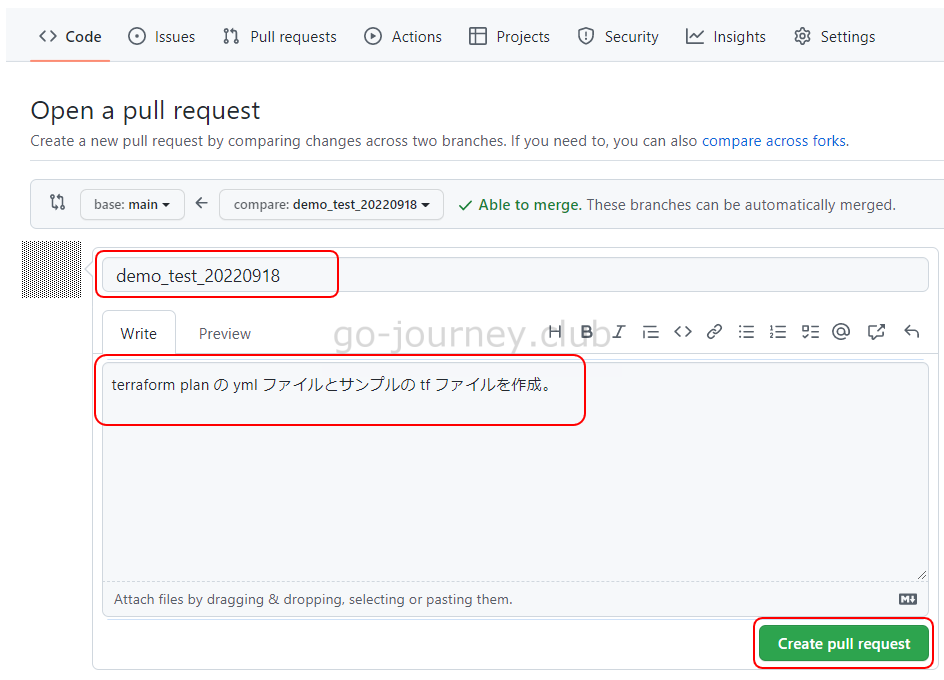
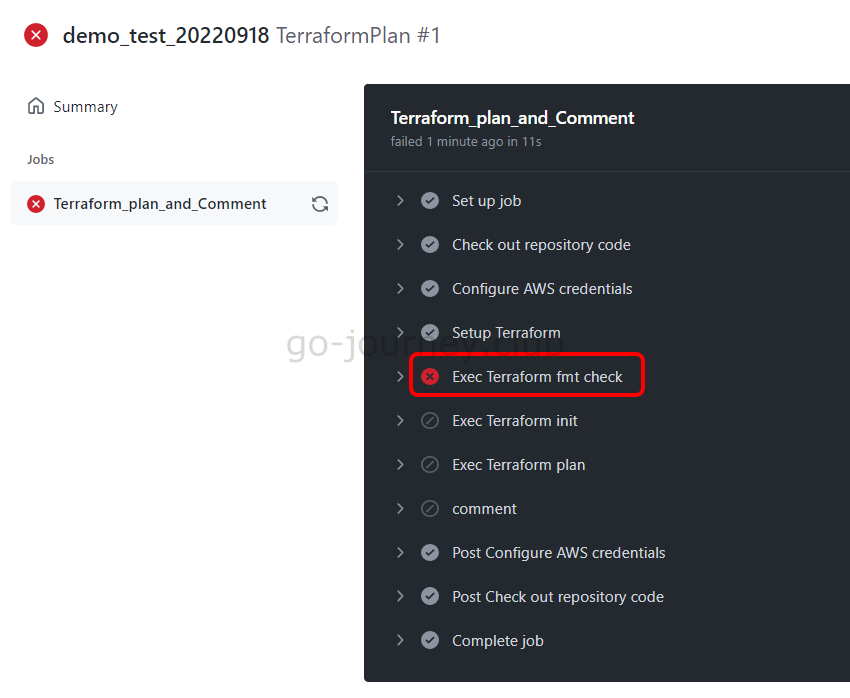
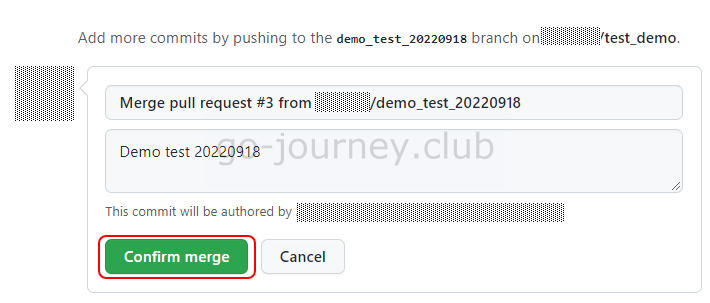
(demo_test_20220918) $ git status
On branch demo_test_20220918
Changes not staged for commit:
(use “git add/rm …” to update what will be committed)
(use “git restore …” to discard changes in working directory)
deleted: .github/workflows/test_demo.yml
Untracked files:
(use “git add …” to include in what will be committed)
.github/workflows/terraform_plan.yml
demo-ec2.tf
no changes added to commit (use “git add” and/or “git commit -a”)
(demo_test_20220918) $ git add .
(demo_test_20220918) $ git status
On branch demo_test_20220918
Changes to be committed:
(use “git restore –staged …” to unstage)
new file: .github/workflows/terraform_plan.yml
deleted: .github/workflows/test_demo.yml
new file: demo-ec2.tf
(demo_test_20220918) $ git commit -m “demo_test_20220918”
[demo_test_20220918 384e1d1] demo_test_20220918
Committer: EC2 Default User <ec2-user@ip-172-31-44-157.ap-northeast-1.compute.internal>
Your name and email address were configured automatically based
on your username and hostname. Please check that they are accurate.
You can suppress this message by setting them explicitly:
(demo_test_20220918) $ git add .
(demo_test_20220918) $ git commit -m “demo_test_20220918”
[demo_test_20220918 c31e9d1] demo_test_20220918
Committer: EC2 Default User <ec2-user@ip-172-31-44-157.ap-northeast-1.compute.internal>
Your name and email address were configured automatically based
on your username and hostname. Please check that they are accurate.
You can suppress this message by setting them explicitly: