【Python】【CentOS7】Python 3.6.2 を「yum からインストールする手順」と「ソースからインストールする手順」

何か欲しい本があるわけではないのに、よく池袋のジュンク堂に通っています。

池袋ジュンク堂


最近のジュンク堂の傾向では「機械学習」「人工知能」関連の本が平積みになって売られています。

(つまり大量入荷されています)


私は今までインフラ系エンジニア(特にLinux)でしたが、プログラミングも好きなので、まずは興味優先で Python を勉強して「機械学習」の空気を味わいたいと思いました。

一念発起です。


まずは自分の環境に最新のPythonをインストールする手順から(開発環境から)始めます。

以下は、私が管理しているサーバー環境(CentOS7)に、Python3.6 をインストールした手順です。


現在の CentOS 7 の環境

まずは現在の環境を見てみます。


OS・カーネル周り

[test@test07 ~]$ cat /etc/redhat-release
CentOS Linux release 7.3.1611 (Core)
[test@test07 ~]$ uname -a
Linux test07 3.10.0-514.21.1.el7.x86_64 #1 SMP Thu May 25 17:04:51 UTC 2017 x86_64 x86_64 x86_64 GNU/Linux
[test@test07 ~]$


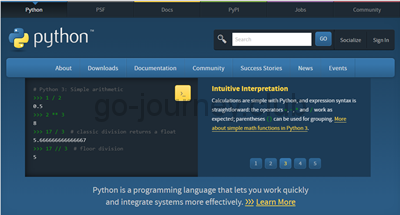
インストール直後の Python のバージョン

[test@test07 ~]$ python
Python 2.7.5 (default, Nov 6 2016, 00:28:07)
[GCC 4.8.5 20150623 (Red Hat 4.8.5-11)] on linux2
Type “help”, “copyright”, “credits” or “license” for more information.
>>> exit() ← 「exit()」コマンドで python コンソールを抜けられます。
[test@test07 ~]$


Pythonをインストールしていませんが、デフォルトで Python が入っています。

Pythonのバージョンは、2.7.5 です。


Python 公式サイトで最新の Python のバージョンを確認

以下の URL より Python の公式サイトへアクセスします。

https://www.python.org/

https://www.python.org/


公式ページの中盤に下図のように最新バージョンが表示されています。

公式サイトでは、3.6.2 が最新です。(2017年8月13日現在)

Latest: Python 3.6.2 - Python 2.7.13


Python を 3.6 にする手順は2つ

Python を 3.6 にアップグレードするための手順は2つあります。

  • yum でアップグレードする手順
  • ソールファイルをコンパイルしてインストールする手順


yum でアップグレードする手順の「メリット」「デメリット」

運用・管理が簡単です。

特に会社等組織でサーバーを運用している場合は個人のクセがでない yum コマンドでの運用・管理が最適だと思います。

手順書も作りやすいです。


その代り、最新バージョンのリポジトリが追いつかない場合があります。

特に問題になるのが脆弱性の問題が出た場合、yum でのリポジトリがリリースされるまで時間が掛かる場合があります。

その反面、ソールからコンパイルしてインストールする方法は、脆弱性を回避した修正版がリリースされたらすぐにインストールすることができます。


ソールファイルをコンパイルしてインストールする手順の「メリット」「デメリット」

職人気質のエンジニアが一人で運用管理できるような少人数の組織で最適です。

常に最新バージョンのコマンド・ツールが使用できるので、脆弱性対応など俊敏に対応することができます。


その反面、多数のサーバー、多数のエンジニアが所属する組織の場合は運用・管理で確実に「ヒューマンエラー」が発生する温床になります。

エンジニアが多数集まると、どうしても「こだわり」「クセ」が出て、「インストールするディレクトリ」や「オプション」など違いが生まれます。

手順書を作成しても「裏ワザ」や「裏オプション」などがあったり、今までの担当のエンジニアが辞めて新任のエンジニアが担当に着くと完全に引き継がれないのでヒューマンエラーを引き起こします。


「yum でアップグレードする方法」、「ソールファイルでコンパイルしてインストールする方法」ともに「メリット」「デメリット」がありますが、今回は「yum でアップグレードする方法」を選択します。


ただし、「ソースファイルからコンパイルしてインストールする手順」もやってみます。


yum で Python をインストールする手順

デフォルトですでに「Python 2.7.5」がインストールされていますが、何もしない状態で(デフォルトの状態)で「yum update python」コマンドを実行してみます。

# yum update python


No packages marked for update


デフォルトの状態では「Python 2.7.5」以上にはアップグレードされません。

ちなみに、現在インストールしているリポジトリ一覧です。

# yum repolist all
読み込んだプラグイン:fastestmirror, langpacks
Loading mirror speeds from cached hostfile
* epel: kartolo.sby.datautama.net.id
リポジトリー ID                リポジトリー名                                                状態
C7.0.1406-base/x86_64          CentOS-7.0.1406 – Base                                        無効
C7.0.1406-centosplus/x86_64    CentOS-7.0.1406 – CentOSPlus                                  無効
C7.0.1406-extras/x86_64        CentOS-7.0.1406 – Extras                                      無効
C7.0.1406-fasttrack/x86_64     CentOS-7.0.1406 – CentOSPlus                                  無効
C7.0.1406-updates/x86_64       CentOS-7.0.1406 – Updates                                     無効
C7.1.1503-base/x86_64          CentOS-7.1.1503 – Base                                        無効
C7.1.1503-centosplus/x86_64    CentOS-7.1.1503 – CentOSPlus                                  無効
C7.1.1503-extras/x86_64        CentOS-7.1.1503 – Extras                                      無効
C7.1.1503-fasttrack/x86_64     CentOS-7.1.1503 – CentOSPlus                                  無効
C7.1.1503-updates/x86_64       CentOS-7.1.1503 – Updates                                     無効
C7.2.1511-base/x86_64          CentOS-7.2.1511 – Base                                        無効
C7.2.1511-centosplus/x86_64    CentOS-7.2.1511 – CentOSPlus                                  無効
C7.2.1511-extras/x86_64        CentOS-7.2.1511 – Extras                                      無効
C7.2.1511-fasttrack/x86_64     CentOS-7.2.1511 – CentOSPlus                                  無効
C7.2.1511-updates/x86_64       CentOS-7.2.1511 – Updates                                     無効
base/7/x86_64                  CentOS-7 – Base                                               有効: 9,363
base-debuginfo/x86_64          CentOS-7 – Debuginfo                                          無効
!base-source/7                 CentOS-7 – Base Sources                                       無効
c7-media                       CentOS-7 – Media                                              無効
centosplus/7/x86_64            CentOS-7 – Plus                                               無効
centosplus-source/7            CentOS-7 – Plus Sources                                       無効
cr/7/x86_64                    CentOS-7 – cr                                                 無効
epel/x86_64                    Extra Packages for Enterprise Linux 7 – x86_64                有効: 11,785
epel-debuginfo/x86_64          Extra Packages for Enterprise Linux 7 – x86_64 – Debug        無効
!epel-source/x86_64            Extra Packages for Enterprise Linux 7 – x86_64 – Source       無効
epel-testing/x86_64            Extra Packages for Enterprise Linux 7 – Testing – x86_64      無効
epel-testing-debuginfo/x86_64  Extra Packages for Enterprise Linux 7 – Testing – x86_64 – De 無効
epel-testing-source/x86_64     Extra Packages for Enterprise Linux 7 – Testing – x86_64 – So 無効
extras/7/x86_64 CentOS-7 –     Extras                                                        有効: 449
!extras-source/7 CentOS-7 –    Extras Sources                                                無効
fasttrack/7/x86_64 CentOS-7 –  fasttrack                                                     無効
updates/7/x86_64 CentOS-7 –    Updates                                                       有効: 2,146
!updates-source/7 CentOS-7 –   Updates Sources                                               無効
repolist: 23,743


標準のリポジトリと EPEL のリポジトリがインストールされていますが、これらのリポジトリは古い Python のバージョンしかサポートしていません。

そもそも CentOS は企業で運用するサーバーとしての特徴があります。

そのため「安定稼働」を重視しているので、バージョンも「枯れたバージョン(バグも出し終わった古いバージョン)」が中心になります。

そのため「標準のリポジトリ」も「EPEL」もバージョンは古めです。


しかし CentOS で利用できるリポジトリは多数あり、その中には最新に近いバージョンの Python をインストールできるリポジトリもあります。

その中でも「一番信頼性」があり、且つ「新しいバージョン」を提供してくれるのは「IUS」リポジトリです。


IUS Community Project とは

IUS Community Project とは、企業で利用している Linux サーバーのために、「より新しいバージョン」の RPM パッケージを提供するプロジェクトです。

「最新」ではなく「より新しい」バージョンです。

以下のサイトより「IUS」のリポジトリをダウンロードすることができます。

https://ius.io/

https://ius.io/


ちなみにリポジトリは多数ありますが、中には更新が止まっているプロジェクトや、廃止してしまったプロジェクトもあります。


IUSからリポジトリをダウンロードする

早速 IUS からリポジトリをダウンロードします。

以下のURLより「Getting Started」のページにアクセスします。

https://ius.io/GettingStarted/


ページの下の方にhttps://centos7.iuscommunity.org/ius-release.rpmのリンクがあるのでクリックします。

IUS Community Project


PCにダウンロードしたら、Teratermの「SSH SCP」でサーバーにアップロードします。


IUS リポジトリのインストール

yum コマンドで IUS リポジトリをインストールします。

# yum install ius-release-1.0-15.ius.centos7.noarch.rpm


インストール可能な Python 3.x 系のパッケージを確認します。

※大量の利用可能なパッケージが表示されたので省略しています。

# yum list available | grep python3
python34.x86_64         3.4.5-4.el7          epel

~ 省略 ~

python34u.x86_64         3.4.6-1.ius.centos7      ius

~ 省略 ~

python35u.x86_64         3.5.3-1.ius.centos7      ius

~ 省略 ~

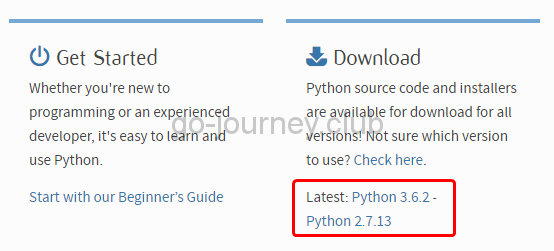
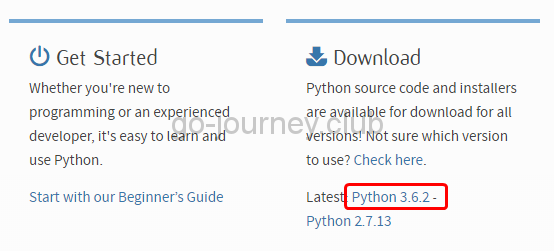
python36u.x86_64         3.6.2-1.ius.centos7       ius ← IUS リポジトリでは「3.6.2」が最新バージョンです。
~ 省略 ~


こうして見ると「EPEL」でも「Python 3.4.5」をインストールできますね。

しかし IUS リポジトリでは「Python 3.6.2」をインストールできます。

今回は、この「Python 3.6.2」をインストールします。


yum で Python をインストール

インストールは、「yum list available」コマンドで表示されたパッケージ名を指定してインストールします。

# yum install python36u.x86_64


インストール後の動作確認

Python の動作確認をします。

[root@test07 ~]# python3.6
Python 3.6.2 (default, Jul 18 2017, 22:59:34)
[GCC 4.8.5 20150623 (Red Hat 4.8.5-11)] on linux
Type “help”, “copyright”, “credits” or “license” for more information.
>>> exit()
[root@test07 ~]# which python3.6
/bin/python3.6


デフォルトの Python のバージョン確認

念のため、デフォルトの Python のバージョン確認をします。

[root@test07 ~]# python
Python 2.7.5 (default, Nov 6 2016, 00:28:07)
[GCC 4.8.5 20150623 (Red Hat 4.8.5-11)] on linux2
Type “help”, “copyright”, “credits” or “license” for more information.
>>> exit()
[root@test07 ~]#


yum コマンドの動作確認

yum は Python を使用しているため、yum コマンドに影響がないか確認します。

[test@test07 bin]$ yum list

一覧が表示されれば(エラーが出力されなければ)問題ありません。


ソールファイルをコンパイルしてインストールする手順

最新の Python をソースファイルをコンパイルしてインストールする手順も説明します。

基本的になるべくデフォルトでインストールします。


Python インストール設計

最初に設計をします。

  • Python バージョン → 公式サイト(https://www.python.org/)の最新バージョン
  • Python をインストールするディレクトリ → /usr/local ← 個人の好みに分かれてしまいますが「/usr/local」にインストールします。


公式サイトの Python の最新バージョンの確認

公式サイト(https://www.python.org/)の最新バージョンを確認したところ、Python 3.6.2 が最新でした。

ということは「IUS」リポジトリでインストールする方法とバージョンが一緒になりますが、それでもソールからコンパイルしてインストールする場合もあるので続けます。


ソールファイルのダウンロード

ソースファイルはこちらからダウンロードしました。


公式サイトのトップページに行きます。

https://www.python.org/

https://www.python.org/


トップページの中盤に下図のように「Latest:Python 3.6.2」のリンクがあるのでクリックします。

Latest: Python 3.6.2 - Python 2.7.13


ページが移ったら、ページの下部の方に「Files」があるので、「Gzipped source tarball(.tgz形式のファイルです)」のリンクをクリックします。

【Python】Linux CentOS7 に Python 3.6 をソースからインストールする手順


「Python-3.6.2.tgz」という形式のファイルをダウンロードしたら、Teraterm の「SSH SCP」でファイルをサーバーへアップロードします。


Python 3.6.2 のコンパイル および インストール手順

アカウントは「test」アカウントで作業します。

[test@test07 Python]$ pwd
/home/test/Python
[test@test07 Python]$ ls
Python-3.6.2.tgz ← ソースファイルをここに置きました。


解凍します。

[test@test07 Python]$ tar xvfz Python-3.6.2.tgz

[test@test07 Python]$ ls
Python-3.6.2 Python-3.6.2.tgz


Python-3.6.2 ディレクトリができています。

この Python-3.6.2 ディレクトリに移動すると、configure スクリプトがあります。

この「configure」スクリプトを実行します。


さらに、Python 3.6.2 を /usr/local にインストールするので、prefix オプションで指定します。

[test@test07 Python]$ cd Python-3.6.2/
[test@test07 Python-3.6.2]$ ls
Doc     LICENSE Makefile.pre.in Objects Parser   README.rst config.guess configure.ac setup.py
Grammar Lib     Misc            PC      Programs Tools      config.sub   install-sh
Include Mac     Modules         PCbuild Python   aclocal.m4 configure    pyconfig.h.in
[test@test07 Python-3.6.2]$ ./configure –prefix=/usr/local


~ 省略 ~


configure: creating ./config.status
config.status: creating Makefile.pre
config.status: creating Modules/Setup.config
config.status: creating Misc/python.pc
config.status: creating Misc/python-config.sh
config.status: creating Modules/ld_so_aix
config.status: creating pyconfig.h
creating Modules/Setup
creating Modules/Setup.local
creating Makefile

If you want a release build with all stable optimizations active (PGO, etc),
please run ./configure –enable-optimizations


とりあえず、エラーは出力されずに「Makefile」が作成されました。

[test@test07 Python-3.6.2]$ ls -l Makefile
-rw-rw-r– 1 test test 67376 8月 13 11:42 Makefile


続けて make コマンドを実行します。

ディレクトリはそのままで、「make」コマンドだけ実行します。

[test@test07 Python-3.6.2]$ make


 ~省略~

Python build finished successfully! ← ビルドには成功したようです。
The necessary bits to build these optional modules were not found: ← ここら辺のメッセージが気になるところですが先へ進みます。
_bz2 _sqlite3 _ssl
_tkinter readline
To find the necessary bits, look in setup.py in detect_modules() for the module’s name.

The following modules found by detect_modules() in setup.py, have been
built by the Makefile instead, as configured by the Setup files:
atexit pwd time
running build_scripts
creating build/scripts-3.6
copying and adjusting /home/test/Python/Python-3.6.2/Tools/scripts/pydoc3 -> build/scripts-3.6
copying and adjusting /home/test/Python/Python-3.6.2/Tools/scripts/idle3 -> build/scripts-3.6
copying and adjusting /home/test/Python/Python-3.6.2/Tools/scripts/2to3 -> build/scripts-3.6
copying and adjusting /home/test/Python/Python-3.6.2/Tools/scripts/pyvenv -> build/scripts-3.6
changing mode of build/scripts-3.6/pydoc3 from 664 to 775
changing mode of build/scripts-3.6/idle3 from 664 to 775
changing mode of build/scripts-3.6/2to3 from 664 to 775
changing mode of build/scripts-3.6/pyvenv from 664 to 775
renaming build/scripts-3.6/pydoc3 to build/scripts-3.6/pydoc3.6
renaming build/scripts-3.6/idle3 to build/scripts-3.6/idle3.6
renaming build/scripts-3.6/2to3 to build/scripts-3.6/2to3-3.6
renaming build/scripts-3.6/pyvenv to build/scripts-3.6/pyvenv-3.6
/bin/install -c -m 644 ./Tools/gdb/libpython.py python-gdb.py
gcc -pthread -c -Wno-unused-result -Wsign-compare -DNDEBUG -g -fwrapv -O3 -Wall -Wstrict-prototypes -std=c99 -Wextra -Wno-unused-result -Wno-unused-parameter -Wno-missing-field-initializers -I. -I./Include -DPy_BUILD_CORE -o Programs/_testembed.o ./Programs/_testembed.c
gcc -pthread -Xlinker -export-dynamic -o Programs/_testembed Programs/_testembed.o libpython3.6m.a -lpthread -ldl -lutil -lm
# Substitution happens here, as the completely-expanded BINDIR
# is not available in configure
sed -e “s,@EXENAME@,/usr/local/bin/python3.6m,” < ./Misc/python-config.in >python-config.py
# Replace makefile compat. variable references with shell script compat. ones; ->
LC_ALL=C sed -e ‘s,\$(\([A-Za-z0-9_]*\)),\$\{\1\},g’ < Misc/python-config.sh >python-config
# On Darwin, always use the python version of the script, the shell
# version doesn’t use the compiler customizations that are provided
# in python (_osx_support.py).
if test `uname -s` = Darwin; then \
cp python-config.py python-config; \
fi
[test@test07 Python-3.6.2]$


「make install」コマンドを実行します。

※ファイルを /usr/local に移動する必要が出てくるので、sudo で実行します。

[test@test07 Python-3.6.2]$ sudo make install


 ~省略~


running install
running build
running build_ext
INFO: Can’t locate Tcl/Tk libs and/or headers
warning: building with the bundled copy of libffi is deprecated on this platform. It will not be distributed with Python 3.7

Python build finished successfully!


~省略~


Collecting setuptools
Collecting pip
Installing collected packages: setuptools, pip
Successfully installed pip-9.0.1 setuptools-28.8.0


とりあえず、エラーは出力されずに、インストールは成功したようです。


python 3.6.2 の動作確認

動作確認をします。

[test@test07 Python-3.6.2]$ cd /usr/local/
[test@test07 local]$ ls
bin etc games include lib lib64 libexec sbin share src
[test@test07 local]$ cd bin/
[test@test07 bin]$ ls
2to3 easy_install-3.6 idle3.6 pip3.6 pydoc3.6 python3-config python3.6-config python3.6m-config pyvenv-3.6
2to3-3.6 idle3 pip3 pydoc3 python3 python3.6 python3.6m pyvenv
[test@test07 bin]$ ./python3.6
Python 3.6.2 (default, Aug 13 2017, 11:45:58) ← 「Python 3.6.2」です。
[GCC 4.8.5 20150623 (Red Hat 4.8.5-11)] on linux
Type “help”, “copyright”, “credits” or “license” for more information.
>>> exit()
[test@test07 bin]$


デフォルトの Python の確認

念のため、デフォルトの「Python」のバージョンの確認をします。

[test@test07 bin]$ python
Python 2.7.5 (default, Nov 6 2016, 00:28:07)
[GCC 4.8.5 20150623 (Red Hat 4.8.5-11)] on linux2
Type “help”, “copyright”, “credits” or “license” for more information.
>>> exit()
[test@test07 bin]$


yum の動作確認

yum は Python を使用しているため、yum コマンドに影響がないか確認します。

[test@test07 bin]$ yum list


一覧が表示されれば(エラーが出力されなければ)問題ありません。


まとめ

IUS は新しいバージョンのパッケージを提供していますが、Python に関しては最新バージョンを提供していました。

これからもプロジェクトを運営し続けてくれるとエンジニアとしては大変うれしいです。


よかったらシェアしてね!
  • URLをコピーしました!
  • URLをコピーしました!

この記事を書いた人

コメント

コメントする

AlphaOmega Captcha Medica  –  What Do You See?


このサイトはスパムを低減するために Akismet を使っています。コメントデータの処理方法の詳細はこちらをご覧ください