sshでのログインが遅い場合の対応方法

サーバーに負荷は掛かっていないはずなのに、ssh でのログインが異常なほど遅いと感じる時があります。

もちろん原因があって ssh ログインが遅延しています。

その場合の対応方法です。

ssh のデバッグモード(Verbose mode)でログインする

まずは ssh のデバッグモードでログインを試してみます。

「-v」でデバッグモードになり詳細にログが出力されます。

デバッグモードにもレベルがあり、マックスは「-vvv」と3つの v までです。

以下、デバッグモードで ssh ログインをした場合のログです。


$ ssh xx.xx.xx.215 -vvv
OpenSSH_6.6.1, OpenSSL 1.0.1e-fips 11 Feb 2013
debug1: Reading configuration data /etc/ssh/ssh_config
debug1: /etc/ssh/ssh_config line 56: Applying options for *
debug2: ssh_connect: needpriv 0
debug1: Connecting to xx.xx.xx.215 [xx.xx.xx.215] port 22.
debug1: Connection established.
debug1: identity file /home/test_accont/.ssh/id_rsa type -1 ← 様々な認証を試そうとしている
debug1: identity file /home/test_accont/.ssh/id_rsa-cert type -1
debug1: identity file /home/test_accont/.ssh/id_dsa type -1
debug1: identity file /home/test_accont/.ssh/id_dsa-cert type -1
debug1: identity file /home/test_accont/.ssh/id_ecdsa type -1
debug1: identity file /home/test_accont/.ssh/id_ecdsa-cert type -1
debug1: identity file /home/test_accont/.ssh/id_ed25519 type -1
debug1: identity file /home/test_accont/.ssh/id_ed25519-cert type -1
debug1: Enabling compatibility mode for protocol 2.0
debug1: Local version string SSH-2.0-OpenSSH_6.6.1
debug1: Remote protocol version 2.0, remote software version OpenSSH_6.6.1
debug1: match: OpenSSH_6.6.1 pat OpenSSH_6.6.1* compat 0x04000000
debug2: fd 3 setting O_NONBLOCK
debug3: load_hostkeys: loading entries for host “xx.xx.xx.215” from file “/home/test_accont/.ssh/known_hosts”
debug3: load_hostkeys: found key type ECDSA in file /home/test_accont/.ssh/known_hosts:103
debug3: load_hostkeys: loaded 1 keys
debug3: order_hostkeyalgs: prefer hostkeyalgs: ecdsa-sha2-nistp256-cert-v01@openssh.com,ecdsa-sha2-nistp384-cert-v01@openssh.com,ecdsa-sha2-nistp521-cert-v01@openssh.com,ecdsa-sha2-nistp256,ecdsa-sha2-nistp384,ecdsa-sha2-nistp521
debug1: SSH2_MSG_KEXINIT sent
debug1: SSH2_MSG_KEXINIT received
debug2: kex_parse_kexinit: curve25519-sha256@libssh.org,ecdh-sha2-nistp256,ecdh-sha2-nistp384,ecdh-sha2-nistp521,diffie-hellman-group-exchange-sha256,diffie-hellman-group-exchange-sha1,diffie-hellman-group14-sha1,diffie-hellman-group1-sha1
debug2: kex_parse_kexinit: ecdsa-sha2-nistp256-cert-v01@openssh.com,ecdsa-sha2-nistp384-cert-v01@openssh.com,ecdsa-sha2-nistp521-cert-v01@openssh.com,ecdsa-sha2-nistp256,ecdsa-sha2-nistp384,ecdsa-sha2-nistp521,ssh-ed25519-cert-v01@openssh.com,ssh-rsa-cert-v01@openssh.com,ssh-dss-cert-v01@openssh.com,ssh-rsa-cert-v00@openssh.com,ssh-dss-cert-v00@openssh.com,ssh-ed25519,ssh-rsa,ssh-dss
debug2: kex_parse_kexinit: aes128-ctr,aes192-ctr,aes256-ctr,arcfour256,arcfour128,aes128-gcm@openssh.com,aes256-gcm@openssh.com,chacha20-poly1305@openssh.com,aes128-cbc,3des-cbc,blowfish-cbc,cast128-cbc,aes192-cbc,aes256-cbc,arcfour,rijndael-cbc@lysator.liu.se
debug2: kex_parse_kexinit: hmac-md5-etm@openssh.com,hmac-sha1-etm@openssh.com,umac-64-etm@openssh.com,umac-128-etm@openssh.com,hmac-sha2-256-etm@openssh.com,hmac-sha2-512-etm@openssh.com,hmac-ripemd160-etm@openssh.com,hmac-sha1-96-etm@openssh.com,hmac-md5-96-etm@openssh.com,hmac-md5,hmac-sha1,umac-64@openssh.com,umac-128@openssh.com,hmac-sha2-256,hmac-sha2-512,hmac-ripemd160,hmac-ripemd160@openssh.com,hmac-sha1-96,hmac-md5-96
debug2: kex_parse_kexinit: none,zlib@openssh.com,zlib
debug2: kex_parse_kexinit:
debug2: kex_parse_kexinit: first_kex_follows 0
debug2: kex_parse_kexinit: reserved 0
debug2: kex_parse_kexinit: curve25519-sha256@libssh.org,ecdh-sha2-nistp256,ecdh-sha2-nistp384,ecdh-sha2-nistp521,diffie-hellman-group-exchange-sha256,diffie-hellman-group-exchange-sha1,diffie-hellman-group14-sha1,diffie-hellman-group1-sha1
debug2: kex_parse_kexinit: ssh-rsa,ecdsa-sha2-nistp256,ssh-ed25519
debug2: kex_parse_kexinit: aes128-ctr,aes192-ctr,aes256-ctr,arcfour256,arcfour128,aes128-gcm@openssh.com,aes256-gcm@openssh.com,chacha20-poly1305@openssh.com,aes128-cbc,3des-cbc,blowfish-cbc,cast128-cbc,aes192-cbc,aes256-cbc,arcfour,rijndael-cbc@lysator.liu.se
debug2: kex_parse_kexinit: hmac-md5-etm@openssh.com,hmac-sha1-etm@openssh.com,umac-64-etm@openssh.com,umac-128-etm@openssh.com,hmac-sha2-256-etm@openssh.com,hmac-sha2-512-etm@openssh.com,hmac-ripemd160-etm@openssh.com,hmac-sha1-96-etm@openssh.com,hmac-md5-96-etm@openssh.com,hmac-md5,hmac-sha1,umac-64@openssh.com,umac-128@openssh.com,hmac-sha2-256,hmac-sha2-512,hmac-ripemd160,hmac-ripemd160@openssh.com,hmac-sha1-96,hmac-md5-96
debug2: kex_parse_kexinit: none,zlib@openssh.com
debug2: kex_parse_kexinit:
debug2: kex_parse_kexinit: first_kex_follows 0
debug2: kex_parse_kexinit: reserved 0
debug2: mac_setup: setup hmac-md5-etm@openssh.com
debug1: kex: server->client aes128-ctr hmac-md5-etm@openssh.com none
debug2: mac_setup: setup hmac-md5-etm@openssh.com
debug1: kex: client->server aes128-ctr hmac-md5-etm@openssh.com none
debug1: kex: curve25519-sha256@libssh.org need=16 dh_need=16
debug1: sending SSH2_MSG_KEX_ECDH_INIT
debug1: expecting SSH2_MSG_KEX_ECDH_REPLY
debug1: Server host key: ECDSA 26:bd:d4:a5:61:44:7f:b7:e0:00:0f:92:77:5c:e5:89
debug3: load_hostkeys: loading entries for host “xx.xx.xx.215” from file “/home/test_accont/.ssh/known_hosts”
debug3: load_hostkeys: found key type ECDSA in file /home/test_accont/.ssh/known_hosts:103
debug3: load_hostkeys: loaded 1 keys
debug1: Host ‘xx.xx.xx.215’ is known and matches the ECDSA host key.
debug1: Found key in /home/test_accont/.ssh/known_hosts:103
debug1: ssh_ecdsa_verify: signature correct
debug2: kex_derive_keys
debug2: set_newkeys: mode 1
debug1: SSH2_MSG_NEWKEYS sent
debug1: expecting SSH2_MSG_NEWKEYS
debug2: set_newkeys: mode 0
debug1: SSH2_MSG_NEWKEYS received
debug1: SSH2_MSG_SERVICE_REQUEST sent
debug2: service_accept: ssh-userauth
debug1: SSH2_MSG_SERVICE_ACCEPT received
debug2: key: /home/test_accont/.ssh/id_rsa ((nil)),
debug2: key: /home/test_accont/.ssh/id_dsa ((nil)),
debug2: key: /home/test_accont/.ssh/id_ecdsa ((nil)),
debug2: key: /home/test_accont/.ssh/id_ed25519 ((nil)),
debug1: Authentications that can continue: publickey,gssapi-keyex,gssapi-with-mic,password ← GSSAPI authentication 関連のログは最終的に失敗していることを表している?
debug3: start over, passed a different list publickey,gssapi-keyex,gssapi-with-mic,password
debug3: preferred gssapi-keyex,gssapi-with-mic,publickey,keyboard-interactive,password
debug3: authmethod_lookup gssapi-keyex
debug3: remaining preferred: gssapi-with-mic,publickey,keyboard-interactive,password
debug3: authmethod_is_enabled gssapi-keyex
debug1: Next authentication method: gssapi-keyex
debug1: No valid Key exchange context
debug2: we did not send a packet, disable method
debug3: authmethod_lookup gssapi-with-mic
debug3: remaining preferred: publickey,keyboard-interactive,password
debug3: authmethod_is_enabled gssapi-with-mic
debug1: Next authentication method: gssapi-with-mic
debug1: Unspecified GSS failure. Minor code may provide more information
No Kerberos credentials available (default cache: KEYRING:persistent:1000)

debug1: Unspecified GSS failure. Minor code may provide more information
No Kerberos credentials available (default cache: KEYRING:persistent:1000)

debug2: we did not send a packet, disable method
debug3: authmethod_lookup publickey
debug3: remaining preferred: keyboard-interactive,password
debug3: authmethod_is_enabled publickey
debug1: Next authentication method: publickey
debug1: Trying private key: /home/test_accont/.ssh/id_rsa
debug3: no such identity: /home/test_accont/.ssh/id_rsa: No such file or directory
debug1: Trying private key: /home/test_accont/.ssh/id_dsa
debug3: no such identity: /home/test_accont/.ssh/id_dsa: No such file or directory
debug1: Trying private key: /home/test_accont/.ssh/id_ecdsa
debug3: no such identity: /home/test_accont/.ssh/id_ecdsa: No such file or directory
debug1: Trying private key: /home/test_accont/.ssh/id_ed25519
debug3: no such identity: /home/test_accont/.ssh/id_ed25519: No such file or directory
debug2: we did not send a packet, disable method
debug3: authmethod_lookup password
debug3: remaining preferred: ,password
debug3: authmethod_is_enabled password
debug1: Next authentication method: password
test_accont@xx.xx.xx.215’s password:  ← この password:プロンプトが表示されるまでが異常に長い
debug3: packet_send2: adding 48 (len 62 padlen 18 extra_pad 64)
debug2: we sent a password packet, wait for reply
debug1: Authentication succeeded (password).
Authenticated to xx.xx.xx.215 ([xx.xx.xx.215]:22).
debug1: channel 0: new [client-session]
debug3: ssh_session2_open: channel_new: 0
debug2: channel 0: send open
debug1: Requesting no-more-sessions@openssh.com
debug1: Entering interactive session.
debug2: callback start
debug2: fd 3 setting TCP_NODELAY
debug3: packet_set_tos: set IP_TOS 0x10
debug2: client_session2_setup: id 0
debug2: channel 0: request pty-req confirm 1
debug1: Sending environment.
debug3: Ignored env XDG_SESSION_ID
debug3: Ignored env HOSTNAME
debug3: Ignored env TERM
debug3: Ignored env SHELL
debug3: Ignored env HISTSIZE
debug3: Ignored env SSH_CLIENT
debug3: Ignored env SSH_TTY
debug3: Ignored env USER
debug3: Ignored env LD_LIBRARY_PATH
debug3: Ignored env LS_COLORS
debug3: Ignored env MAIL
debug3: Ignored env PATH
debug3: Ignored env PWD
debug1: Sending env LANG = ja_JP.UTF-8
debug2: channel 0: request env confirm 0
debug3: Ignored env HISTCONTROL
debug3: Ignored env SHLVL
debug3: Ignored env HOME
debug3: Ignored env LOGNAME
debug3: Ignored env SSH_CONNECTION
debug3: Ignored env LESSOPEN
debug3: Ignored env XDG_RUNTIME_DIR
debug3: Ignored env _
debug2: channel 0: request shell confirm 1
debug2: callback done
debug2: channel 0: open confirm rwindow 0 rmax 32768
debug2: channel_input_status_confirm: type 99 id 0
debug2: PTY allocation request accepted on channel 0
debug2: channel 0: rcvd adjust 2097152
debug2: channel_input_status_confirm: type 99 id 0
debug2: shell request accepted on channel 0
Last login: Fri Jun 16 18:01:00 2017 from xx.xx.xx.215


何度かログを見返してみたのですが、正直言うと上記のログでは当たりがつけられませんでした。

途中で何度か下記のようなログが表示されています。

これは様々な認証方式を試しているログと思いますが、実際他のサーバーも同じ環境であるにもかかわらず、当該サーバーのみ異様にログインに時間が掛かります。


debug1: identity file /home/test_accont/.ssh/id_rsa type -1
debug1: identity file /home/test_accont/.ssh/id_rsa-cert type -1
debug1: identity file /home/test_accont/.ssh/id_dsa type -1
debug1: identity file /home/test_accont/.ssh/id_dsa-cert type -1
debug1: identity file /home/test_accont/.ssh/id_ecdsa type -1
debug1: identity file /home/test_accont/.ssh/id_ecdsa-cert type -1
debug1: identity file /home/test_accont/.ssh/id_ed25519 type -1
debug1: identity file /home/test_accont/.ssh/id_ed25519-cert type -1


あとは、ここら辺が怪しいでしょうか。

debug2: we did not send a packet, disable method
debug3: authmethod_lookup password
debug3: remaining preferred: ,password
debug3: authmethod_is_enabled password
debug1: Next authentication method: password

ここで時間を取っている?


具体的に ssh でログインする際にどのような内部処理が行われているのか確認するために「man ssh」コマンドで「認証部分」のみ調べてみました。


AUTHENTICATION

The OpenSSH SSH client supports SSH protocols 1 and 2.

OpenSSH SSHクライアントは、SSHプロトコル1と2をサポートしています。


The default is to use protocol 2 only, though this can be changed via the Protocol option in ssh_config(5) or the -1 and -2 options (see above).

デフォルトではプロトコル2のみを使用しますが、これはssh_config(5)のプロトコルオプションまたは-1と-2のオプション(上記参照)で変更できます。


Both protocols support similar authentication methods, but protocol 2 is the default since it provides additional mechanisms for confidentiality (the traffic is encrypted using AES, 3DES, Blowfish, CAST128, or Arcfour) and integrity (hmac-md5, hmac-sha1, hmac-sha2-256, hmac-sha2-512, umac-64, umac-128, hmac-ripemd160).

どちらのプロトコルも同様の認証方法をサポートしていますが、プロトコル2は、機密性(トラフィックはAES、3DES、Blowfish、CAST128、またはArcfourを使用して暗号化されています)と整合性(hmac-md5、hmac-sha1、hmac- sha2-256、hmac-sha2-512、umac-64、umac-128、hmac-ripemd160)があります。 


Protocol 1 lacks a strong mechanism for ensuring the integrity of the connection.

プロトコル1には、接続の完全性を保証する強力なメカニズムがありません。


The methods available for authentication are: GSSAPI-based authentication, host-based authentication, public key authentication, challenge-response authentication, and password authentication.

認証に使用できるメソッドは、GSSAPIベースの認証、ホストベースの認証、公開鍵認証、チャレンジ/レスポンス認証、およびパスワード認証です。


Authentication methods are tried in the order specified above, though protocol 2 has a configuration option to change the default order: PreferredAuthentications.

プロトコル2にはデフォルトの順序「PreferredAuthentications」を変更する設定オプションがありますが、認証方法は上記の順序で試行されます。


Host-based authentication works as follows: If the machine the user logs in from is listed in /etc/hosts.equiv or /etc/ssh/shosts.equiv on the remote machine, and the user names are the same on both sides, or if the files ~/.rhosts or ~/.shosts exist in the user’s home directory on the remote machine and contain a line containing the name of the client machine and the name of the user on that machine, the user is considered for login.

ホストベースの認証は、次のように動作します。ユーザーがログインしたマシンがリモートマシンの /etc/hosts.equiv または /etc/ssh/shosts.equiv にリストされていて、ユーザー名が両側で同じである場合は、 ファイル「 ~/.rhosts 」または「 ~/.shosts 」がリモートマシン上のユーザのホームディレクトリに存在し、クライアントマシンの名前とそのマシン上のユーザ名を含む行を含む場合、ユーザはログインと見なされます 。


Additionally, the server must be able to verify the client’s host key (see the description of /etc/ssh/ssh_known_hosts and ~/.ssh/known_hosts, below) for login to be permitted.

さらに、サーバはログインを許可するために、クライアントのホスト鍵(以下の「 /etc/ssh/ssh_known_hosts 」および「 ~/.ssh/known_hosts 」の説明を参照)を検証できる必要があります。


This authentication method closes security holes due to IP spoofing, DNS spoofing, and routing spoofing.

この認証方法は、IPスプーフィング、DNSスプーフィング、およびルーティングスプーフィングによるセキュリティホールを閉じます。


[Note to the administrator: /etc/hosts.equiv, ~/.rhosts, and the rlogin/rsh protocol in general, are inherently insecure and should be disabled if security is desired.]

[管理者への注意:「 /etc/hosts.equiv 」、「 ~/.rhosts 」、および rlogin rsh プロトコルは、本質的に安全ではないので、セキュリティが必要な場合は無効にする必要があります。]


Public key authentication works as follows: The scheme is based on public-key cryptography, using cryptosystems where encryption and decryption are done using separate keys, and it is unfeasible to derive the decryption key from the encryption key.

公開鍵認証は次のように機能します。スキームは、暗号化と復号化が別々の鍵を使用して行われる暗号システムを使用する公開鍵暗号化に基づいており、暗号化鍵から復号鍵を引き出すことは不可能です。


The idea is that each user creates a public/private key pair for authentication purposes.

アイデアは、各ユーザが認証のために公開鍵/秘密鍵のペアを作成することです。


The server knows the public key, and only the user knows the private key.

サーバは公開鍵を知っており、ユーザだけが秘密鍵を知っています。


ssh implements public key authentication protocol automatically, using one of the DSA, ECDSA, ED25519 or RSA algorithms. 

sshは、DSA、ECDSA、ED25519またはRSAアルゴリズムのいずれかを使用して、公開鍵認証プロトコルを自動的に実装します。


Protocol 1 is restricted to using only RSA keys, but protocol 2 may use any.

プロトコル1はRSAキーのみを使用するように制限されていますが、プロトコル2は任意のものを使用できます。


The HISTORY section of ssl(8) contains a brief discussion of the DSA and RSA algorithms.

ssl(8)のHISTORYセクションには、DSAアルゴリズムとRSAアルゴリズムの簡単な説明が含まれています。


The file ~/.ssh/authorized_keys lists the public keys that are permitted for logging in.

~/.ssh/authorized_keys ファイルには、ログインが許可されている公開鍵がリストされています。


When the user logs in, the ssh program tells the server which key pair it would like to use for authentication.

ユーザーがログインすると、sshプログラムは認証に使用するキーペアをサーバーに通知します。


The client proves that it has access to the private key and the server checks that the corresponding public key is authorized to accept the account.

クライアントは、秘密鍵へのアクセス権を有していることを証明し、サーバは、対応する公開鍵がそのアカウントを受け入れる権限を有することをチェックする。


The user creates his/her key pair by running ssh-keygen(1).

ユーザは、ssh-keygen(1)を実行することによって、自分の鍵ペアを作成します。


This stores the private key in ~/.ssh/identity (protocol 1), ~/.ssh/id_dsa (protocol 2 DSA), ~/.ssh/id_ecdsa (protocol 2 ECDSA), ~/.ssh/id_ed25519 (protocol 2ED25519), or ~/.ssh/id_rsa (protocol 2 RSA) and stores the public key in ~/.ssh/identity.pub (protocol 1), ~/.ssh/id_dsa.pub (protocol 2 DSA), ~/.ssh/id_ecdsa.pub (protocol 2 ECDSA), ~/.ssh/id_ed25519.pub (protocol 2 ED25519), or ~/.ssh/id_rsa.pub (protocol 2 RSA) in the user’s home directory.

これは秘密鍵を

~/.ssh/identity(プロトコル1)、

~/.ssh/id_dsa(プロトコル2 DSA)、

~/.ssh/id_ecdsa(プロトコル2 ECDSA)、

~/.ssh/id_ed25519(プロトコル2ED25519 )、

~/.ssh/id_rsa(プロトコル2 RSA)

に格納し、


公開鍵を

~/.ssh/identity.pub(プロトコル1)、

~/.ssh/id_dsa.pub(プロトコル2 DSA)、

~/.ssh/id_ecdsa.pub(プロトコル2 ECDSA)、

~/.ssh/id_ed25519.pub(プロトコル2 ED25519)、

~/.ssh/id_rsa.pub(プロトコル2 RSA)

に格納します。


The user should then copy the public key to ~/.ssh/authorized_keys in his/her home directory on the remote machine.

ユーザーは、公開鍵をリモートマシンのホームディレクトリの ~/.ssh/authorized_keys にコピーする必要があります。


The authorized_keys file corresponds to the conventional ~/.rhosts file, and has one key per line, though the lines can be very long.

authorized_keys ファイルは、従来の ~/.rhosts ファイルに対応し、1行に1つのキーがありますが、行は非常に長くなります。


After this, the user can log in without giving the password.

その後、ユーザーはパスワードを入力せずにログインできます。


A variation on public key authentication is available in the form of certificate authentication: instead of a set of public/private keys, signed certificates are used.

公開鍵認証のバリエーションは、証明書認証の形で利用できます。公開鍵/秘密鍵のセットではなく、署名された証明書が使用されます。


This has the advantage that a single trusted certification authority can be used in place of many public/private keys.

これには、多くの公開鍵/秘密鍵の代わりに単一の信頼できる証明機関を使用できるという利点があります。


See the CERTIFICATES section of ssh-keygen(1) for more information.

詳細は、ssh-keygen(1)のCERTIFICATESセクションを参照してください。


The most convenient way to use public key or certificate authentication may be with an authentication agent.

公開鍵または証明書認証を使用する最も便利な方法は、認証エージェントを使用する方法です。


See ssh-agent(1) for more information.

詳細は、ssh-agent(1)を参照してください。


Challenge-response authentication works as follows: The server sends an arbitrary “challenge” text, and prompts for a response.

チャレンジレスポンス認証は、次のように動作します。サーバーは任意の「チャレンジ」テキストを送信し、応答を求めるメッセージを表示します。


Protocol 2 allows multiple challenges and responses; protocol 1 is restricted to just one challenge/response.

プロトコル2では、複数のチャレンジと応答が可能です。 プロトコル1は1つのチャレンジ/レスポンスに制限されています。


Examples of challenge-response authentication include BSD Authentication (see login.conf(5)) and PAM (some non-OpenBSD systems).

チャレンジレスポンス認証の例には、BSD認証(login.conf(5)を参照)とPAM(OpenBSD以外のシステム)が含まれます。


Finally, if other authentication methods fail, ssh prompts the user for a password.

最後に、他の認証方法が失敗すると、sshはユーザにパスワードの入力を促します。


The password is sent to the remote host for checking; however, since all communications are encrypted, the password cannot be seen by someone listening on the network.

チェックのためにパスワードがリモートホストに送信されます。 ただし、すべての通信は暗号化されているため、ネットワーク上で聴取している人はパスワードを見ることができません。


ssh automatically maintains and checks a database containing identification for all hosts it has ever been used with.

sshは、それまで使用されていたすべてのホストの識別情報を含むデータベースを自動的に維持し、チェックします。


Host keys are stored in ~/.ssh/known_hosts in the user’s home directory.

ホストキーは、ユーザーのホームディレクトリの ~/.ssh/known_hosts に格納されます。


Additionally, the file /etc/ssh/ssh_known_hosts is automatically checked for known hosts.

さらに、/etc/ssh/ssh_known_hosts ファイルには、既知のホストが自動的にチェックされます。


Any new hosts are automatically added to the user’s file.

新しいホストは自動的にユーザーのファイルに追加されます。


If a host’s identification ever changes, ssh warns about this and disables password authentication to prevent server spoofing or man-in-the-middle attacks, which could otherwise be used to circumvent the encryption.

ホストの身分証明書が変更された場合、sshはこれについて警告し、パスワードの認証を無効にしてサーバーのなりすましや中間者攻撃を防止します。


The StrictHostKeyChecking option can be used to control logins to machines whose host key is not known or has changed.

StrictHostKeyCheckingオプションを使用すると、ホスト鍵が不明または変更されたマシンへのログインを制御できます。


When the user’s identity has been accepted by the server, the server either executes the given command, or logs into the machine and gives the user a normal shell on the remote machine.

ユーザーのIDがサーバーによって受け入れられると、サーバーは指定されたコマンドを実行するか、マシンにログインして、リモート・マシン上の通常のシェルをユーザーに与えます。


All communication with the remote command or shell will be automatically encrypted.

リモートコマンドまたはシェルとのすべての通信は自動的に暗号化されます。


If a pseudo-terminal has been allocated (normal login session), the user may use the escape characters noted below.

擬似端末が割り当てられている場合(通常のログインセッション)、ユーザーは以下に示すエスケープ文字を使用することがあります。


If no pseudo-tty has been allocated, the session is transparent and can be used to reliably transfer binary data.

擬似ttyが割り当てられていない場合、セッションは透過的であり、バイナリデータを確実に転送するために使用できます。


On most systems, setting the escape character to “none” will also make the session transparent even if a tty is used.

ほとんどのシステムでは、エスケープ文字を “none”に設定すると、ttyが使用されてもセッションが透過的になります。


The session terminates when the command or shell on the remote machine exits and all X11 and TCP connections have been closed.

セッションは、リモートマシン上のコマンドまたはシェルが終了し、すべてのX11およびTCP接続が閉じられたときに終了します。


この説明を読んでも不明でした。

さらにインターネット検索をしたら、以下の記事を見つけました。


Why does ssh’s “password” prompt take so long to appear?

https://askubuntu.com/questions/246323/why-does-sshs-password-prompt-take-so-long-to-appear
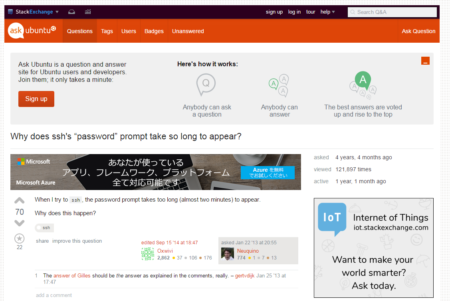
Why does ssh's “password” prompt take so long to appear?


以下、記事の内容

質問


When I try to ssh, the password prompt takes too long (almost two minutes) to appear.

Why does this happen?


回答


There are several things that can go wrong. Add -vvv to make ssh print a detailed trace of what it’s doing, and see where it’s pausing.

The problem could be on the client or on the server.

A common problem on the server is if you’re connecting from a client for which reverse DNS lookups time out.

(A “reverse DNS lookup” means getting back from the client machine’s IP address to a host name. It isn’t really useful for security, only slightly helpful to diagnose breakin attempts from log entries, but the default configuration does it anyway.)

To turn off reverse DNS lookups, add UseDNS no to /etc/ssh/sshd_config (you need to be root on the server; remember to restart the SSH service afterwards).

Another thing that can go wrong is GSSAPI authentication timing out.

If you don’t know what that is, you’re probably not relying on it; you can turn it off by adding the line GSSAPIAuthentication no to /etc/ssh/ssh_config or ~/.ssh/config (that’s on the client side).


まさにドンピシャな感じです。

回答では

①-vvvをつけるようにアドバイス

 →しかしこれをやってみたが不明でした。


②よくある問題は、DNSの逆引き(IPアドレスからドメイン名(FQDN)を引くこと)でタイムアウトをしているのが原因

 →確かに動作確認をすると何の処理を待ってタイムアウトをして最後に「password」プロンプトを表示しているように見えます。

  その場合の対応策(Work around)として「/etc/ssh/sshd_config」ファイルに「UseDNS no」を加えると良いと回答しています。


③その他よくある問題は「GSSAPI authentication」がタイムアウトをしていることが原因

 →これもログに出ていました。


debug1: Authentications that can continue: publickey,gssapi-keyex,gssapi-with-mic,password
debug3: start over, passed a different list publickey,gssapi-keyex,gssapi-with-mic,password
debug3: preferred gssapi-keyex,gssapi-with-mic,publickey,keyboard-interactive,password
debug3: authmethod_lookup gssapi-keyex
debug3: remaining preferred: gssapi-with-mic,publickey,keyboard-interactive,password
debug3: authmethod_is_enabled gssapi-keyex
debug1: Next authentication method: gssapi-keyex
debug1: No valid Key exchange context
debug2: we did not send a packet, disable method
debug3: authmethod_lookup gssapi-with-mic
debug3: remaining preferred: publickey,keyboard-interactive,password
debug3: authmethod_is_enabled gssapi-with-mic
debug1: Next authentication method: gssapi-with-mic
debug1: Unspecified GSS failure. Minor code may provide more information
No Kerberos credentials available (default cache: KEYRING:persistent:1000)

debug1: Unspecified GSS failure. Minor code may provide more information
No Kerberos credentials available (default cache: KEYRING:persistent:1000)


そもそも「GSSAPI authentication」とは一体何なのでしょうか?

GSSAPI は「Generic Security Service Application Programming Interface」の略で、アプリケーションにデータのセキュリティを提供するライブラリのようです。


このライブラリを利用するとプログラマは細かいセキュリティの設定までプログラミングする必要はないということなのでしょうか。

それ以上は詳しく分かりませんでした。


とりあえず、切り分け調査をする材料が揃ったので、1つ1つ試してみます。


「/etc/ssh/sshd_config」ファイルに「UseDNS no」を追加する

まずは「/etc/ssh/sshd_config」ファイルに「UseDNS no」を追加して動作確認をしてみます。


# vi sshd_config
# $OpenBSD: sshd_config,v 1.93 2014/01/10 05:59:19 djm Exp $

# This is the sshd server system-wide configuration file. See
# sshd_config(5) for more information.

# This sshd was compiled with PATH=/usr/local/bin:/usr/bin

# The strategy used for options in the default sshd_config shipped with
# OpenSSH is to specify options with their default value where
# possible, but leave them commented. Uncommented options override the
# default value.

# If you want to change the port on a SELinux system, you have to tell
# SELinux about this change.
# semanage port -a -t ssh_port_t -p tcp #PORTNUMBER
#
#Port 22
#AddressFamily any
#ListenAddress 0.0.0.0
#ListenAddress ::

# The default requires explicit activation of protocol 1
#Protocol 2

# HostKey for protocol version 1
#HostKey /etc/ssh/ssh_host_key
# HostKeys for protocol version 2
HostKey /etc/ssh/ssh_host_rsa_key
#HostKey /etc/ssh/ssh_host_dsa_key
HostKey /etc/ssh/ssh_host_ecdsa_key
HostKey /etc/ssh/ssh_host_ed25519_key

# Lifetime and size of ephemeral version 1 server key
#KeyRegenerationInterval 1h
#ServerKeyBits 1024

# Ciphers and keying
#RekeyLimit default none

# Logging
# obsoletes QuietMode and FascistLogging
#SyslogFacility AUTH
SyslogFacility AUTHPRIV
#LogLevel INFO

# Authentication:

#LoginGraceTime 2m
#PermitRootLogin yes
#StrictModes yes
#MaxAuthTries 6
#MaxSessions 10

#RSAAuthentication yes
#PubkeyAuthentication yes

# The default is to check both .ssh/authorized_keys and .ssh/authorized_keys2
# but this is overridden so installations will only check .ssh/authorized_keys
AuthorizedKeysFile .ssh/authorized_keys

#AuthorizedPrincipalsFile none

#AuthorizedKeysCommand none
#AuthorizedKeysCommandUser nobody

# For this to work you will also need host keys in /etc/ssh/ssh_known_hosts
#RhostsRSAAuthentication no
# similar for protocol version 2
#HostbasedAuthentication no
# Change to yes if you don’t trust ~/.ssh/known_hosts for
# RhostsRSAAuthentication and HostbasedAuthentication
#IgnoreUserKnownHosts no
# Don’t read the user’s ~/.rhosts and ~/.shosts files
#IgnoreRhosts yes

# To disable tunneled clear text passwords, change to no here!
#PasswordAuthentication yes
#PermitEmptyPasswords no
PasswordAuthentication yes

# Change to no to disable s/key passwords
#ChallengeResponseAuthentication yes
ChallengeResponseAuthentication no

# Kerberos options
#KerberosAuthentication no
#KerberosOrLocalPasswd yes
#KerberosTicketCleanup yes
#KerberosGetAFSToken no
#KerberosUseKuserok yes

# GSSAPI options
GSSAPIAuthentication yes
GSSAPICleanupCredentials no
#GSSAPIStrictAcceptorCheck yes
#GSSAPIKeyExchange no
#GSSAPIEnablek5users no

# Set this to ‘yes’ to enable PAM authentication, account processing,
# and session processing. If this is enabled, PAM authentication will
# be allowed through the ChallengeResponseAuthentication and
# PasswordAuthentication. Depending on your PAM configuration,
# PAM authentication via ChallengeResponseAuthentication may bypass
# the setting of “PermitRootLogin without-password”.
# If you just want the PAM account and session checks to run without
# PAM authentication, then enable this but set PasswordAuthentication
# and ChallengeResponseAuthentication to ‘no’.
# WARNING: ‘UsePAM no’ is not supported in Red Hat Enterprise Linux and may cause several
# problems.
UsePAM yes

#AllowAgentForwarding yes
#AllowTcpForwarding yes
#GatewayPorts no
X11Forwarding yes
#X11DisplayOffset 10
#X11UseLocalhost yes
#PermitTTY yes
#PrintMotd yes
#PrintLastLog yes
#TCPKeepAlive yes
#UseLogin no
UsePrivilegeSeparation sandbox # Default for new installations.
#PermitUserEnvironment no
#Compression delayed
#ClientAliveInterval 0
#ClientAliveCountMax 3
#ShowPatchLevel no
#UseDNS yes
UseDNS no ← ここに「UseDNS no」を加える。
#PidFile /var/run/sshd.pid
#MaxStartups 10:30:100
#PermitTunnel no
#ChrootDirectory none
#VersionAddendum none

# no default banner path
#Banner none

# Accept locale-related environment variables
AcceptEnv LANG LC_CTYPE LC_NUMERIC LC_TIME LC_COLLATE LC_MONETARY LC_MESSAGES
AcceptEnv LC_PAPER LC_NAME LC_ADDRESS LC_TELEPHONE LC_MEASUREMENT
AcceptEnv LC_IDENTIFICATION LC_ALL LANGUAGE
AcceptEnv XMODIFIERS

# override default of no subsystems
Subsystem sftp /usr/libexec/openssh/sftp-server

# Example of overriding settings on a per-user basis
#Match User anoncvs
# X11Forwarding no
# AllowTcpForwarding no
# PermitTTY no
# ForceCommand cvs server


この後、sshd サービスを再起動します。

# cat /etc/redhat-release ← OSのバージョンを確認します。
CentOS Linux release 7.3.1611 (Core) ← OS は CentOS7.3 でした。
#
# systemctl list-unit-files | grep ssh ← sshd のサービス名を確認します。
sshd-keygen.service static
sshd.service enabled ← sshd のサービス名は「sshd.service」であることが分かりました。
sshd@.service static
sshd.socket disabled
# systemctl restart sshd.service ← sshd.service を再起動します。
# systemctl status sshd.service ← sshd.service のステータスを確認します。
sshd.service – OpenSSH server daemon
Loaded: loaded (/usr/lib/systemd/system/sshd.service; enabled; vendor preset: enabled)
Active: active (running) since 月 2017-06-19 18:39:57 JST; 6s ago
Docs: man:sshd(8)
man:sshd_config(5)
Process: 32392 ExecStart=/usr/sbin/sshd $OPTIONS (code=exited, status=0/SUCCESS)
Main PID: 32393 (sshd)
CGroup: /system.slice/sshd.service
mq32393 /usr/sbin/sshd

6月 19 18:39:57 xxx-xxxx01 systemd[1]: Starting OpenSSH server daemon…
6月 19 18:39:57 xxx-xxxx01 sshd[32393]: Server listening on 0.0.0.0 port 22.
6月 19 18:39:57 xxx-xxxx01 sshd[32393]: Server listening on :: port 22.
6月 19 18:39:57 xxx-xxxx01 systemd[1]: Started OpenSSH server daemon.
#


この後、sshでログインを試してみたところ、1秒以内で ssh ログインができました。

この「UseDNS no」を入れる前まで1分近くかかっていたログインが、一瞬でログインができるようになり若干感動を味わいました。


また、この結果により「GSSAPI authentication」は ssh ログインに遅延には無関係であることが分かりました。


「UseDNS no」は何をするための設定なのか?

DNSを使用してリモートホスト名を確認するためのオプションです。

もっと詳しくいうと、このオプションは接続されたクライアントのIPアドレスから逆引きによって解決されたホスト名を、同じIPアドレスにマップするかどうかを確認するよう sshd に指示するオプションです。

デフォルトは「UseDNS yes」です。


UseDNSオプションはあまり役に立つ場面がありません。

通常クライアントマシンは、逆引き設定を持たない場合が多く、逆引きが解決されません。

一般的には、DNSはロギングにのみ使用されますが、認証に使用する場合は、「sshd_config」ファイルに「IgnoreRhosts no」が指定されている場合です。

非常に特殊な環境を除いては、「UseDNS no」にした方がいいと思います。


今回の場合のように、環境によっては、リモートの ssh サーバーの逆引きがタイムアウトするまで数十秒待つことになることがあります。


よかったらシェアしてね!
  • URLをコピーしました!
  • URLをコピーしました!

この記事を書いた人

コメント

コメントする

AlphaOmega Captcha Medica  –  What Do You See?


このサイトはスパムを低減するために Akismet を使っています。コメントデータの処理方法の詳細はこちらをご覧ください