Windows のリモートデスクトップ接続ではなく、PowerShell を利用し、コマンドラインでリモートログインして操作できるようにするための設定手順について解説します。
リモートアクセスされる側(する側ではありません)の設定になります。
目次
リモートアクセスされる側の設定
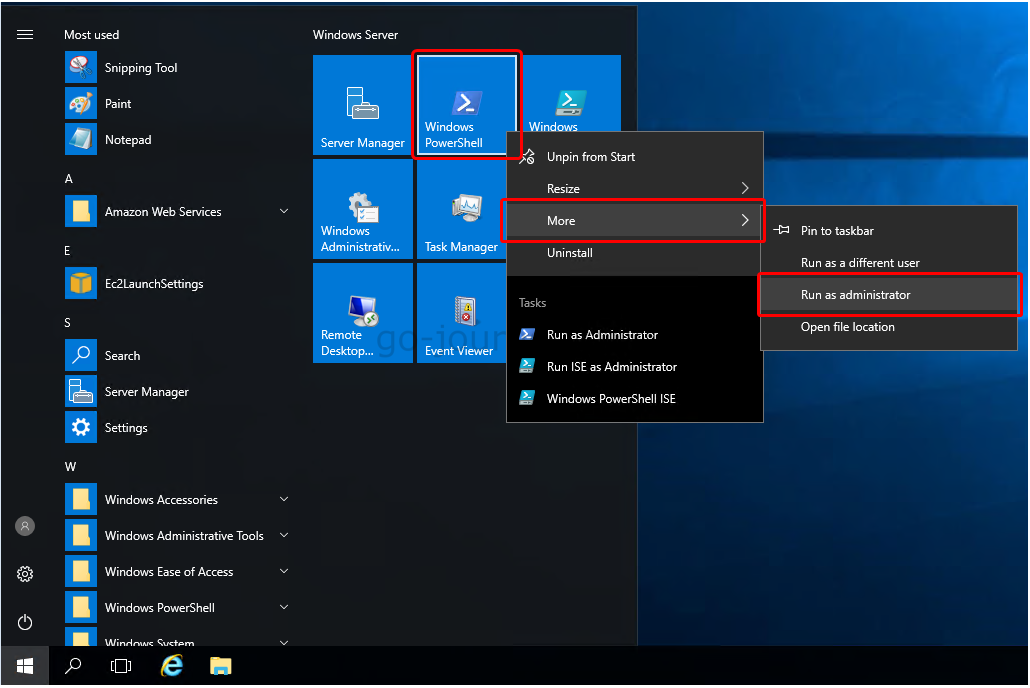
リモートからアクセスされる側の Windows にログインをして管理者権限で「PowerShell」を起動します。
以下のように設定をします。
■Windows Server 2016 の場合
最初に「Set-ExecutionPolicy RemoteSigned -Force」コマンドを実行し実行ポリシーを変更します。
|
Windows PowerShell |
■Windows Server 2012 の場合
|
PS C:\Users\Administrator> Set-ExecutionPolicy RemoteSigned -Force |
■Windows Server 2016 の場合
次に「Set-WSManQuickConfig -Force」コマンドを実行し、WinRM サービスによるリモート管理を有効にします。
|
PS C:\Users\Administrator> Set-WSManQuickConfig -Force |
■Windows Server 2012 の場合
|
PS C:\Users\Administrator> Set-WSManQuickConfig -Force |
ローカルからの接続確認
■Windows Server 2016 の場合
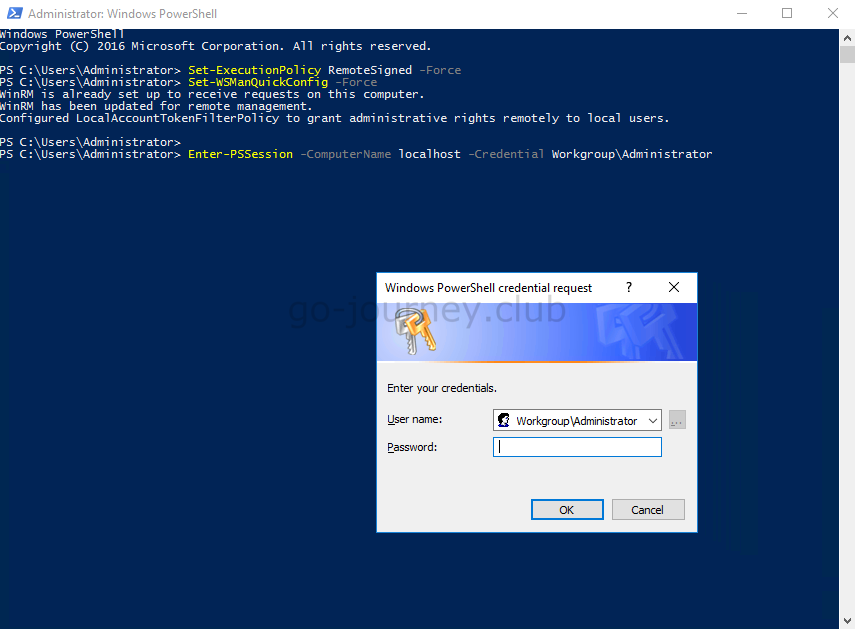
Enter-PSSession コマンドを実行し、ローカルから(localhost)接続確認します。
|
PS C:\Users\Administrator> Enter-PSSession -ComputerName localhost -Credential Workgroup\Administrator |
上記コマンドを実行すると、下図のように認証画面が表示されます。
■Windows Server 2016 の場合
Administratorのパスワードを入力すると以下のように localhost へログインができます。
|
PS C:\Users\Administrator> Enter-PSSession -Compute -ComputerName localhost -Credential Workgroup\Administrator |
Windows ファイアウォールの設定
■Windows Server 2016 の場合
Windows ファイアウォールの設定変更は不要でした。
■Windows Server 2012 の場合
Windows Server 2012 の場合は、Windows ファイアウォールの設定変更が必要でした。
以下の手順で設定を変更します。
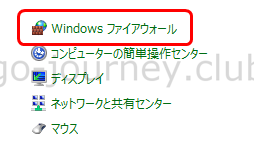
Windows ファイアウォールを起動します。
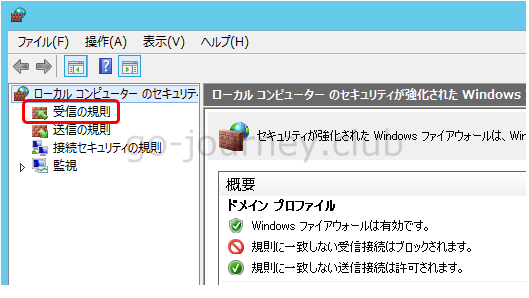
左側ペインより「詳細設定」をクリックします。

左側ペインより「受信の規則」をクリックします。
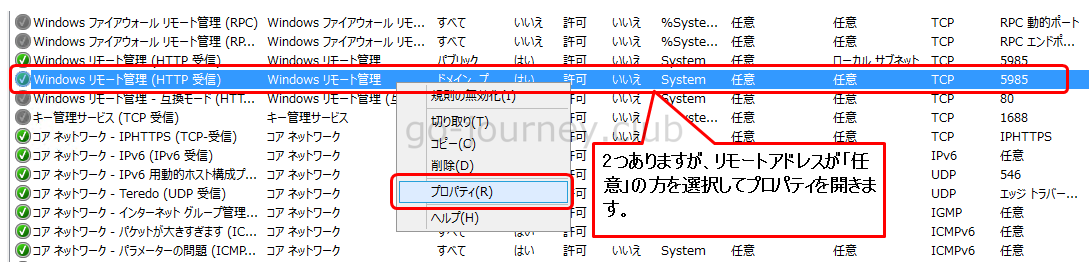
「Windows リモート管理(HTTP 受信)」が2つありますが、「リモートアドレス」が「任意」の方を選択して右クリックし「プロパティ」を表示します。
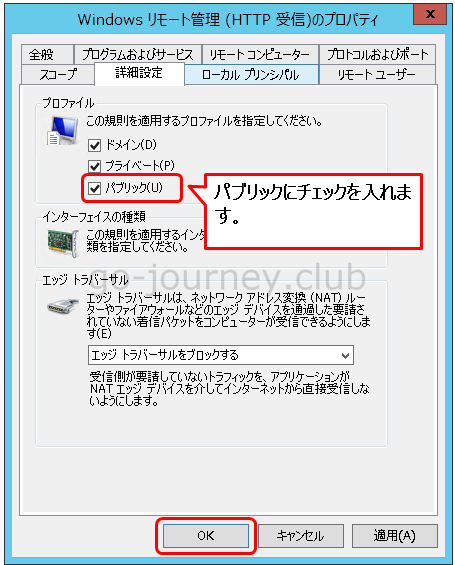
「Windows リモート管理(HTTP 受信)のプロパティ」画面で「パブリック」にチェックを入れて「OK」ボタンをクリックします。
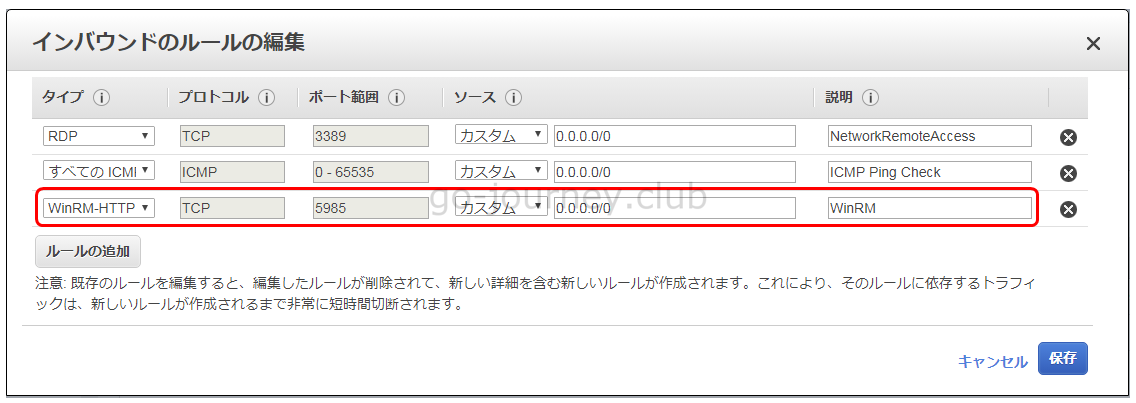
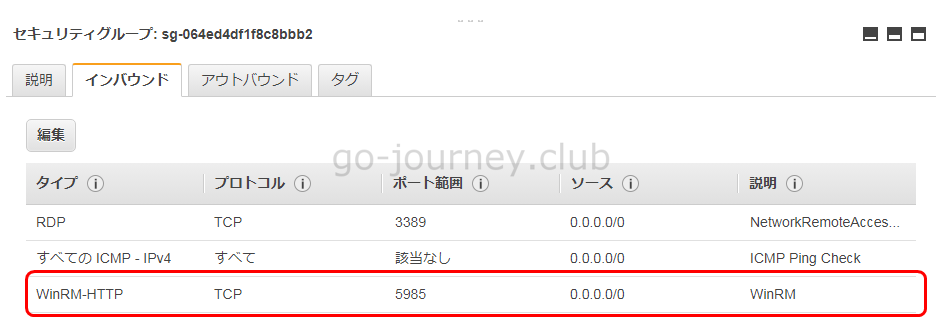
セキュリティグループ(ファイアウォール)の許可の設定をする
EC2 インスタンスの場合はセキュリティグループに WinRM のポートを開ける必要があります。
リモートアクセスする側の設定
次にリモートアクセスする側(アクセスされる側ではない)で設定をします。
スタートボタンより「PowerShell」を起動します。

■Windows 7 の場合
PowerShell が起動することを確認します。
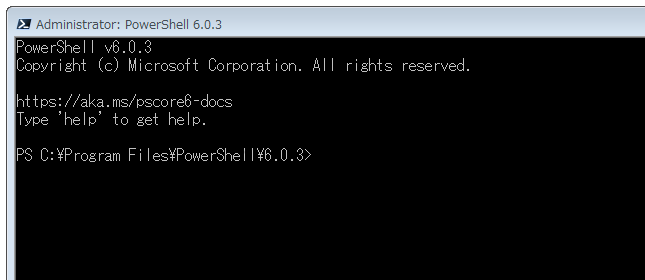
■Windows 7 の場合
リモートコンピュータを TrustedHosts に追加します。
|
PS C:\Program Files\PowerShell\6.0.3> Set-Item WSman:\localhost\Client\TrustedHosts -Value ec2-xxx-xxx-xxx-xxx.ap-northeast-1.compute.amazonaws.com |
■Windows 7 の場合
TrustedHosts に追加されたことを確認します。
|
PS C:\Program Files\PowerShell\6.0.3> Get-Item WSMan:\localhost\Client\TrustedHosts |
ログイン確認
■Windows 7 の場合
ログイン確認をします。
|
PS C:\Program Files\PowerShell\6.0.3> Enter-PSSession -ComputerName ec2-xxx-xxx-xxx-xxx.ap-northeast-1.compute.amazonaws.com -Credential Workgroup\Administrator |
トラブルシューティング
以下のエラーが出力される場合です。
|
PS C:\Program Files\PowerShell\6.0.3> Enter-PSSession -ComputerName 54.xxx.xxx.xxx -Credential Administrator |
リモートデスクトップ接続でリモートコンピュータにログインし、localhostに(自分自身に)ログインできるか確認します。
|
PS C:\Users\Administrator> Enter-PSSession -ComputerName localhost -Credential Administrator |
上でも記述しましたが Windows ファイアウォールで「パブリック」にチェックが入っていることを確認します。
Windows ファイアウォールを起動します。
左側ペインより「詳細設定」をクリックします。
左側ペインより「受信の規則」をクリックします。
「Windows リモート管理(HTTP 受信)」が2つありますが、「リモートアドレス」が「任意」の方を選択して右クリックし「プロパティ」を表示します。
「Windows リモート管理(HTTP 受信)のプロパティ」画面で「パブリック」にチェックを入れて「OK」ボタンをクリックします。
コメント