以下の記事で Linux と Windows で複数のセキュリティグループと EC2 インスタンスをコマンドラインから作成する手順を解説しています。
【AWS】AWS CLI(コマンドライン)でセキュリティグループと EC2 インスタンスを作成する手順
今回は AWS CLI(コマンドライン)でセキュリティグループと Windows OS の EC2 インスタンスを作成する手順について解説をします。
環境
以下の環境で手順を実行しています。
[ec2-user@RedHat8 ~]$ cat /etc/redhat-release
Red Hat Enterprise Linux release 8.0 (Ootpa)
[ec2-user@RedHat8 ~]$
AWS CLI のバージョン
[ec2-user@RedHat8 ~]$ aws –version
aws-cli/1.16.211 Python/3.6.8 Linux/4.18.0-80.4.2.el8_0.x86_64 botocore/1.12.201
[ec2-user@RedHat8 ~]$
既存のセキュリティグループ名とセキュリティグループIDの確認方法
最初に既存のセキュリティグループとセキュリティグループ ID を確認します。
[ec2-user@RedHat8 ~]$ aws ec2 describe-security-groups –query “SecurityGroups[].[GroupName,GroupId]” –output table
———————————————————
| DescribeSecurityGroups |
+——————————+————————+
| Test-EC2-Instance-012-sg | sg-00f409326f289ff5f |
| Test-EC2-Instance-014-sg | sg-02b74292787df5eb0 |
| Test-EC2-Instance-018-sg | sg-02e8e505472a4f606 |
| Test-EC2-Instance-017-sg | sg-0367e7052e11fd1d8 |
| Test-EC2-Instance-001-sg | sg-0380a09dd359d1ec7 |
| Test-EC2-Instance-002-sg | sg-03a22fef7cb32a9c8 |
| Test-EC2-Instance-019-sg | sg-04b336e6140a2e957 |
| Test-EC2-Instance-011-sg | sg-05f21606526791072 |
| Test-EC2-Instance-006-sg | sg-078bd3e6e42edf225 |
| Test-EC2-Instance-010-sg | sg-079d6593b5e82c4c0 |
| Test-EC2-Instance-008-sg | sg-07e72aff4847deaad |
| Test-EC2-Instance-020-sg | sg-083fb48a9c71f4071 |
| Test-EC2-Instance-005-sg | sg-08bcbd9df64fe7c7b |
| Test-EC2-Instance-004-sg | sg-08e2f7b33f736d18c |
| Test-EC2-Instance-009-sg | sg-09ca16d8b638621c3 |
| Test-EC2-Instance-007-sg | sg-0a26b612c7daf5325 |
| Test-EC2-Instance-013-sg | sg-0a6755330e171e647 |
| Test-EC2-Instance-003-sg | sg-0a7e85ea480094884 |
| Test-EC2-Instance-015-sg | sg-0bec46470f3c12131 |
| Test-EC2-Instance-016-sg | sg-0e7dcacbdeee90b30 |
| default | sg-922e21ea |
+——————————+————————+
[ec2-user@RedHat8 ~]$
既存セキュリティグループの内容を確認する
以下のコマンドで既存せっきゅりてぃグループの内容を確認します。
[ec2-user@RedHat8 ~]$ aws ec2 describe-security-groups –group-id `aws ec2 describe-security-groups –filters “Name=group-name,Values=Test-EC2-Instance-001-sg” | jq ‘.SecurityGroups[].GroupId’ -r` –output table
——————————————————————————————————————
| DescribeSecurityGroups |
+—————————————————————————————————————-+
|| SecurityGroups ||
|+————————+———————–+—————————-+—————+—————-+|
|| Description | GroupId | GroupName | OwnerId | VpcId ||
|+————————+———————–+—————————-+—————+—————-+|
|| Test-EC2-Instance-001| sg-0380a09dd359d1ec7 | Test-EC2-Instance-001-sg | xxxxxxxxxxxx | vpc-xxxxxxxx ||
|+————————+———————–+—————————-+—————+—————-+|
||| IpPermissionsEgress |||
||+————————————————————————————————————+||
||| IpProtocol |||
||+————————————————————————————————————+||
||| -1 |||
||+————————————————————————————————————+||
|||| IpRanges ||||
|||+———————————————————————————————————-+|||
|||| CidrIp ||||
|||+———————————————————————————————————-+|||
|||| 0.0.0.0/0 ||||
|||+———————————————————————————————————-+|||
||| Tags |||
||+———————-+————————————————————————————-+||
||| Key | Value |||
||+———————-+————————————————————————————-+||
||| Name | Test-EC2-Instance-001-sg |||
||+———————-+————————————————————————————-+||
[ec2-user@RedHat8 ~]$
既存セキュリティグループの削除
不要な場合はセキュリティグループを削除します。
以下はセキュリティグループ名が「Test-EC2-Instance-001-sg」 のセキュリティグループを削除する例です。
[ec2-user@RedHat8 ~]$ aws ec2 delete-security-group –group-id `aws ec2 describe-security-groups –filters “Name=group-name,Values=Test-EC2-Instance-001-sg” | jq ‘.SecurityGroups[].GroupId’ -r`
セキュリティグループ作成
最初に新規セキュリティグループを作成します。
以下のコマンドは Linux & Windows 共通です。
セキュリティグループの箱だけ作り、後程ルールを追加していきます。
以下は、セキュリティグループ名が「Test-EC2-Instance-001-Windows-sg」 のセキュリティグループを作成する例です。
[ec2-user@RedHat8 ~]$ aws ec2 create-security-group –group-name Test-EC2-Instance-001-Windows-sg –vpc-id vpc-xxxxxx –description ” Test-EC2-Instance-001″
{
“GroupId”: “sg-064ed4df1f8c8bbb2”
}
[ec2-user@RedHat8 ~]$
返り値としてセキュリティグループIDが返ってきます。
セキュリティグループにタグを付ける
不要な場合はスキップしてもいいですが、上記コマンドではセキュリティグループにタグが付いていません。
もし「Name」タグなどを設定したい場合は別途「aws ec2 create-tags」 コマンドでタグを付けます。
以下のコマンドは、「セキュリティグループ名」 が「Test-EC2-Instance-001-Windows-sg」 のセキュリティグループに「Test-EC2-Instance-001-Windows-sg」 という「Name」 タグを付ける例です。
aws ec2 create-tags –resources `aws ec2 describe-security-groups –filters “Name=group-name,Values=Test-EC2-Instance-001-Windows-sg” | jq ‘.SecurityGroups[].GroupId’ -r` –tags Key=Name,Value=Test-EC2-Instance-001-Windows-sg
タグを付けると下図のようになります。
セキュリティグループにルールを追加する
次に空っぽのセキュリティグループにルールを追加していきます。
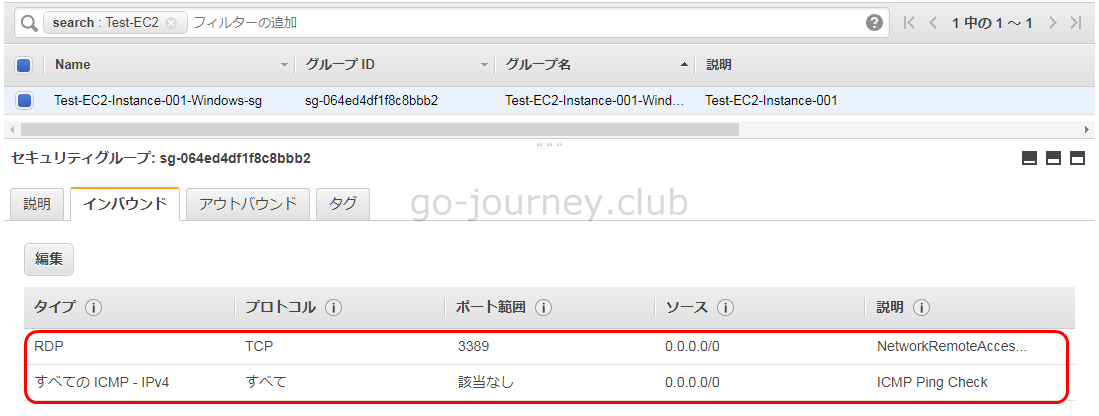
今回は Windows 用のルールなので、インターネット経由での 3389/TCP へのアクセスを許可します。
あとは、Ping 確認をしたいので ICMP Ping も許可しています。
■Windows版(インバウンドルール)
[ec2-user@RedHat8 ~]$ aws ec2 authorize-security-group-ingress –group-id `aws ec2 describe-security-groups –filters “Name=group-name,Values=Test-EC2-Instance-001-Windows-sg” | jq ‘.SecurityGroups[].GroupId’ -r` –ip-permissions IpProtocol=tcp,FromPort=3389,ToPort=3389,IpRanges='[{CidrIp=0.0.0.0/0,Description=”NetworkRemoteAccess”}]’ IpProtocol=icmp,FromPort=-1,ToPort=-1,IpRanges='[{CidrIp=0.0.0.0/0,Description=”ICMP Ping Check”}]’
コマンド実行後は以下のようにリモートデスクトップ接続と Ping が許可されています。
インスタンスを起動する(AMI,IPアドレス,セキュリティグループを指定)
セキュリティグループの準備が出来たら最後に EC2 インスタンスを起動します。
インスタンス起動(dry-run付き)
いきなり EC2 インスタンスを起動するのは不安がある場合、dry-run でコマンドに問題がないかチェックすることができます。
コマンドの構文エラーがないことと、若干冷静になれるというメリットがあります。
[ec2-user@RedHat8 ~]$ aws ec2 run-instances –dry-run –region ap-northeast-1 –image-id ami-0404c1383f6b870a2 –count 1 –instance-type t2.small –key-name basic-network –subnet-id subnet-653b2a2c –private-ip-address 172.31.32.101 –security-group-ids `aws ec2 describe-security-groups –filters “Name=group-name,Values=Test-EC2-Instance-001-Windows-sg” | jq ‘.SecurityGroups[].GroupId’ -r` –tag-specifications ‘ResourceType=instance,Tags=[{Key=Name,Value=Test-EC2-Instance-001-Windows}]’ –output table
An error occurred (DryRunOperation) when calling the RunInstances operation: Request would have succeeded, but DryRun flag is set.
[ec2-user@RedHat8 ~]$
「Request would have succeeded」 のメッセージがあるため構文的には問題ないことが分かります。
インスタンス起動(dry-runなし)
dry-run 付きでコマンドを実行し構文的に問題がなければ、dry-run なしで実行します。
[ec2-user@RedHat8 ~]$ aws ec2 run-instances –region ap-northeast-1 –image-id ami-0404c1383f6b870a2 –count 1 –instance-type t2.small –key-name basic-network –subnet-id subnet-653b2a2c –private-ip-address 172.31.32.101 –security-group-ids `aws ec2 describe-security-groups –filters “Name=group-name,Values=Test-EC2-Instance-001-Windows-sg” | jq ‘.SecurityGroups[].GroupId’ -r` –tag-specifications ‘ResourceType=instance,Tags=[{Key=Name,Value=Test-EC2-Instance-001-Windows}]’ –output table
———————————————————————————
| RunInstances |
+——————————–+———————————————-+
| OwnerId | xxxxxxxxxxxx |
| ReservationId | r-0f0071b7a680fa1a0 |
+——————————–+———————————————-+
|| Instances ||
|+————————+—————————————————-+|
|| AmiLaunchIndex | 0 ||
|| Architecture | x86_64 ||
|| ClientToken | ||
|| EbsOptimized | False ||
|| Hypervisor | xen ||
|| ImageId | ami-0404c1383f6b870a2 ||
|| InstanceId | i-xxxxxxxxxxxxxxxxx ||
|| InstanceType | t2.small ||
|| KeyName | basic-network ||
|| LaunchTime | 2019-08-18T06:46:40.000Z ||
|| Platform | windows ||
|| PrivateDnsName | ip-172-31-32-101.ap-northeast-1.compute.internal ||
|| PrivateIpAddress | 172.31.32.101 ||
|| PublicDnsName | ||
|| RootDeviceName | /dev/sda1 ||
|| RootDeviceType | ebs ||
|| SourceDestCheck | True ||
|| StateTransitionReason | ||
|| SubnetId | subnet-653b2a2c ||
|| VirtualizationType | hvm ||
|| VpcId | vpc-dc2376bb ||
|+————————+—————————————————-+|
||| CapacityReservationSpecification |||
||+————————————————————+————–+||
||| CapacityReservationPreference | open |||
||+————————————————————+————–+||
||| CpuOptions |||
||+———————————————————-+—————-+||
||| CoreCount | 1 |||
||| ThreadsPerCore | 1 |||
||+———————————————————-+—————-+||
||| Monitoring |||
||+——————————-+——————————————-+||
||| State | disabled |||
||+——————————-+——————————————-+||
||| NetworkInterfaces |||
||+———————+—————————————————–+||
||| Description | |||
||| InterfaceType | interface |||
||| MacAddress | 06:0f:27:d4:c9:dc |||
||| NetworkInterfaceId | eni-050c04664e393b11c |||
||| OwnerId | 295332586563 |||
||| PrivateDnsName | ip-172-31-32-101.ap-northeast-1.compute.internal |||
||| PrivateIpAddress | 172.31.32.101 |||
||| SourceDestCheck | True |||
||| Status | in-use |||
||| SubnetId | subnet-653b2a2c |||
||| VpcId | vpc-xxxxxxxxxxxx |||
||+———————+—————————————————–+||
|||| Attachment ||||
|||+—————————–+——————————————-+|||
|||| AttachTime | 2019-08-18T06:46:40.000Z ||||
|||| AttachmentId | eni-attach-xxxxxxxxxxxxxxxxx ||||
|||| DeleteOnTermination | True ||||
|||| DeviceIndex | 0 ||||
|||| Status | attaching ||||
|||+—————————–+——————————————-+|||
|||| Groups ||||
|||+——————+——————————————————+|||
|||| GroupId | sg-064ed4df1f8c8bbb2 ||||
|||| GroupName | Test-EC2-Instance-001-Windows-sg ||||
|||+——————+——————————————————+|||
|||| PrivateIpAddresses ||||
|||+——————-+—————————————————–+|||
|||| Primary | True ||||
|||| PrivateDnsName | ip-172-31-32-101.ap-northeast-1.compute.internal ||||
|||| PrivateIpAddress | 172.31.32.101 ||||
|||+——————-+—————————————————–+|||
||| Placement |||
||+————————————-+————————————-+||
||| AvailabilityZone | ap-northeast-1a |||
||| GroupName | |||
||| Tenancy | default |||
||+————————————-+————————————-+||
||| SecurityGroups |||
||+——————+——————————————————–+||
||| GroupId | sg-064ed4df1f8c8bbb2 |||
||| GroupName | Test-EC2-Instance-001-Windows-sg |||
||+——————+——————————————————–+||
||| State |||
||+——————————+——————————————–+||
||| Code | 0 |||
||| Name | pending |||
||+——————————+——————————————–+||
||| StateReason |||
||+————————————+————————————–+||
||| Code | pending |||
||| Message | pending |||
||+————————————+————————————–+||
||| Tags |||
||+————–+————————————————————+||
||| Key | Name |||
||| Value | Test-EC2-Instance-001-Windows |||
||+————–+————————————————————+||
[ec2-user@RedHat8 ~]$
ログイン確認
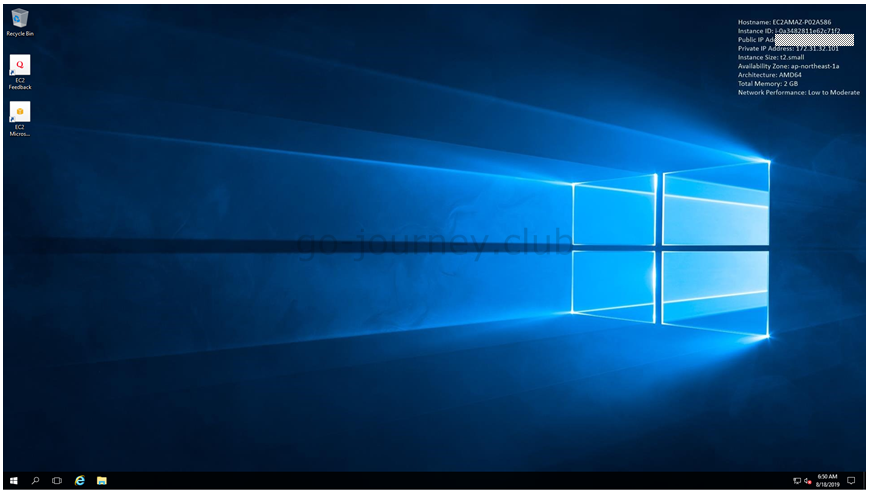
実際にリモートデスクトップ接続でログインできるか確認します。
コメント