今回は、VMware で仮想の Linux環境(CentOS7)を構築してみました。
仮想環境と聞くと難しいとイメージするかもしれませんが、実際に構築してみる意外と簡単に仮想環境を構築することができます。
しかも嬉しいことに「無料」です。
今後は AWS でもサーバーの構築・運用・管理について記事を書く予定ですが、今回は VMware を使いました。
若干中級者向けですが、7年前に購入した古いノートPCに「VMware vSphere 6 ESXi Hypervisor」をインストールする手順はこちらです。

複雑な VMware のソフトウェア構成を整理したい場合はこちらのページを参照してください。
目次
VMware Workstation 12.5.2 Playerで仮想環境を構築する手順
今回は、VMware Workstation 12.5.2 Player を選択しました。
※Varant や Virtual Box など他にもいろいろと使える環境がありますが、今回は VMware Workstation Player にしました。
理由は、レンタルサーバー初心者の方でも仮想環境初心者の方でも簡単に環境ができると思ったからです。
ホストマシン&仮想マシンの設計をする
まずは、何をしたいのか、どうしたいのか、何が必要なのかを事前に設計します。
今回は、以下の環境で構築することにしました。
ホストマシン(仮想マシンを乗っけるマシン)
HW:Dell XPS 8300
OS:Windows7 Professional Edition SP1 64bit
仮想アプリ:VMware Wordstation 12.5.5 Player
仮想マシン(ホストマシンに乗っかるマシン)
OS:CentOS 7
ホスト名:centos7
FQDN名(ホスト名+ドメイン名):centos7.localdomain
IPアドレス:DHCPによる自動割り当て
パーティション:1つ(/のみ)
ディスクサイズ:20GB
VMware Workstation 12.5.5 Player をダウンロードする
1.以下のサイトにアクセスします。
https://my.vmware.com/jp/web/vmware/free#desktop_end_user_computing/vmware_workstation_player/12_0
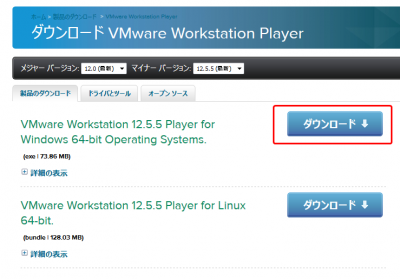
2.「VMware Workstation 12.5.5 Player for Windows 64-bit Operating Systems」の「ダウンロード」ボタンをクリックします。
もし、リンクが切れていたら、以下の手順でexeファイルをダウンロードします。
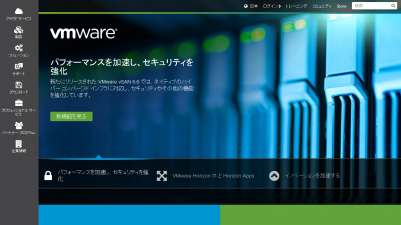
3.以下のURLにアクセスします。
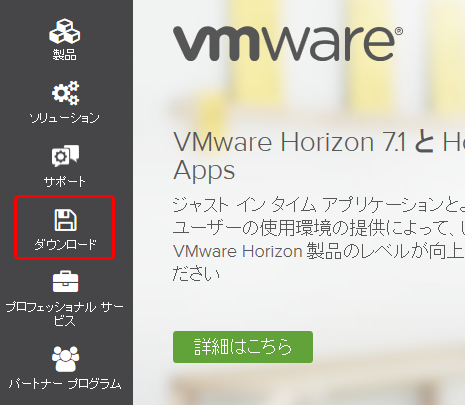
4.左側ペインにある「ダウンロード」ボタンをクリックします。
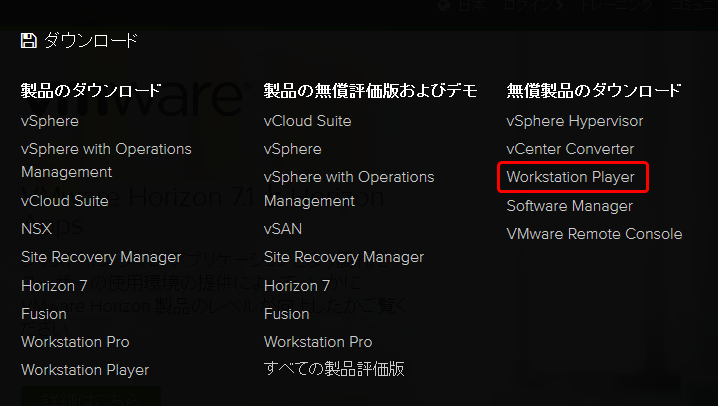
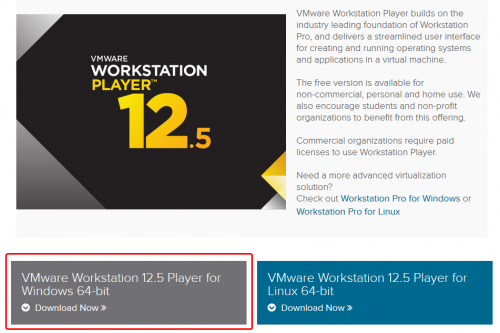
5.「無償製品のダウンロード」-「Workstation Player」をクリックします。
6.「VMware Workstation 12.5 Player for Windows 64-bit」ボタンをクリックします。
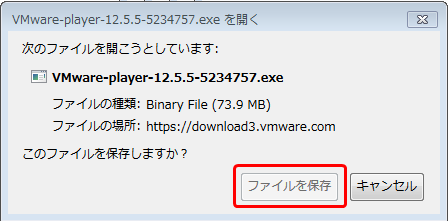
7.「ファイルを保存」ボタンをクリックします。
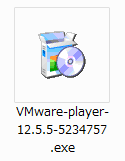
8.exeファイルがダウンロードされたことを確認します。
VMware Workstation Playerをインストールする
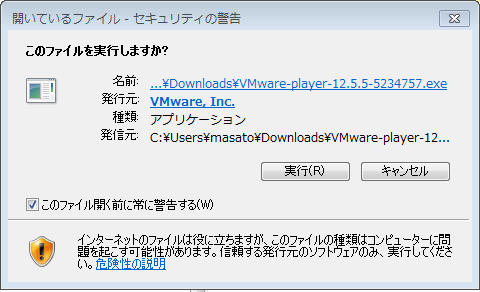
1.exeファイルをダブルクリックします。
2.以下の画面が表示されたら「実行」ボタンをクリックします。
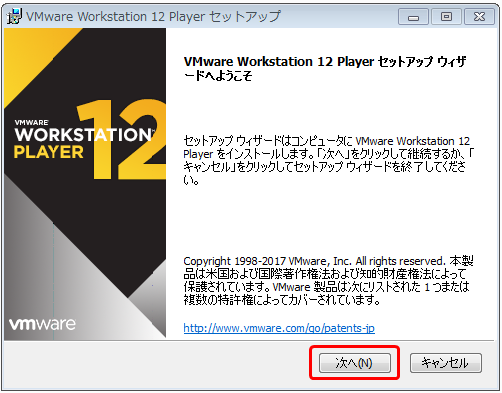
3.ようこそ画面が出たら「次へ」をクリックします。
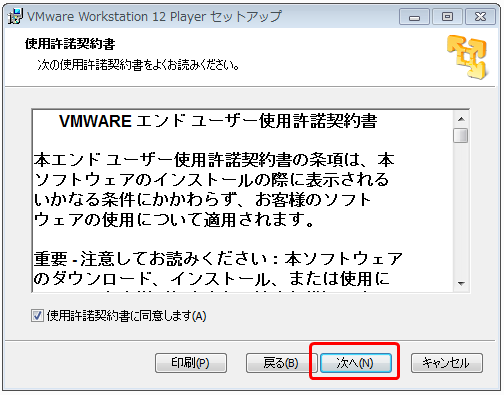
4.「使用許諾契約書」を読み、チェックを入れて「次へ」ボタンをクリックします。
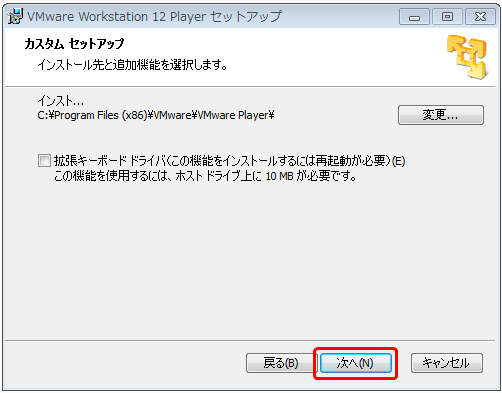
5.そのまま「次へ」ボタンをクリックします。
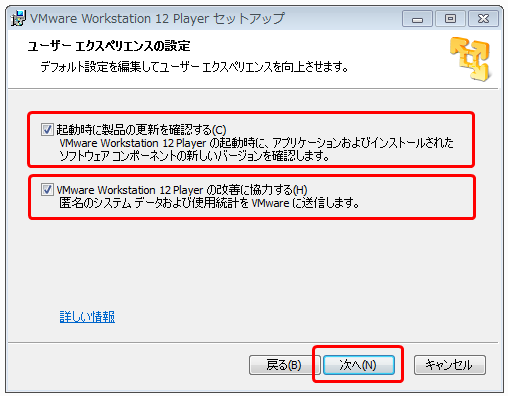
6.「ユーザーエクスペリエンスの設定」画面で、「起動時に製品の更新を確認する」にチェックを入れ、「VMware Workstation 12 Player の改善に協力する」にチェックを入れ(任意)「次へ」ボタンをクリックします。
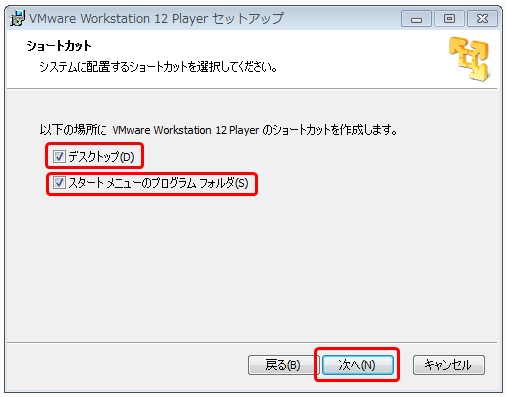
7.「ショートカット」画面で、「デスクトップ」と「スタートメニューのプログラム フォルダ」にチェックを入れて(任意)「次へ」ボタンをクリックします。
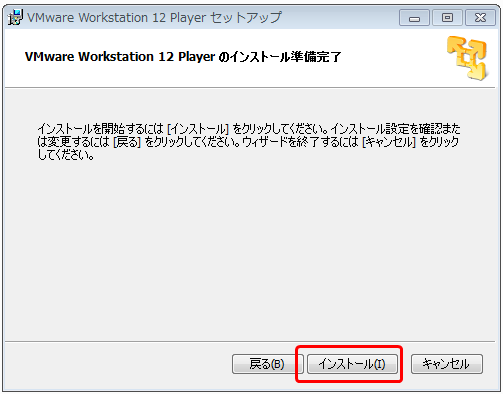
8.「インストール」ボタンをクリックします。
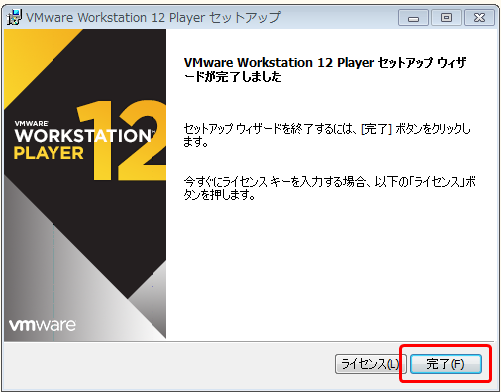
9.インストールが完了したら「完了」ボタンをクリックします。
※ちなみに商用で利用する場合は「ライセンス」を購入してライセンス登録をします。
今回は商用ではなく検証目的なのでライセンス登録はしません。
たとえば、ここにサーバを構築してお客さんからお金をもらってサイトを運用するとか商用で利用する場合はライセンス登録が必要となります。
インストールが完了したので VMware Workstation Player の設定をしていきます。
VMware Workstation Playerの起動
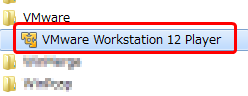
1.スタートボタンをクリックして「VMware」-「VMware Workstation 12 Player」をクリックして VMware を起動します。
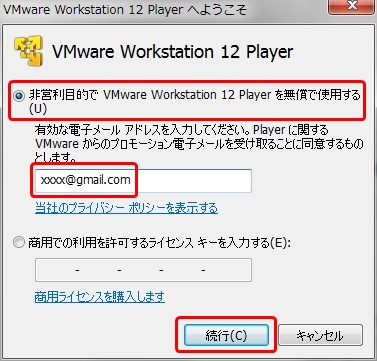
2.「VMware Workstation 12 Player へようこそ」画面が表示されたら、目的を選択し「非営利」ならメールアドレス、「商用」ならライセンスキーを入力し「続行」ボタンをクリックします。
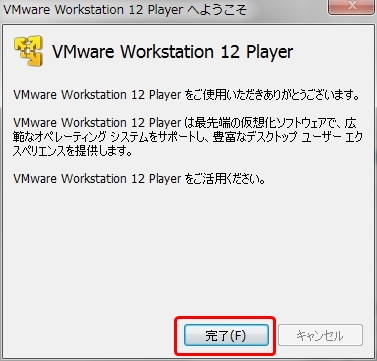
3.「完了」ボタンをクリックします。
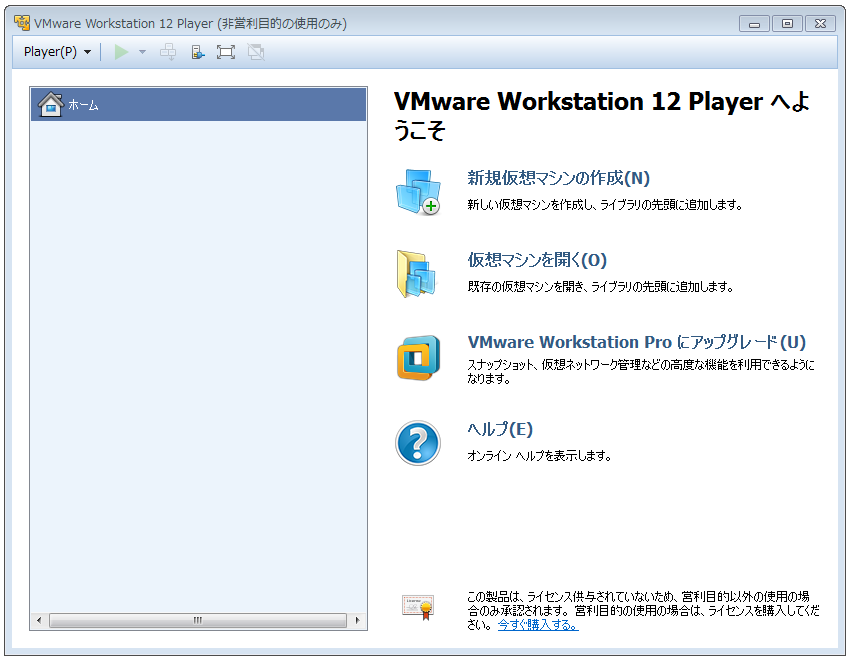
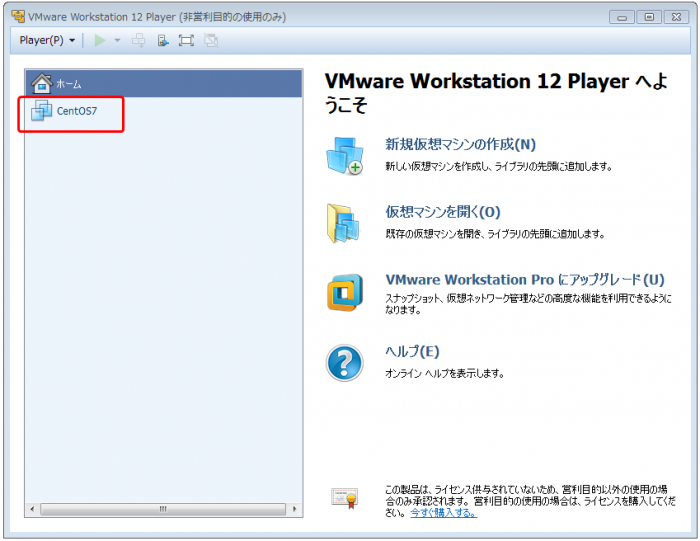
4.以下のように「VMware Workstation 12 Player(非営利目的の仕様のみ)」の画面が表示されることを確認します。
※もし以下の画面が起動したら「このバージョンをスキップ」ボタンをクリックする。

Linux(CentOS7)のイメージをダウンロードする
ここで一旦 VMwareを離れてインストールしたい Linux のイメージを取得します。
どの Linux のディストリビューションでもいいですが、今回は CentOS7 を VMware にインストールする手順を記載します。
1.以下の URL にアクセスします。
http://ftp.jaist.ac.jp/pub/Linux/CentOS/7.3.1611/isos/x86_64/
※もし以下のように「Not Found」のメッセージが出た場合の対処です。
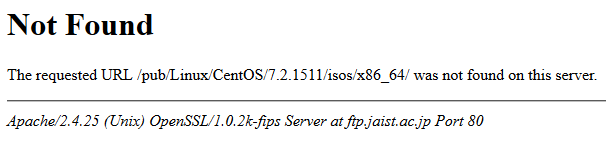
この場合は単純にパスが変わっただけです。
(Linuxディストリビューションのバージョンは定期的にバージョンアップするのですぐに変わります)
一旦「http://ftp.jaist.ac.jp/pub/Linux/CentOS/」まで移動して、そこから「CentOS7の一番新しいバージョン」のフォルダに移動して「ioso」→「x86_64」フォルダに移動すれば CentOS7 のイメージが見つかります。
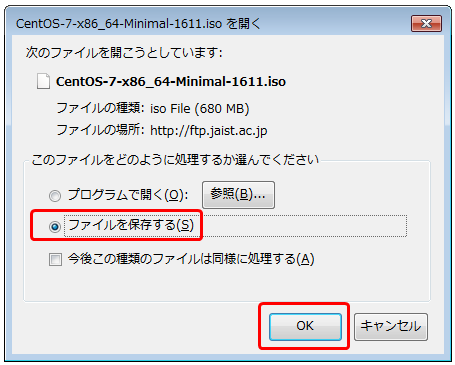
2.様々なバージョンのイメージがありますが、今回は標準の「CentOS-7-x86_64-Minimal-1611.iso」のリンクをクリックして ISO イメージをダウンロードします。

3.以下の画面が表示されたら「ファイルを保存する」にチェックを入れて「OK」ボタンをクリックします。
※大体680MBのサイズだと1時間弱かかると思います。
VMware に 仮想マシンを作成する
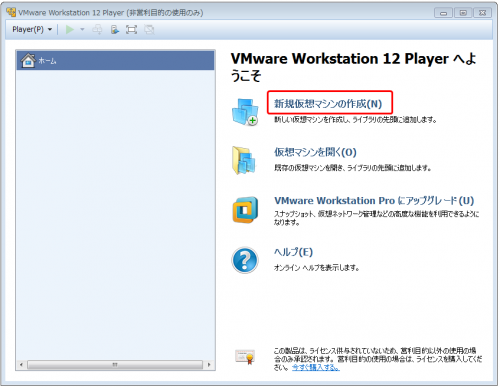
1.「VMware Workstation 12 Player」の画面より、「新規仮想マシンの作成」をクリックします。
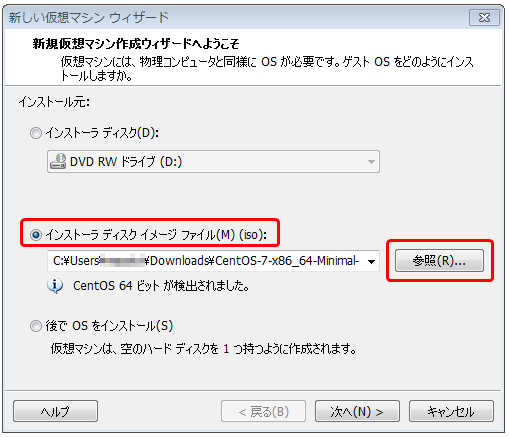
2.「新しい仮想マシン ウィザード」画面が表示されたら、「インストーラ ディスク イメージ ファイル(M) (iso)」にチェックを入れて「参照」ボタンをクリックします。
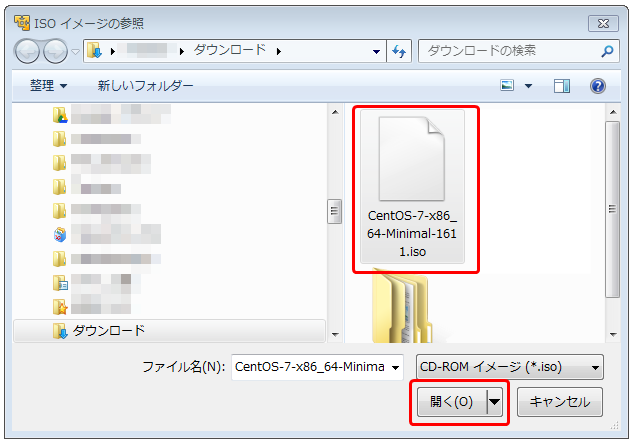
3.ダウンロードした「iso」ファイルを選択して「開く」ボタンをクリックします。
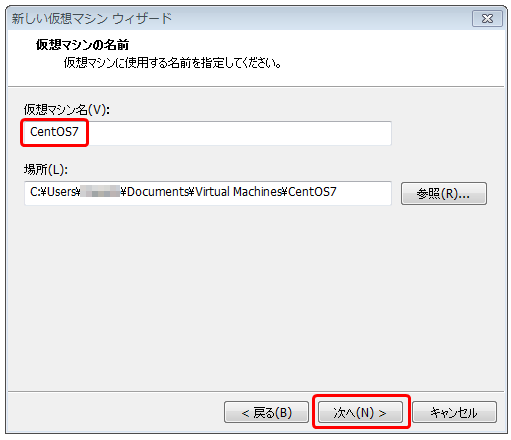
4.下図のように適当に「仮想マシン名」を入力し「次へ」ボタンをクリックします。
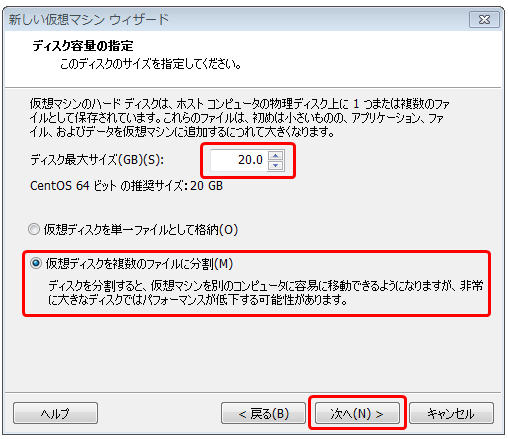
5.ディスク容量を指定します。ここではデフォルトの20GBのままにします。ディスクの構成ですが、デフォルトの「仮想ディスクを複数のファイルに分割」にチェックを入れて「次へ」ボタンをクリックします。
6.デフォルトのまま「完了」ボタンをクリックします。
※すべてデフォルトの場合は下記の構成になります。
ディスク:20GB
メモリ:1GB
CPU:1個
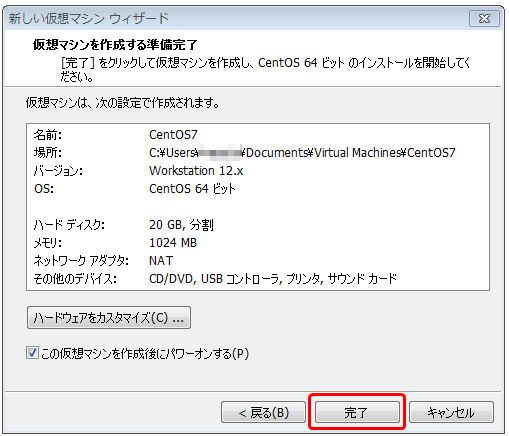
※「完了」ボタンをクリックするとそのまま CentOS7 のインストールが始まります。
CentOS 7 のインストール
ここからCentOS7のインストールを行います。
インストール前に以下のように設計しました。
OS:CentOS 7
ホスト名:centos7
FQDN名(ホスト名+ドメイン名):centos7.localdomain
IPアドレス:DHCPによる自動割り当て
パーティション:1つ(/のみ)
ディスクサイズ:20GB
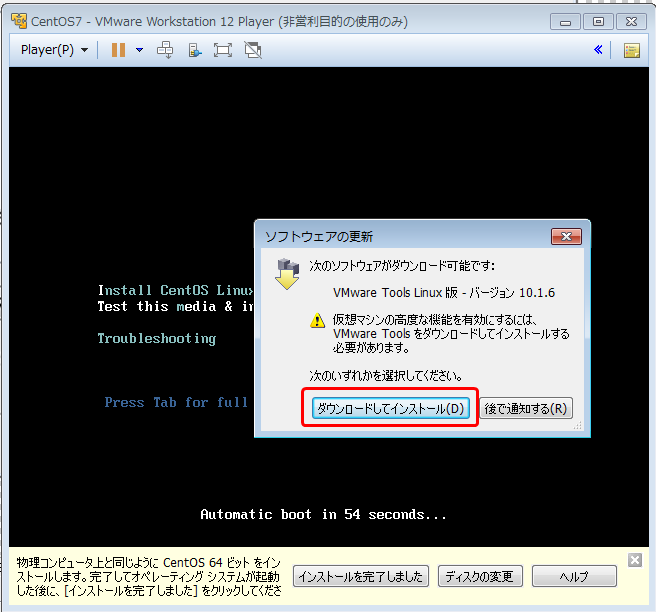
1.「VMware Tools Linux 版 バージョン 10.1.6」をダウンロードしてインストールするかどうか確認ウィンドウが表示されたら「ダウンロードしてインストール」ボタンをクリックします。
※画面は「VMware Tools」をダウンロードしてインストールしたら自動的に消えます。
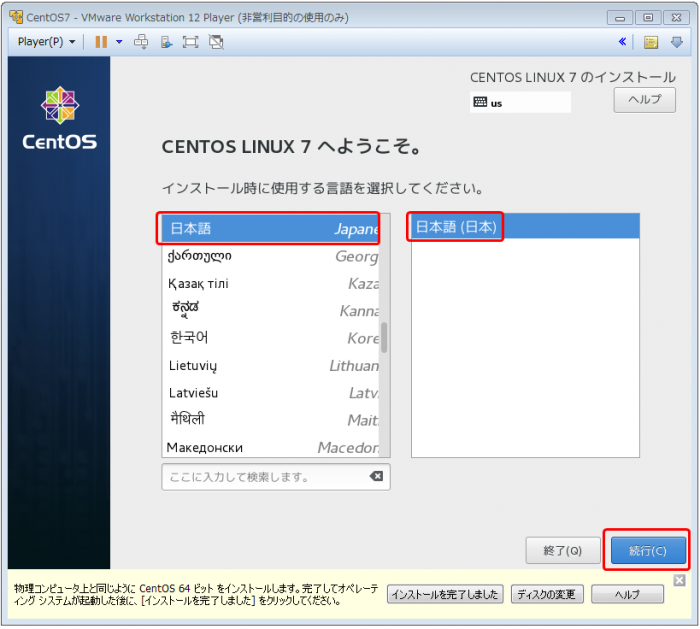
2.「CENTOS LINUX 7 へようこそ。」の画面で「日本語」を選択します。
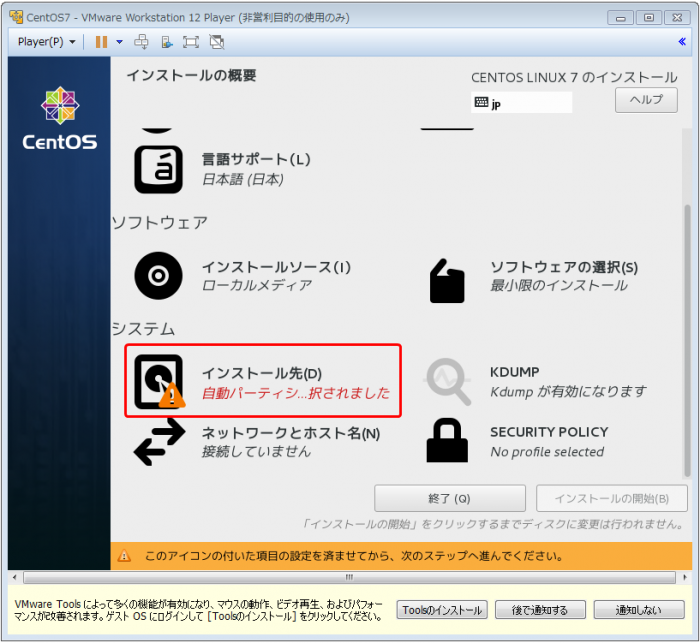
3.「システム」-「インストール先」をクリックします。
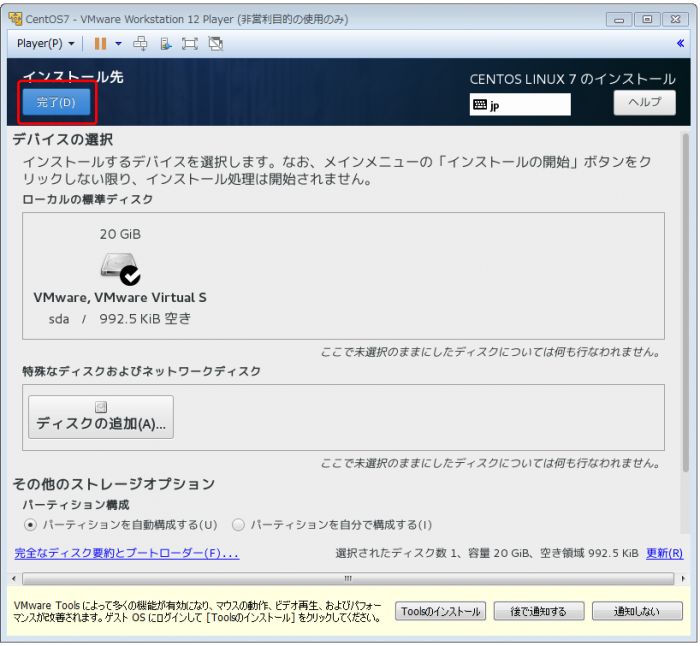
4.特に何も設定変更せずに「完了」ボタンをクリックします。
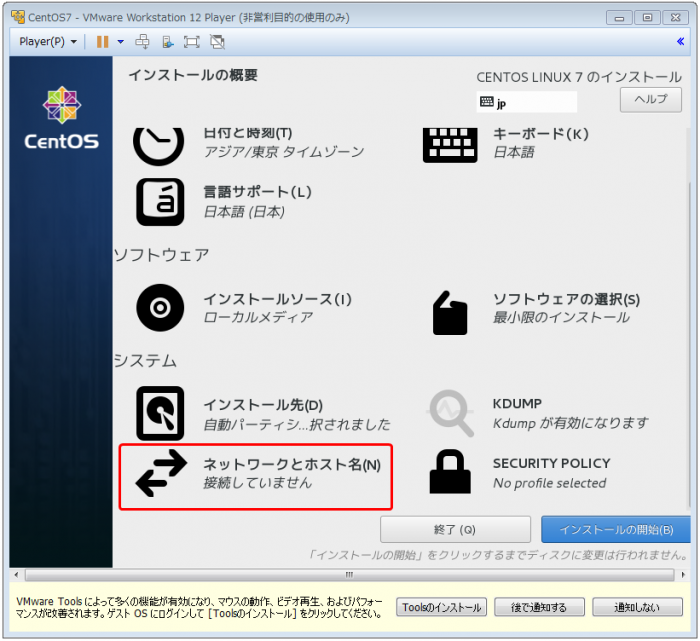
5.ネットワークの設定をするために「ネットワークとホスト名」をクリックします。
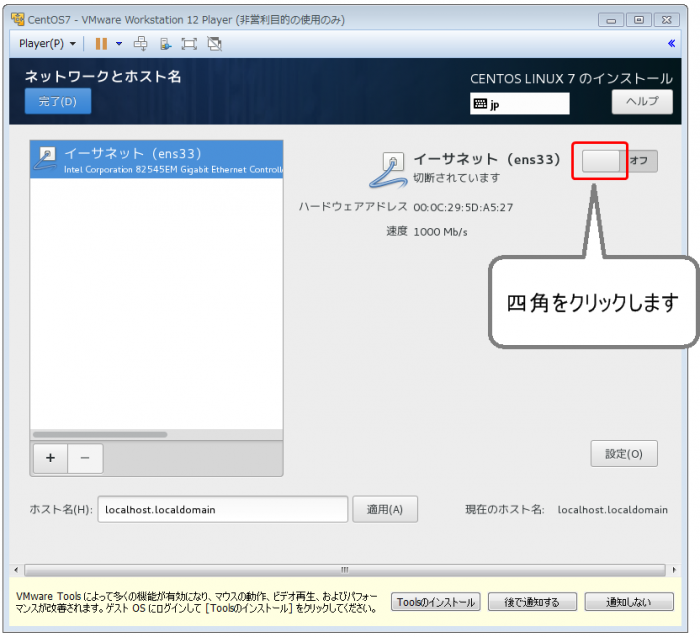
6.下図のように四角の部分をクリックして「オン」にします。
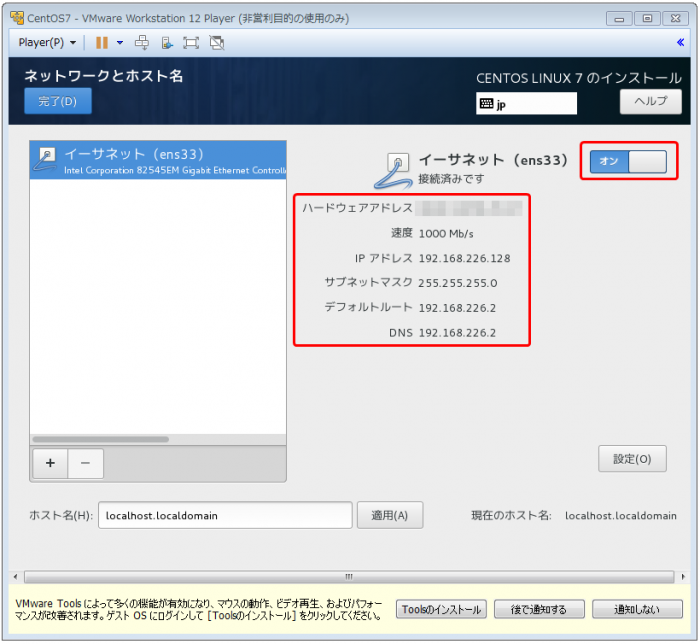
7.下図のように「オン」になっていることと、DHCPにより自動的にIPアドレスが取得できていることを確認します。
※デフォルトではDHCPによるIPアドレス取得が有効になっています。
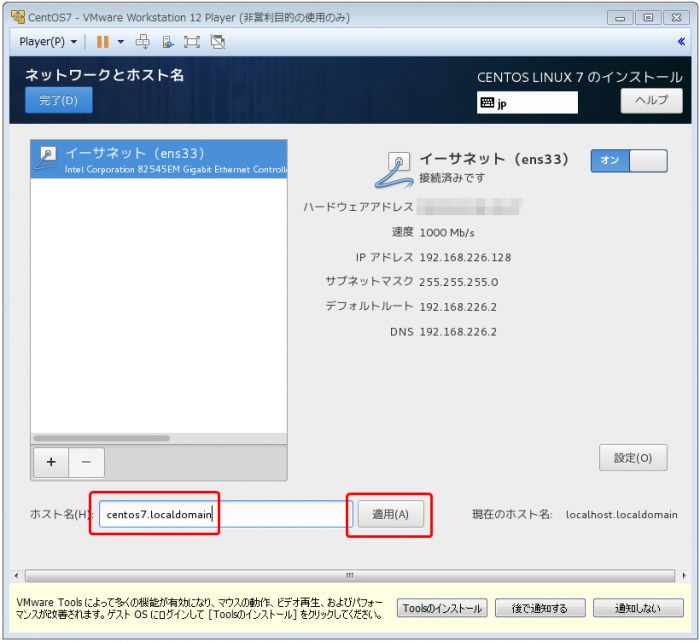
8.下図のように「ホスト名」に任意のホスト名を入力し「適用」ボタンをクリックします。
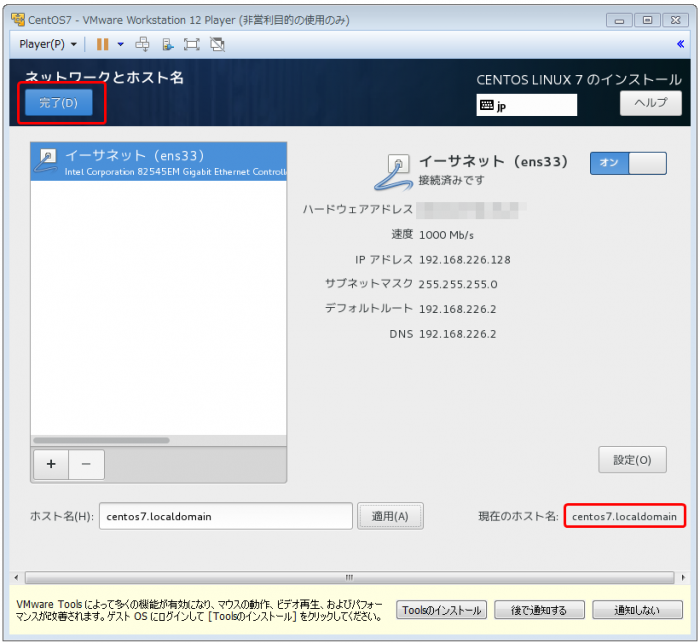
9.「現在のホスト名」が設定したホスト名に変更されていることを確認します。確認後、「完了」ボタンをクリックします。
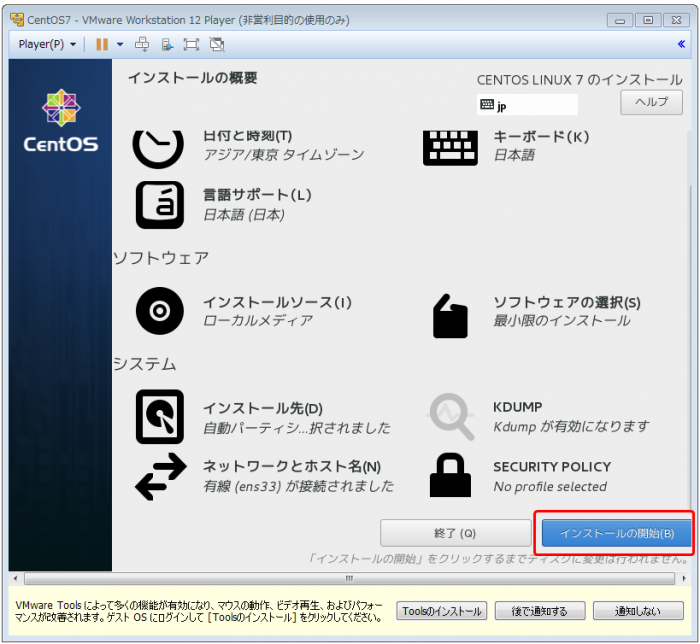
10.「インストールの開始」ボタンをクリックします。
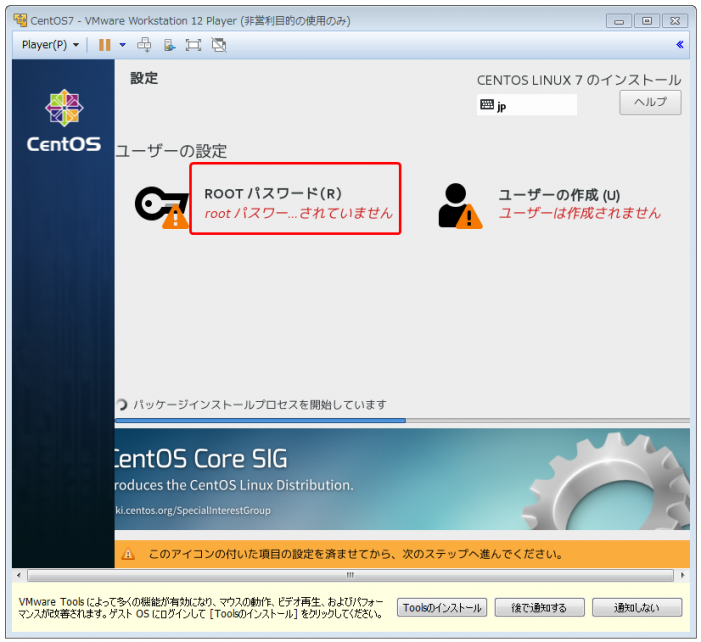
11.「ROOTパスワード」をクリックします。
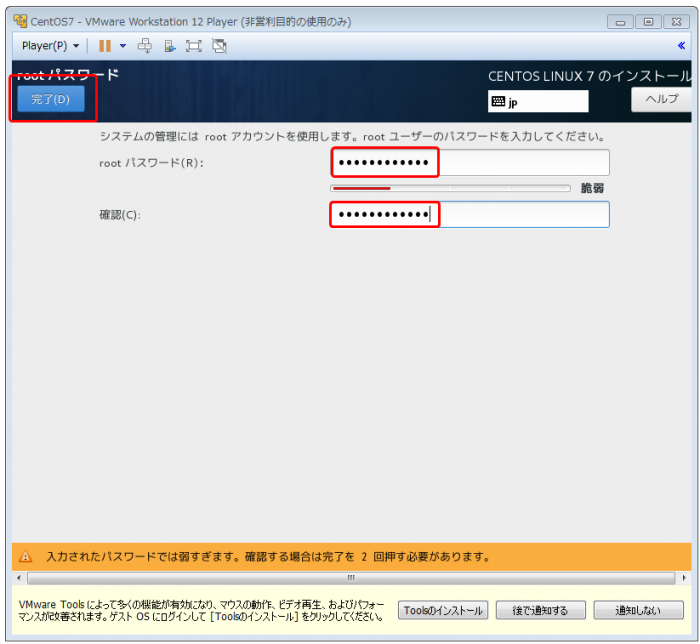
12.rootのパスワードを入力して、「完了」ボタンをクリックします。
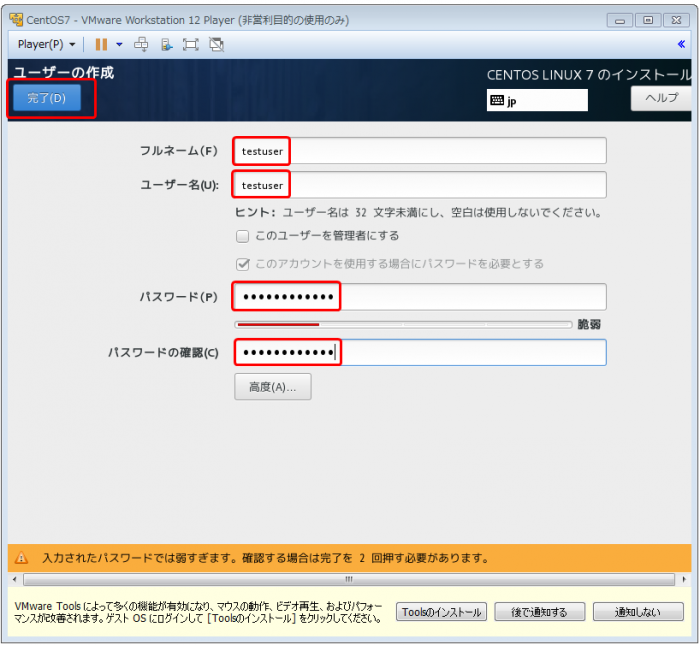
※パスワードが弱いと判断されると下図のように「入力されたパスワードでは弱すぎます。確認する場合は完了を 2 回押す必要があります。」と警告が出ますが、設定はできます。
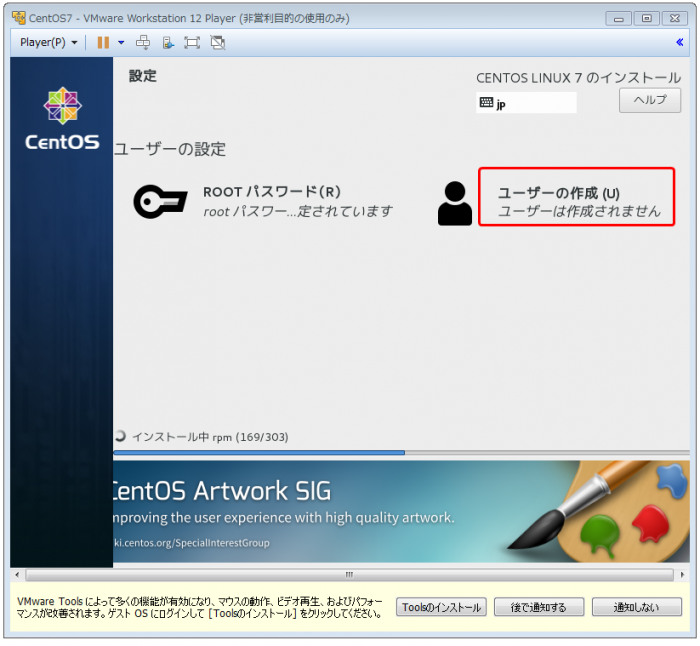
13.「ユーザーの作成」をクリックします。
14.一般アカウントを作成します。「ユーザー名」と「パスワード」を入力し、「完了」ボタンをクリックします。
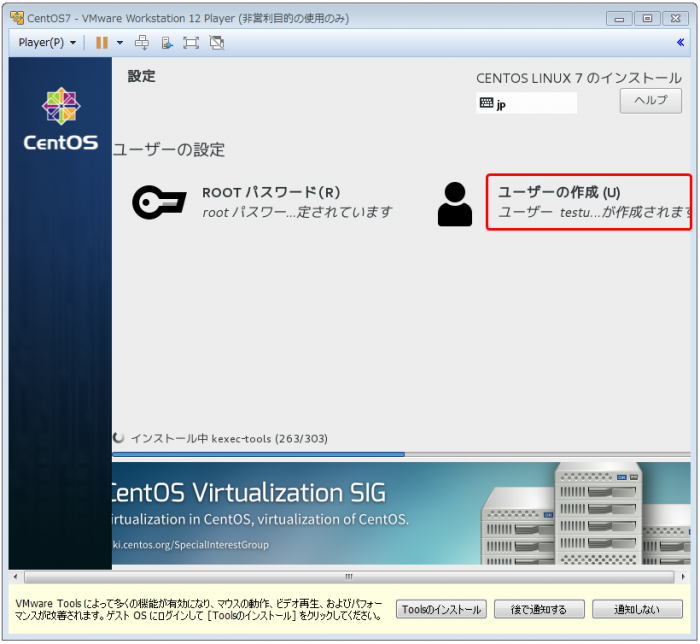
15.ユーザーが作成されていることを確認します。
16.インストールが完了したら「再起動」ボタンをクリックしてOSを再起動します。
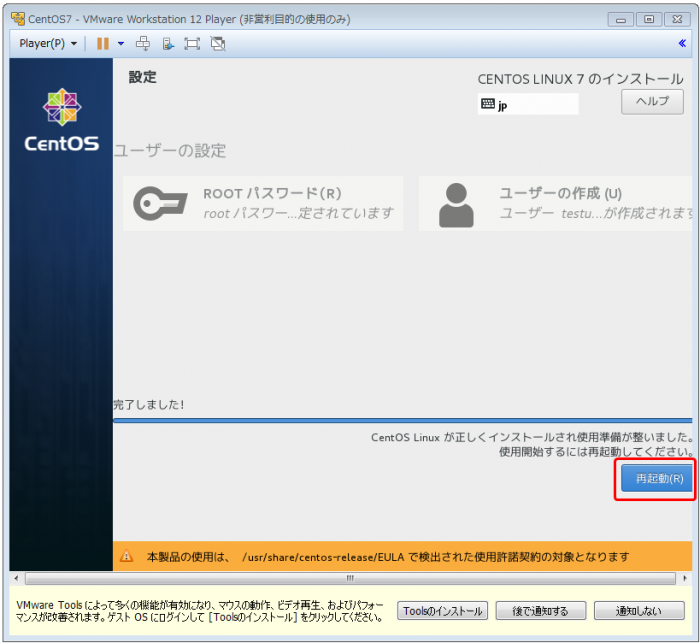
以上で CentOS7 のインストール作業は完了です。
続けて CentOS7 の各種設定をします。
CentOS7のリモートログイン確認
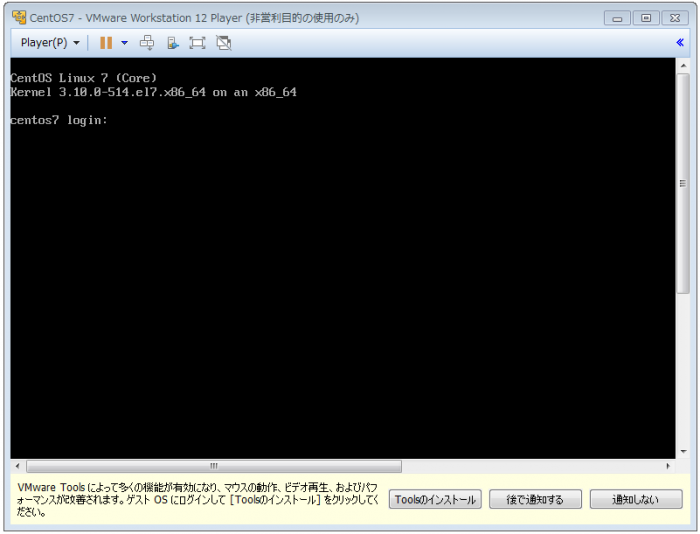
1.下図のようにログイン画面が表示されたらrootアカウントでログインします。
2.下記のように「ip a」コマンドを実行してIPアドレスが設計通りについていることを確認します。
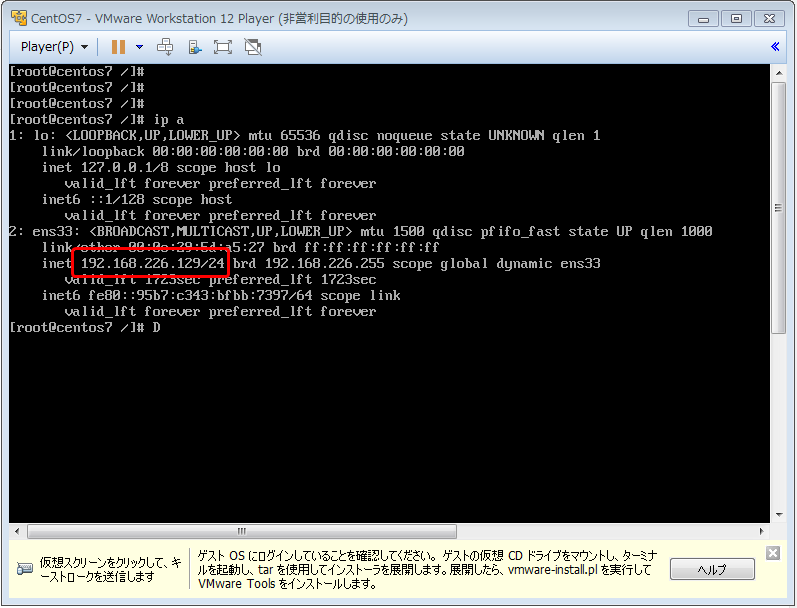
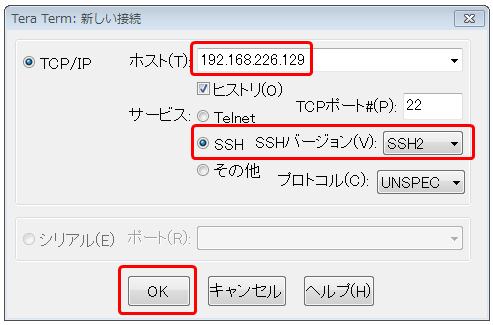
3.IPアドレスが設定されていることが確認できたら、Teratermでリモートログインします。
Teratermを起動して「ホスト」にIPアドレスを入力し、「サービス」は「SSH」を選択し、「OK」ボタンをクリックします。
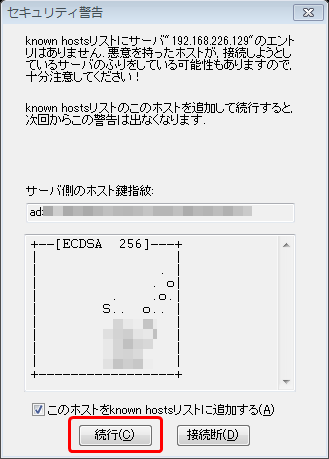
4.下記のように「セキュリティ警告」が表示されたら「続行」ボタンをクリックします。
5.下図のように「ユーザ名」と「パスワード」を入力し、「OK」ボタンをクリックします。
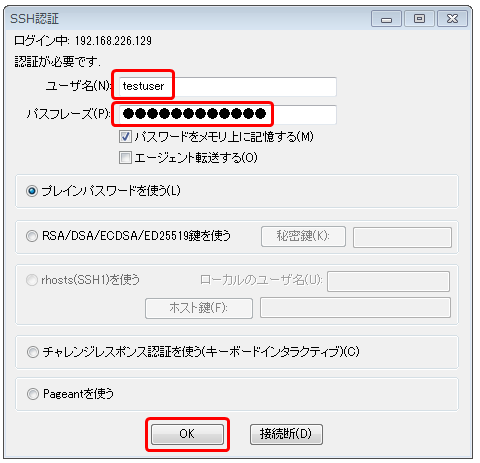
6.Teratermよりリモートログインできることを確認します。
必要なパッケージのインストール
CentOS7 を最小限の構成でインストールした場合、以下のパッケージのインストールが必要になります。
- kernel-devel
- net-tools
- gcc
- perl
1.上記パッケージをインストールします。
| [root@centos7 ~]# yum install kernel-devel net-tools gcc perl |
2.インストール後に OS を再起動します。
| [root@centos7 ~]# reboot |
続けて「VMware Tools」のインストールをします。
VMware Tools のインストール
VMware Tools は、CD-ROMに入っています。
CD-ROMは、自動的に接続されているのでマウントをすることで CD-ROM にアクセスすることができるようになります。
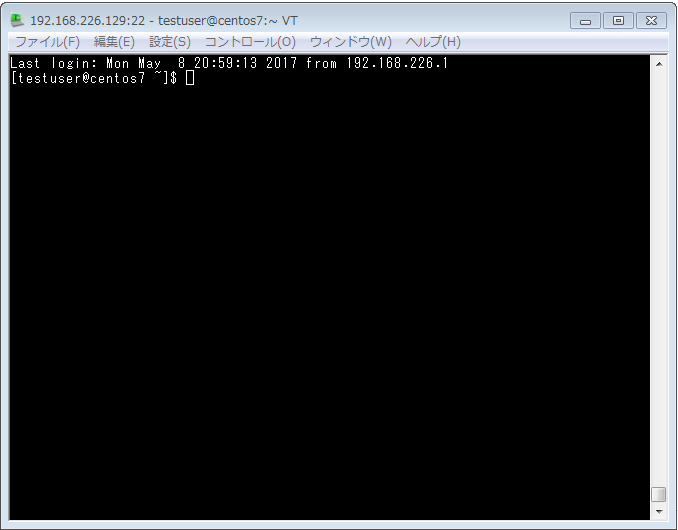
1.rootアカウントにスイッチします。
| Last login: Mon May 8 20:59:13 2017 from 192.168.226.1 [testuser@centos7 ~]$ su – パスワード: ← rootのパスワードを入力します。 最終ログイン: 2017/05/08 (月) 21:19:02 JST日時 pts/0 [root@centos7 ~]# |
2.dfコマンドを実行して、まだCD-ROMがマウントされていないことを確認します。
| [root@centos7 ~]# df -h ファイルシス サイズ 使用 残り 使用% マウント位置 /dev/mapper/cl-root 17G 951M 17G 6% / devtmpfs 478M 0 478M 0% /dev tmpfs 489M 0 489M 0% /dev/shm tmpfs 489M 6.8M 482M 2% /run tmpfs 489M 0 489M 0% /sys/fs/cgroup /dev/sda1 1014M 139M 876M 14% /boot tmpfs 98M 0 98M 0% /run/user/0 tmpfs 98M 0 98M 0% /run/user/1000 [root@centos7 ~]# |
4.「VMware Tools」は CD-ROM に入っているので、まずはマウントポイントを作成します。
| [root@centos7 ~]# mkdir /mnt/cdrom ← /mnt/cdromというマウントポイントを作成します。 [root@centos7 ~]# ls /mnt/ ← マウントポイントが作成されていることを確認します。 cdrom [root@centos7 ~]# |
5.CD-ROM を /mnt/cdrom にマウントします。
| [root@centos7 ~]# mount /dev/cdrom /mnt/cdrom mount: /dev/sr0 is write-protected, mounting read-only [root@centos7 ~]# df -h ファイルシス サイズ 使用 残り 使用% マウント位置 /dev/mapper/cl-root 17G 951M 17G 6% / devtmpfs 478M 0 478M 0% /dev tmpfs 489M 0 489M 0% /dev/shm tmpfs 489M 6.8M 482M 2% /run tmpfs 489M 0 489M 0% /sys/fs/cgroup /dev/sda1 1014M 139M 876M 14% /boot tmpfs 98M 0 98M 0% /run/user/0 tmpfs 98M 0 98M 0% /run/user/1000 /dev/sr0 56M 56M 0 100% /mnt/cdrom ← 「/dev/cdrom」ではなく「/dev/sr0」が「/mnt/cdrom」にマウントされています。 [root@centos7 ~]# |
6.CD-ROMにアクセスして、VMware Toolsをローカルにコピーします。
| [root@centos7 ~]# cd /mnt/cdrom/ ← /mnt/cdrom に移動します。 [root@centos7 cdrom]# ls VMwareTools-10.1.6-5214329.tar.gz vmware-tools-upgrader-32 manifest.txt vmware-tools-upgrader-64 run_upgrader.sh [root@centos7 cdrom]# cp -ip VMwareTools-10.1.6-5214329.tar.gz /tmp ← VMwareTools-10.1.6-5214329.tar.gz |
7.「VMwareTools-10.1.6-5214329.tar.gz」を展開します。
| [root@centos7 cdrom]# cd /tmp/ [root@centos7 tmp]# ls VMwareTools-10.1.6-5214329.tar.gz ks-script-E0mggt yum.log [root@centos7 tmp]# tar zxvf VMwareTools-10.1.6-5214329.tar.gz ← VMwareTools-10.1.6-5214329.tar.gzを展開します。 vmware-tools-distrib/ vmware-tools-distrib/lib/ vmware-tools-distrib/lib/lib32/ vmware-tools-distrib/lib/lib32/libgiomm-2.4.so.1/ vmware-tools-distrib/lib/lib32/libgiomm-2.4.so.1/libgiomm-2.4.so.1 |
8.「VMware Tools」をインストールします。(vmware-install.plを実行します)
| [root@centos7 vmware-tools-distrib]# ./vmware-install.pl open-vm-tools packages are available from the OS vendor and VMware recommends using open-vm-tools packages. See http://kb.vmware.com/kb/2073803 for more information. Do you still want to proceed with this installation? [yes] A previous installation of VMware Tools has been detected. The previous installation was made by the tar installer (version 4). Keeping the tar4 installer database format. You have a version of VMware Tools installed. Continuing this install will Uninstalling the tar installation of VMware Tools. SELinux unconfigure: The ‘semanage’ utility was not found. Stopping services for VMware Tools The removal of VMware Tools 10.1.6 build-5214329 for Linux completed Installing VMware Tools. In which directory do you want to install the binary files? What is the directory that contains the init directories (rc0.d/ to rc6.d/)? What is the directory that contains the init scripts? In which directory do you want to install the daemon files? In which directory do you want to install the library files? The path “/usr/lib/vmware-tools” does not exist currently. This program is In which directory do you want to install the common agent library files? In which directory do you want to install the common agent transient files? In which directory do you want to install the documentation files? The path “/usr/share/doc/vmware-tools” does not exist currently. This program The installation of VMware Tools 10.1.6 build-5214329 for Linux completed Before running VMware Tools for the first time, you need to configure it by Initializing… Making sure services for VMware Tools are stopped. The module vmci has already been installed on this system by another installer The module vsock has already been installed on this system by another installer The module vmxnet3 has already been installed on this system by another The module pvscsi has already been installed on this system by another The module vmmemctl has already been installed on this system by another The VMware Host-Guest Filesystem allows for shared folders between the host OS Before you can compile modules, you need to have the following installed… make
Searching for GCC… Searching for a valid kernel header path… WARNING: This program cannot compile any modules for the following reason(s)… – This program could not find a valid path to the kernel headers of the running [ Press Enter key to continue ]
The filesystem driver (vmhgfs module) is used only for the shared folder If you wish to have the shared folders feature, you can install the driver by The vmxnet driver is no longer supported on kernels 3.3 and greater. Please The vmblock enables dragging or copying files between host and guest in a NOTICE: It appears your system does not have the required fuse packages VMware automatic kernel modules enables automatic building and installation of Would you like to enable VMware automatic kernel modules? Do you want to enable Guest Authentication (vgauth)? Enabling vgauth is needed Do you want to enable Common Agent (caf)? [yes] No X install found. Creating a new initrd boot image for the kernel. The configuration of VMware Tools 10.1.6 build-5214329 for Linux for this You must restart your X session before any mouse or graphics changes take You can now run VMware Tools by invoking “/usr/bin/vmware-toolbox-cmd” from the To enable advanced X features (e.g., guest resolution fit, drag and drop, and Enjoy, –the VMware team [root@centos7 vmware-tools-distrib]# |
9.vmware-toolsが起動していることを確認します。
| [root@centos7 vmware-tools-distrib]# service vmware-tools status vmtoolsd is running [root@centos7 vmware-tools-distrib]# |
VMware-Toolsが正常にインストールされたことの確認
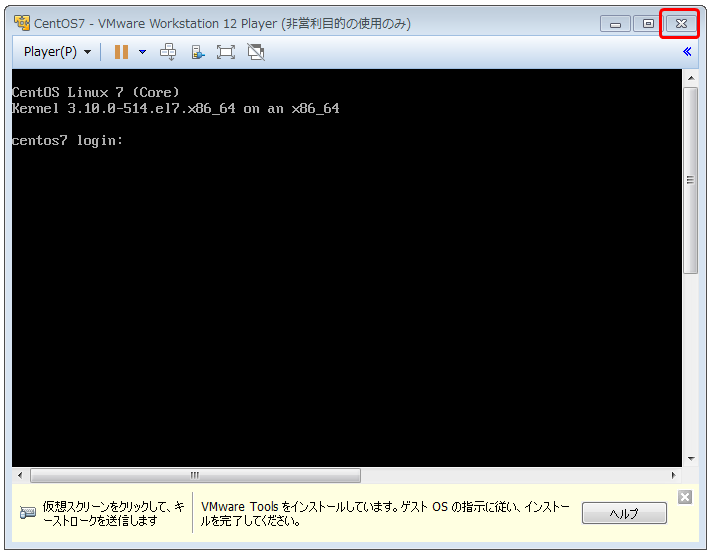
1.一旦、右上の[X]をクリックして「VMware Workstation 12 Player」を閉じます。
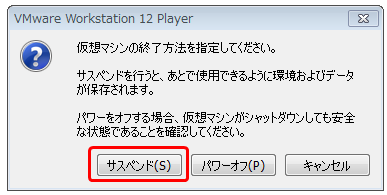
2.「サスペンド」ボタンをクリックします。
3.再度「VMware Workstation 12 Player」を起動します。
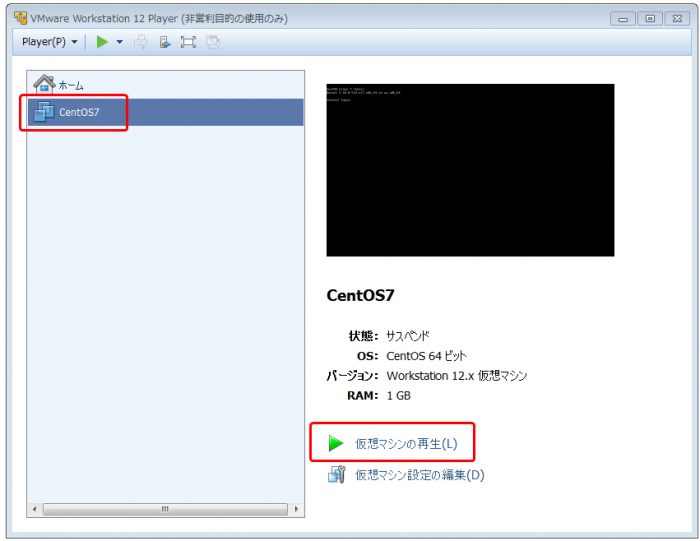
4.作成した仮想マシンを選択します。
5.仮想マシンが選択された状態で「仮想マシンの再生」をクリックします。
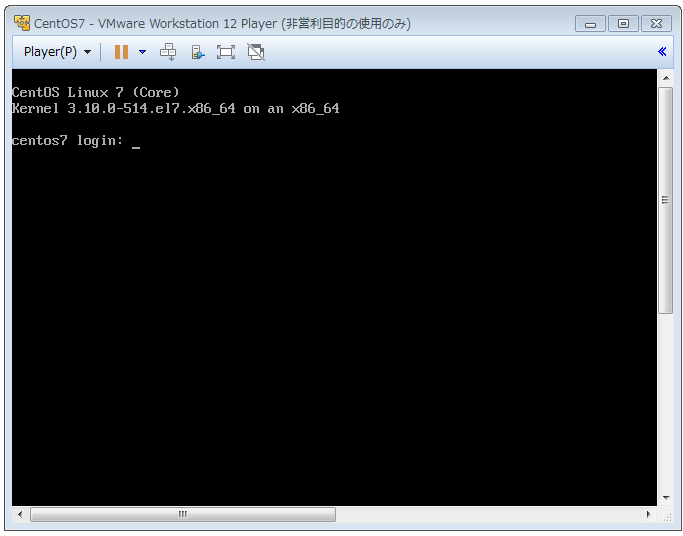
6.下図のように「VMware-Tools」のインストールを促すメッセージが消えていることを確認します。
まとめ
全体的に問題なく VMware インストールから設定まで完了しました。
唯一はまったのが、「VMware-Tools」をインストールする時の「kernel-headers」のパスの部分です。
しかし以下のサイトを参考にして「kernel-headers」をインストールしました。
※参考サイト
http://forfreeworld.com/archives/48358726.html
結論を言えば、手順の通り「kernel-headers」のパスを設定せずにそのまま「VMware-Tools」のインストールを進めれば問題なくインストールできるということです。
念のため、この後も動作確認をして問題ないかどうか検証をします。