【メール】【Postfix】【DKIM】DomainKeys Identified Mail(ドメイン・キー・アイデンティファイド・メール)の設定方法【Red Hat 7】

今回は、メールサーバーに対して DKIM(DomainKeys Identified Mail)を設定する手順について解説します。


【メール】【SPFレコード】逆引きレコードを設定していないとスパムメール扱いになるので注意


今回利用するメール環境は以下の手順で作成しました。


【AWS】【メール】EC2 インスタンスから Postfix で Gmail 経由でインターネットにメールを送信する(メールサーバー)設定手順


何の設定もしていない単純なメールメッセージのソース

以下の記事で単純なメールサーバーを構築してメールメッセージのソースを表示します。


【AWS】【メール】EC2 インスタンスから Postfix で Gmail 経由でインターネットにメールを送信する(メールサーバー)設定手順


今回構築したメールサーバーから受信したメールのソースを確認します。

Gmail にログインして対象のメールを選択して右上の丸印をクリックして「メッセージのソースを表示」をクリックします。

【メール】【DKIM】DomainKeys Identified Mail(ドメイン・キー・アイデンティファイド・メール)の設定方法


■メッセージのソース

Return-Path: <xxxxxxxx@gmail.com> 
Received: from xxxxxxx.com (xxxxxxx.com. [54.xxx.xxx.xxx]) 
        by smtp.gmail.com with ESMTPSA id k191sm2070065pfc.151.2019.05.02.22.57.32 
        for <xxxxxxxx@gmail.com> 
        (version=TLS1_2 cipher=ECDHE-RSA-AES128-GCM-SHA256 bits=128/128); 
        Thu, 02 May 2019 22:57:32 -0700 (PDT) 
From: Cloud User <xxxxxxxx@gmail.com> 
X-Google-Original-From: ec2-user@xxxxxxx.com (Cloud User) 
Received: by xxxxxxx.com (Postfix, from userid 1000) id 0608ACA2A16; Fri, 
  3 May 2019 05:57:31 +0000 (UTC) 
Date: Fri, 03 May 2019 05:57:30 +0000 
To: xxxxxxxx@gmail.com 
Subject: タイトル:メール送信テスト 
User-Agent: Heirloom mailx 12.5 7/5/10 
MIME-Version: 1.0 
Content-Type: text/plain; charset=utf-8 
Content-Transfer-Encoding: 8bit 
Message-Id: <20190503055731.0608ACA2A16@xxxxxxx.com> 
 
インターネットへのメール送信テスト


上記メッセージのソースを確認しても特に DKIM などの設定は全く見当たりません。


Linux の場合は OpenDKIM を利用できる

Linux 系の場合は OpenDKIM を利用できます。


OpenDKIM 公式ページ

http://opendkim.org/


OpenDKIM は、DKIM サービスを実装するライブラリと milter 対応の MTA へのプラグインを提供しています。

そのため、最近の Sendmail MTA や milter プロトコルをサポートする MTA で利用できます。


DKIM(Domain Keys Identified Mail)とは 

DKIM(Domain Keys Identified Mail)とは、送受信メールサーバ間で公開鍵暗号を利用して送信ドメイン認証を行う方式です。


SPF(Sender Policy Framework)とは

SPF(Sender Policy Framework)とは、送信メールサーバを IP アドレスから正しいメールサーバーかを判別する方式です。

自メールサーバーの IP アドレス(インターネットにメールを送信するならグローバル IP)を DNS サーバーの SPF レコードに登録します。

受信側ではこの公開情報と比較することにより認証します。


milter もしくは milter プロトコルとは?

株式会社クリアコードのサイトには以下の説明があります。


milterプロトコル

https://www.clear-code.com/blog/2014/12/10.html


Postfixは2.3からmilterという仕組みをサポートしました。milterとは「mail filter」の略で、送信したメールまたは受信したメールになんらかの処理を行う仕組みです。もともとはSendmailが作った仕組みですが、Sendmail・Postfix以外のMTAでもサポートしているMTAがあります。

Postfix 2.3でのmilterサポートは限定的な機能のみのサポートでしたが、Postfix 2.6ではSendmailとほぼ同等の機能をサポートしています。SendmailとPostfixでマクロ(後述)名が違うなど一部非互換な部分もありますが、SendmailでもPostfixでも同様に使えます。


「Postfixのぺーじ」には以下の説明があります。


Postfix before-queue Milterサポート

http://www.postfix-jp.info/trans-2.3/jhtml/MILTER_README.html


Postfix バージョン 2.3 では Sendmail バージョン 8 の Milter (mail filter) プロトコルのサポートを導入します。このプロトコルはMTAの外側のアプリケーションでメールの内容だけでなくSMTPのイベント (接続、切断)、SMTP コマンド (HELO、MAIL FROM など) を検査するのに使われます。これはすべてメールがキューに入る前におこなわれます。

Postfix に Milter サポートを追加した理由は、望まないメールをブロックするだけでなく、信憑性を検証したり (例: SenderID+SPF と Domain keys)、メールに電子署名したり (例: Domain keys) といった既存アプリケーションがたくさんあるためです。そういったもろもろのソフトウェアごとにもうひとつ Postfix 固有のバージョンを持つのは人的およびシステムのリソースの無駄遣いです。


事前準備

OpenDKIM インストールする前の事前準備です。


今回インストールする環境

今回インストールする環境は以下となります。

[ec2-user@redhat7 ~]$ cat /etc/redhat-release
Red Hat Enterprise Linux Server release 7.6 (Maipo)
[ec2-user@redhat7 ~]$


RedHat への EPEL のインストール

デフォルトでは Red Hat Enterprise Linux には EPEL はインストールされていません。

[ec2-user@redhat7 ~]$ rpm -qa | grep epel
[ec2-user@redhat7 ~]$


EPEL のリポジトリもインストールされていません。

[root@redhat7 ~]# yum search epel 
Loaded plugins: amazon-id, rhui-lb, search-disabled-repos 
Warning: No matches found for: epel 
No matches found 
[root@redhat7 ~]#


まずは以下の Fedora Project サイトの EPEL 説明ページにアクセします。

https://fedoraproject.org/wiki/EPEL/ja


ページに下部の方の「EL7 epel-release」のリンクを右クリックして「リンクのアドレスをコピー」をクリックします。


インストールするサーバー上で、wget コマンドで先ほどコピーしたリンクのアドレスを引数にして実行し、EPEL のリポジトリパッケージをダウンロードします。

[root@redhat7 ~]# wget https://dl.fedoraproject.org/pub/epel/epel-release-latest-7.noarch.rpm 
–2019-05-03 06:59:39–  https://dl.fedoraproject.org/pub/epel/epel-release-latest-7.noarch.rpm 
Resolving dl.fedoraproject.org (dl.fedoraproject.org)… 209.132.181.25, 209.132.181.23, 209.132.181.24 
Connecting to dl.fedoraproject.org (dl.fedoraproject.org)|209.132.181.25|:443… connected. 
HTTP request sent, awaiting response… 200 OK 
Length: 15080 (15K) [application/x-rpm] 
Saving to: ‘epel-release-latest-7.noarch.rpm’ 
 
100%[====================================================>] 15,080      –.-K/s   in 0.1s 
 
2019-05-03 06:59:40 (131 KB/s) – ‘epel-release-latest-7.noarch.rpm’ saved [15080/15080] 
 
[root@redhat7 ~]#


EPEL リポジトリをインストールします。

[root@redhat7 ~]# yum install epel-release-latest-7.noarch.rpm


SELINUX の設定

SELINUX を「disabled(無効)」に設定します。

[root@redhat7 ~]# vi /etc/selinux/config 
 
# This file controls the state of SELinux on the system. 
# SELINUX= can take one of these three values: 
#     enforcing – SELinux security policy is enforced. 
#     permissive – SELinux prints warnings instead of enforcing. 
#     disabled – No SELinux policy is loaded. 
#SELINUX=enforcing 
SELINUX=disabled 
# SELINUXTYPE= can take one of three values: 
#     targeted – Targeted processes are protected, 
#     minimum – Modification of targeted policy. Only selected processes are protected. 
#     mls – Multi Level Security protection. 
SELINUXTYPE=targeted 
 
 
[root@redhat7 ~]#


OpenDKIM インストールおよび設定手順

OpenDKIM インストールおよび設定手順です。


OpenDKIM をインストールする際に以下のように「Requires: libmilter.so.1.0()(64bit)」のエラーメッセージが出力されてインストールが失敗することがあります。

[root@redhat7 ~]# yum install opendkim


~ 省略 ~


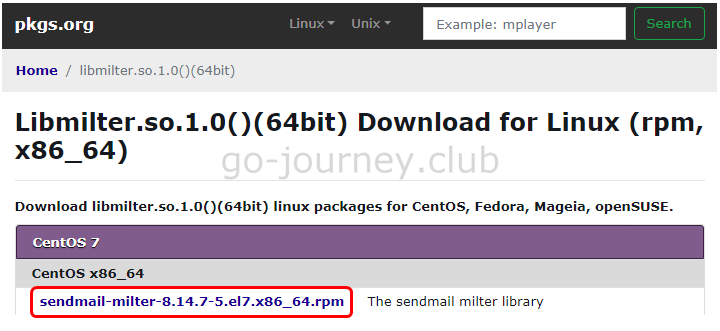
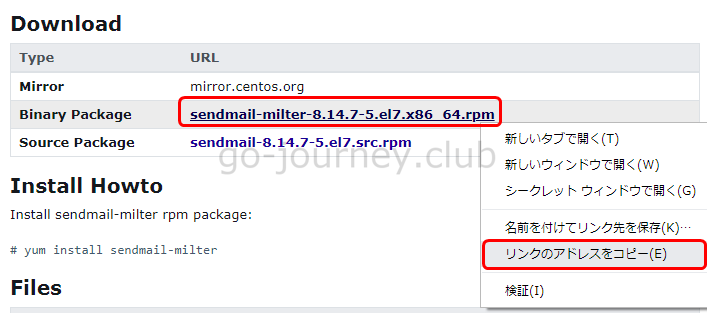
Error: Package: opendkim-2.11.0-0.1.el7.x86_64 (epel) 
           Requires: libmilter.so.1.0()(64bit) ← libmilter.so.1.0()(64bit) が必要というメッセージが出力されています。 
 You could try using –skip-broken to work around the problem 
 You could try running: rpm -Va –nofiles –nodigest 
[root@redhat7 ~]# 


その場合は、以下の手順で「libmilter.so.1.0()(64bit)」をインストールします。


以下の URL にアクセスします。

https://pkgs.org/download/libmilter.so.1.0()(64bit)


下図のように「CentOS 7」をクリックして「sendmail-milter-8.14.7-5.el7.x86_64.rpm」をクリックします。

【メール】【DKIM】DomainKeys Identified Mail(ドメイン・キー・アイデンティファイド・メール)の設定方法


ページの中頃に下図のように「Download」「sendmail-milter-8.14.7-5.el7.x86_64.rpm」を右クリックして「リンクのアドレスをコピー」をクリックします。

【メール】【DKIM】DomainKeys Identified Mail(ドメイン・キー・アイデンティファイド・メール)の設定方法


wget コマンドで先ほどコピーしたリンク先を引数にして「sendmail-milter-8.14.7-5.el7.x86_64.rpm」をダウンロードします。

[root@redhat7 ~]# wget http://mirror.centos.org/centos/7/os/x86_64/Packages/sendmail-milter-8.14.7-5.el7.x86_64.rpm 
–2019-05-03 09:07:13–  http://mirror.centos.org/centos/7/os/x86_64/Packages/sendmail-milter-8.14.7-5.el7.x86_64.rpm 
Resolving mirror.centos.org (mirror.centos.org)… 147.75.93.107, 2401:78c0::10 
Connecting to mirror.centos.org (mirror.centos.org)|147.75.93.107|:80… connected. 
HTTP request sent, awaiting response… 200 OK 
Length: 72424 (71K) [application/x-rpm] 
Saving to: ‘sendmail-milter-8.14.7-5.el7.x86_64.rpm’ 
 
100%[==============================================================>] 72,424      –.-K/s   in 0.008s 
 
2019-05-03 09:07:14 (8.22 MB/s) – ‘sendmail-milter-8.14.7-5.el7.x86_64.rpm’ saved [72424/72424] 
 
[root@redhat7 ~]#


yum コマンドで「sendmail-milter-8.14.7-5.el7.x86_64.rpm」をインストールします。

[root@redhat7 ~]# yum install sendmail-milter-8.14.7-5.el7.x86_64.rpm


OpenDKIM をインストールします。

[root@redhat7 ~]# yum install opendkim


DKIM 署名用の秘密鍵と公開鍵の作成

OpenDKIM インストール後は DKIM 署名用の秘密鍵と公開鍵を作成します。


初めに OpenSSL がインストールされていることを確認します。

[root@redhat7 ~]# openssl version 
OpenSSL 1.0.2k-fips  26 Jan 2017 


DKIM 鍵ファイルの保存先「/etc/opendkim/keys/ドメイン名」を作成します。

[root@redhat7 keys]# pwd
/etc/opendkim/keys
[root@redhat7 keys]# mkdir xxxxxxx.com
[root@redhat7 keys]# ls
xxxxxxx.com
[root@redhat7 keys]#


opendkim-genkey コマンドで鍵ペアを作成します。

[root@redhat7 keys]# opendkim-genkey -D /etc/opendkim/keys/xxxxxxx.com -d xxxxxxx.com -s selector20190503


作成された鍵ペアを確認します。

[root@redhat7 xxxxxxx.com]# pwd
/etc/opendkim/keys/xxxxxxx.com
[root@redhat7 xxxxxxx.com]# ls -lh
total 8.0K
-rw——-. 1 root root 887 May 3 09:18 selector20190503.private
-rw——-. 1 root root 332 May 3 09:18 selector20190503.txt


[root@redhat7 xxxxxxx.com]# cat selector20190503.private 
—–BEGIN RSA PRIVATE KEY—– 
MIxxxxxxxxxxxxxxxxxxxxxxxxxxxxxxxxxxxxxxxxxxxxxxxxxxxxxxxxxxxxxB 
Hexxxxxxxxxxxxxxxxxxxxxxxxxxxxxxxxxxxxxxxxxxxxxxxxxxxxxxxxxxxxx2 
yxxxxxxxxxxxxxxxxxxxxxxxxxxxxxxxxxxxxxxxxxxxxxxxxxxxxxxxxxxxxxB 
AoGADHQEAyesJUJGO3CVuhItYKLxB90AAhGNlVQZlGB4+FPqs3cg3t8nd0QpcfxW 
5IycTWyguhpwTvV6tcib/EKmFSLSar4OPgMVbZ+xLBxADZh/V5tgGAoxQU5ln5ba 
l1WcXZAhE6BA1048XO6W+AGe7sl/8cGVE0MfoRPj1WHt0wkCQQD8tXjmvvEa97P6 
At6BmJ3arqpT9sinGLSVBzyEfgDV5DAhnIJp3TiCBMJpk4P/72ffi8+mvSYqIPWg 
PDfvatANAkEA9BobvOxUHhFQygwXRm35He1XjL8U2J+E7epyLZjTtPfAuwhk4CTn 
MY/u6J7SmRfpco0YJ9fy78Cg/ffwLhN7YwJBAJHhEFHjl7tBkpuYXGnjd/xtJ9Yg 
d+Q91sDQ1JaHRmQyvbYpav9BvQURSkk35tMvmH7rbouKVSWssR42pPOIbWECQHti 
4xh5AP/90q9+sxknp5+oA/Qh9kCVSZUVR8eik4jLHwGreYoPPUnBLospFNzLyHXd 
uhMRxjvIS9h0RlSUBm8CQCYxDCa6jLF6mP59MrAoo/G9VXpSmxqtaWwAGp6ZFQ5N 
CVKAVpB++W6TR7J3FRMdjSVdYlYC0gjXCIaZj2g9B0c= 
—–END RSA PRIVATE KEY—– 
[root@redhat7 xxxxxxx.com]# cat selector20190503.txt 
selector20190503._domainkey     IN      TXT     ( “v=DKIM1; k=rsa; ” 
          “p=MIGxxxxxxxxxxxxxxxxxxxxxxxxxxxxxxxxxxxxxxxxxxxxxxxxxxxxxxxxxxxxxrT5uFN5vmciVxY8+isd7/BHeF/Bu6NLEhTGpgTa2o/4Vgo8zORS311Rv+dB63DFUTvnJyI5OvzPlNe2r/XdE02yMFVErKlIfdAMCMAi4QoUMU+/6sAmqxf3Qx89v/UzMF0HkG+yrcprzu0BwIDAQAB” )  ; —– DKIM key selector20190503 for xxxxxxx.com 
[root@redhat7 xxxxxxx.com]#


OpenDKIM への権限の割り当て

opendkim プロセスが「/etc/opendkim/keys」ディレクトリにアクセスできるように権限を割り当てます。

[root@redhat7 ~]# cd /etc/opendkim/keys/ 
[root@redhat7 keys]# ls -l 
total 0 
drwxr-xr-x. 2 root root 66 May  3 09:18 xxxxxxx.com 
[root@redhat7 keys]# chown -R opendkim:opendkim /etc/opendkim/keys 
[root@redhat7 keys]# ls -l 
total 0 
drwxr-xr-x. 2 opendkim opendkim 66 May  3 09:18 xxxxxxx.com 


Amazon Route 53 へ公開鍵レコードと ADSP レコードの登録

AWS 管理コンソールにログインし「サービス」「ネットワーキングとコンテンツ配信」「Route 53」をクリックします。

【メール】【DKIM】DomainKeys Identified Mail(ドメイン・キー・アイデンティファイド・メール)の設定方法


【メール】【DKIM】DomainKeys Identified Mail(ドメイン・キー・アイデンティファイド・メール)の設定方法


「ホストゾーン」に移動したら設定対象のドメインをクリックします。

【メール】【DKIM】DomainKeys Identified Mail(ドメイン・キー・アイデンティファイド・メール)の設定方法


「レコードセットの作成」ボタンをクリックします。

【メール】【DKIM】DomainKeys Identified Mail(ドメイン・キー・アイデンティファイド・メール)の設定方法


「レコードセットの作成」画面で下図のように入力します。

  • 名前 ← 先ほど作成した「selector20190503.txt」ファイルを開いた最初の値です。(例:selector20190503._domainkey)
  • タイプ ← 「TXT – テキスト」を選択します。
  • 値 ← 先ほど作成した「selector20190503.txt」ファイルを開いた()「カッコ」の中をコピペします。コピペは 1 行になるように(改行が入らないように)します。

設定が完了したら「作成」ボタンをクリックします。

【メール】【DKIM】DomainKeys Identified Mail(ドメイン・キー・アイデンティファイド・メール)の設定方法


先ほど作成した「selector20190503.txt」ファイルの中身です。

【メール】【DKIM】DomainKeys Identified Mail(ドメイン・キー・アイデンティファイド・メール)の設定方法


続けて ADSP レコードを登録します。

再度「レコードセットの作成」ボタンをクリックします。

【メール】【DKIM】DomainKeys Identified Mail(ドメイン・キー・アイデンティファイド・メール)の設定方法


「レコードセットの作成」画面で以下のように設定します。

  • 名前 ← 「_adsp._domainkey」と入力します。
  • タイプ ← 「TXT – テキスト」を選択します。
  • 値 ← 「”dkim=unknown”」と入力します。

設定が完了したら「作成」ボタンをクリックします。

【メール】【DKIM】DomainKeys Identified Mail(ドメイン・キー・アイデンティファイド・メール)の設定方法


最終的に下図のように 2 つのレコードセットが作成されます。

【メール】【DKIM】DomainKeys Identified Mail(ドメイン・キー・アイデンティファイド・メール)の設定方法


Amazon Route 53 へ公開鍵レコードと ADSP レコードの確認

設定したら登録した「公開鍵レコード」「ADSP レコード」が正しく設定されているか確認します。


[root@redhat7 xxxxxxx.com]# nslookup -type=txt selector20190503._domainkey.xxxxxxx.com 
Server:         172.31.0.2 
Address:        172.31.0.2#53 
 
Non-authoritative answer: 
selector20190503._domainkey.xxxxxxx.com  text = “v=DKIM1\; k=rsa\; p=MIxxxxxxxxxxxxxxxxxxxxxxxxxxxxxxxxxxxxxxxxxxxxxxxxxxxxxxxxxxxxxFuEMnrT5uFN5vmciVxY8+isd7/BHeF/Bu6NLEhTGpgTa2o/4Vgo8zORS311Rv+dB63DFUTvnJyI5OvzPlNe2r/XdE02yMFVErKlIfdAMCMAi4QoUMU+/6sAmqxf3Qx89v/UzMF0HkG+yrcprzu0BwIDAQAB” 
 
Authoritative answers can be found from: 
 
[root@redhat7 xxxxxxx.com]#


[root@redhat7 xxxxxxx.com]# nslookup -type=txt _adsp._domainkey.xxxxxxx.com 
Server:         172.31.0.2 
Address:        172.31.0.2#53 
 
Non-authoritative answer: 
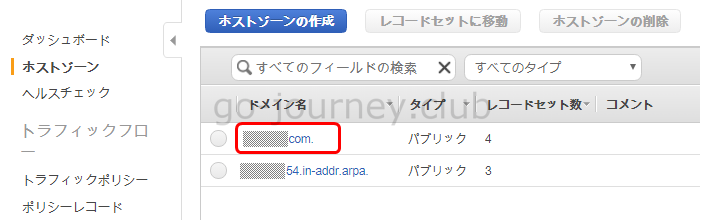
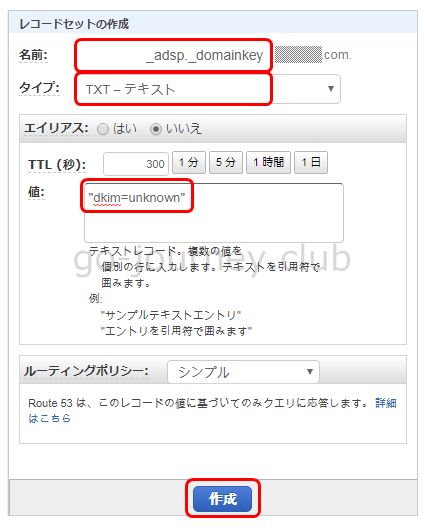
_adsp._domainkey.xxxxxxx.com     text = “dkim=unknown” 
 
Authoritative answers can be found from: 
 
[root@redhat7 xxxxxxx.com]#


■/etc/opendkim.conf ファイルの編集

[root@redhat7 etc]# vi opendkim.conf 
## BASIC OPENDKIM CONFIGURATION FILE 
## See opendkim.conf(5) or /usr/share/doc/opendkim/opendkim.conf.sample for more 
 
## BEFORE running OpenDKIM you must: 
 
## – make your MTA (Postfix, Sendmail, etc.) aware of OpenDKIM 
## – generate keys for your domain (if signing) 
## – edit your DNS records to publish your public keys (if signing) 
 
## See /usr/share/doc/opendkim/INSTALL for detailed instructions. 
 
## DEPRECATED CONFIGURATION OPTIONS 
## 
## The following configuration options are no longer valid.  They should be 
## removed from your existing configuration file to prevent potential issues. 
## Failure to do so may result in opendkim being unable to start. 
## 
## Removed in 2.10.0: 
##   AddAllSignatureResults 
##   ADSPAction 
##   ADSPNoSuchDomain 
##   BogusPolicy 
##   DisableADSP 
##   LDAPSoftStart 
##   LocalADSP 
##   NoDiscardableMailTo 
##   On-PolicyError 
##   SendADSPReports 
##   UnprotectedPolicy 
 
## CONFIGURATION OPTIONS 
 
##  Specifies the path to the process ID file. 
PidFile /var/run/opendkim/opendkim.pid 
 
##  Selects operating modes. Valid modes are s (sign) and v (verify). Default is v. 
##  Must be changed to s (sign only) or sv (sign and verify) in order to sign outgoing 
##  messages. 
#Mode   v 
Mode    sv 
 
##  Log activity to the system log. 
Syslog  yes 
 
##  Log additional entries indicating successful signing or verification of messages. 
SyslogSuccess   yes 
 
##  If logging is enabled, include detailed logging about why or why not a message was 
##  signed or verified. This causes an increase in the amount of log data generated 
##  for each message, so set this to No (or comment it out) if it gets too noisy. 
LogWhy  yes 
 
##  Attempt to become the specified user before starting operations. 
UserID  opendkim:opendkim 
 
##  Create a socket through which your MTA can communicate. 
Socket  inet:8891@localhost 
 
##  Required to use local socket with MTAs that access the socket as a non- 
##  privileged user (e.g. Postfix) 
Umask   002 
 
##  This specifies a text file in which to store DKIM transaction statistics. 
##  OpenDKIM must be manually compiled with –enable-stats to enable this feature. 
# Statistics    /var/spool/opendkim/stats.dat 
 
##  Specifies whether or not the filter should generate report mail back 
##  to senders when verification fails and an address for such a purpose 
##  is provided. See opendkim.conf(5) for details. 
SendReports     yes 
 
##  Specifies the sending address to be used on From: headers of outgoing 
##  failure reports.  By default, the e-mail address of the user executing 
##  the filter is used (executing_user@hostname). 
# ReportAddress “Example.com Postmaster” <postmaster@example.com> 
 
##  Add a DKIM-Filter header field to messages passing through this filter 
##  to identify messages it has processed. 
SoftwareHeader  yes 
 
## SIGNING OPTIONS 
 
##  Selects the canonicalization method(s) to be used when signing messages. 
Canonicalization        relaxed/relaxed 
 
##  Domain(s) whose mail should be signed by this filter. Mail from other domains will 
##  be verified rather than being signed. Uncomment and use your domain name. 
##  This parameter is not required if a SigningTable is in use. 
# Domain        example.com 
 
##  Defines the name of the selector to be used when signing messages. 
Selector        default 
 
##  Specifies the minimum number of key bits for acceptable keys and signatures. 
MinimumKeyBits  1024 
 
##  Gives the location of a private key to be used for signing ALL messages. This 
##  directive is ignored if KeyTable is enabled. 
#KeyFile        /etc/opendkim/keys/default.private 
 
##  Gives the location of a file mapping key names to signing keys. In simple terms, 
##  this tells OpenDKIM where to find your keys. If present, overrides any KeyFile 
##  directive in the configuration file. Requires SigningTable be enabled. 
# KeyTable      /etc/opendkim/KeyTable 
KeyTable        /etc/opendkim/KeyTable 
 
##  Defines a table used to select one or more signatures to apply to a message based 
##  on the address found in the From: header field. In simple terms, this tells 
##  OpenDKIM how to use your keys. Requires KeyTable be enabled. 
# SigningTable  refile:/etc/opendkim/SigningTable 
SigningTable    refile:/etc/opendkim/SigningTable 
 
##  Identifies a set of “external” hosts that may send mail through the server as one 
##  of the signing domains without credentials as such. 
# ExternalIgnoreList    refile:/etc/opendkim/TrustedHosts 
ExternalIgnoreList      refile:/etc/opendkim/TrustedHosts 
 
##  Identifies a set “internal” hosts whose mail should be signed rather than verified. 
# InternalHosts refile:/etc/opendkim/TrustedHosts 
InternalHosts   refile:/etc/opendkim/TrustedHosts 
 
##  Contains a list of IP addresses, CIDR blocks, hostnames or domain names 
##  whose mail should be neither signed nor verified by this filter.  See man 
##  page for file format. 
# PeerList      X.X.X.X 
 
##  Always oversign From (sign using actual From and a null From to prevent 
##  malicious signatures header fields (From and/or others) between the signer 
##  and the verifier.  From is oversigned by default in the Fedora package 
##  because it is often the identity key used by reputation systems and thus 
##  somewhat security sensitive. 
OversignHeaders From 
 
##  Instructs the DKIM library to maintain its own local cache of keys and 
##  policies retrieved from DNS, rather than relying on the nameserver for 
##  caching service. Useful if the nameserver being used by the filter is 
##  not local. 
# QueryCache    yes


■秘密鍵の指定

[root@redhat7 opendkim]# vi /etc/opendkim/KeyTable 
# OPENDKIM KEY TABLE 
# To use this file, uncomment the #KeyTable option in /etc/opendkim.conf, 
# then uncomment the following line and replace example.com with your domain 
# name, then restart OpenDKIM. Additional keys may be added on separate lines. 
 
#default._domainkey.example.com example.com:default:/etc/opendkim/keys/default.private 
selector20190503._domainkey.xxxxxxx.com xxxxxxx.com:selector20190503:/etc/opendkim/keys/xxxxxxx.com/selector20190503.private 
[root@redhat7 opendkim]#


■ドメイン名を指定

[root@redhat7 opendkim]# vi /etc/opendkim/SigningTable 
# OPENDKIM SIGNING TABLE 
# This table controls how to apply one or more signatures to outgoing messages based 
# on the address found in the From: header field. In simple terms, this tells 
# OpenDKIM “how” to apply your keys. 
 
# To use this file, uncomment the SigningTable option in /etc/opendkim.conf, 
# then uncomment one of the usage examples below and replace example.com with your 
# domain name, then restart OpenDKIM. 
 
# WILDCARD EXAMPLE 
# Enables signing for any address on the listed domain(s), but will work only if 
# “refile:/etc/opendkim/SigningTable” is included in /etc/opendkim.conf. 
# Create additional lines for additional domains. 
 
#*@example.com default._domainkey.example.com 
 
# NON-WILDCARD EXAMPLE 
# If “file:” (instead of “refile:”) is specified in /etc/opendkim.conf, then 
# wildcards will not work. Instead, full user@host is checked first, then simply host, 
# then user@.domain (with all superdomains checked in sequence, so “foo.example.com” 
# would first check “user@foo.example.com”, then “user@.example.com”, then “user@.com”), 
# then .domain, then user@*, and finally *. See the opendkim.conf(5) man page under 
# “SigningTable” for more details. 
 
#example.com default._domainkey.example.com 
*@xxxxxxx.com selector20190503._domainkey.xxxxxxx.com


■Postfix の IP アドレスの設定

※特に何も変更しません。

[root@redhat7 opendkim]# cat /etc/opendkim/TrustedHosts 
# OPENDKIM TRUSTED HOSTS 
# To use this file, uncomment the #ExternalIgnoreList and/or the #InternalHosts 
# option in /etc/opendkim.conf then restart OpenDKIM. Additional hosts 
# may be added on separate lines (IP addresses, hostnames, or CIDR ranges). 
# The localhost IP (127.0.0.1) should always be the first entry in this file. 
127.0.0.1 
::1 
#host.example.com 
#192.168.1.0/24


OpenDKIM の起動&自動起動の設定

OpenDKIM の起動及び自動起動の設定をします。


OpenDKIM 自動起動の設定

最初にデフォルトの状態を確認します。

[root@redhat7 ~]# systemctl list-unit-files | grep -i opendkim
opendkim.service           disabled
[root@redhat7 ~]#


OpenDKIM の自動起動設定をします。

[root@redhat7 ~]# systemctl enable opendkim.service
Created symlink from /etc/systemd/system/multi-user.target.wants/opendkim.service to /usr/lib/systemd/system/opendkim.service.
[root@redhat7 ~]#


設定が反映されていることを確認します。

[root@redhat7 ~]# systemctl list-unit-files | grep -i opendkim
opendkim.service          enabled
[root@redhat7 ~]#


OpenDKIM の起動

最初に現在の状態を確認します。

[root@redhat7 ~]# systemctl status opendkim.service 
● opendkim.service – DomainKeys Identified Mail (DKIM) Milter 
   Loaded: loaded (/usr/lib/systemd/system/opendkim.service; enabled; vendor preset: disabled) 
   Active: inactive (dead) 
     Docs: man:opendkim(8) 
           man:opendkim.conf(5) 
           man:opendkim-genkey(8) 
           man:opendkim-genzone(8) 
           man:opendkim-testadsp(8) 
           man:opendkim-testkey 
           http://www.opendkim.org/docs.html 
[root@redhat7 ~]#


OpenDKIM を起動します。

[root@redhat7 ~]# systemctl start opendkim.service


起動状態を確認します。

[root@redhat7 ~]# systemctl status opendkim.service -l 
● opendkim.service – DomainKeys Identified Mail (DKIM) Milter 
   Loaded: loaded (/usr/lib/systemd/system/opendkim.service; enabled; vendor preset: disabled) 
   Active: active (running) since Fri 2019-05-03 13:22:05 UTC; 49s ago 
     Docs: man:opendkim(8) 
           man:opendkim.conf(5) 
           man:opendkim-genkey(8) 
           man:opendkim-genzone(8) 
           man:opendkim-testadsp(8) 
           man:opendkim-testkey 
           http://www.opendkim.org/docs.html 
  Process: 5102 ExecStart=/usr/sbin/opendkim $OPTIONS (code=exited, status=0/SUCCESS) 
 Main PID: 5103 (opendkim) 
   CGroup: /system.slice/opendkim.service 
           mq5103 /usr/sbin/opendkim -x /etc/opendkim.conf -P /var/run/opendkim/opendkim.pid 
 
May 03 13:22:05 redhat7 systemd[1]: Starting DomainKeys Identified Mail (DKIM) Milter… 
May 03 13:22:05 redhat7 systemd[1]: PID file /var/run/opendkim/opendkim.pid not readable (yet?) after start. 
May 03 13:22:05 redhat7 opendkim[5103]: OpenDKIM Filter v2.11.0 starting (args: -x /etc/opendkim.conf -P /var/run/opendkim/opendkim.pid) 
May 03 13:22:05 redhat7 systemd[1]: Started DomainKeys Identified Mail (DKIM) Milter. 
[root@redhat7 ~]#


Postfix の設定

続いて Postfix の /etc/postfix/main.cf ファイルの編集をします。

main.cf の最終行に以下の 4 行を追加します。

# OpenDKIM 設定

smtpd_milters = inet:127.0.0.1:8891
non_smtpd_milters = $smtpd_milters
milter_default_action = accept


Postfix を再起動します。

[root@redhat7 postfix]# systemctl restart postfix.service
[root@redhat7 postfix]#


Postfix の状態を確認します。

[root@redhat7 postfix]# systemctl status postfix.service -l 
● postfix.service – Postfix Mail Transport Agent 
   Loaded: loaded (/usr/lib/systemd/system/postfix.service; enabled; vendor preset: disabled) 
   Active: active (running) since Fri 2019-05-03 13:32:34 UTC; 23s ago 
  Process: 5122 ExecStop=/usr/sbin/postfix stop (code=exited, status=0/SUCCESS) 
  Process: 5135 ExecStart=/usr/sbin/postfix start (code=exited, status=0/SUCCESS) 
  Process: 5133 ExecStartPre=/usr/libexec/postfix/chroot-update (code=exited, status=0/SUCCESS) 
  Process: 5131 ExecStartPre=/usr/libexec/postfix/aliasesdb (code=exited, status=0/SUCCESS) 
 Main PID: 5207 (master) 
   CGroup: /system.slice/postfix.service 
           tq5207 /usr/libexec/postfix/master -w 
           tq5208 pickup -l -t unix -u 
           mq5209 qmgr -l -t unix -u 
 
May 03 13:32:33 redhat7 systemd[1]: Stopped Postfix Mail Transport Agent. 
May 03 13:32:33 redhat7 systemd[1]: Starting Postfix Mail Transport Agent… 
May 03 13:32:34 redhat7 postfix/master[5207]: daemon started — version 2.10.1, configuration /etc/postfix 
May 03 13:32:34 redhat7 systemd[1]: Started Postfix Mail Transport Agent. 
[root@redhat7 postfix]#


メールの送信確認

最後にメールの送信確認をします。

[ec2-user@redhat7 ~]$ echo “インターネットへのメール送信テスト” | mail -s “タイトル: メール送信テスト” xxxxxxxx@gmail.com
[ec2-user@redhat7 ~]$


ログを確認しますが、maillog 上では DKIM で送信されたログは出力されないようです。

[root@redhat7 log]# less /var/log/maillog


May  3 13:56:53 redhat7 postfix/pickup[5208]: 953A2C02436: uid=1000 from= 
May  3 13:56:53 redhat7 postfix/cleanup[5332]: 953A2C02436: message-id=<20190503135653.953A2C02436@xxxxxxx.com> 
May  3 13:56:53 redhat7 opendkim[5103]: 953A2C02436: DKIM-Signature field added (s=selector20190503, d=xxxxxxx.com) ← ここで DKIM が 
May  3 13:56:53 redhat7 postfix/qmgr[5209]: 953A2C02436: from=<ec2-user@xxxxxxx.com>, size=579, nrcpt=1 (queue active) 
May  3 13:56:53 redhat7 postfix/smtp[5335]: smtp_stream_setup: maxtime=300 enable_deadline=0 
May  3 13:56:53 redhat7 postfix/smtp[5335]: < smtp.gmail.com[74.125.203.109]:587: 220 smtp.gmail.com ESMTP a80sm6640966pfj.61 – gsmtp 
May  3 13:56:53 redhat7 postfix/smtp[5335]: > smtp.gmail.com[74.125.203.109]:587: EHLO xxxxxxx.com 
May  3 13:56:54 redhat7 postfix/smtp[5335]: < smtp.gmail.com[74.125.203.109]:587: 250-smtp.gmail.com at your service, [54.xxx.xxx.xxx] 
May  3 13:56:54 redhat7 postfix/smtp[5335]: < smtp.gmail.com[74.125.203.109]:587: 250-SIZE 35882577 
May  3 13:56:54 redhat7 postfix/smtp[5335]: < smtp.gmail.com[74.125.203.109]:587: 250-8BITMIME 
May  3 13:56:54 redhat7 postfix/smtp[5335]: < smtp.gmail.com[74.125.203.109]:587: 250-STARTTLS 
May  3 13:56:54 redhat7 postfix/smtp[5335]: < smtp.gmail.com[74.125.203.109]:587: 250-ENHANCEDSTATUSCODES 
May  3 13:56:54 redhat7 postfix/smtp[5335]: < smtp.gmail.com[74.125.203.109]:587: 250-PIPELINING 
May  3 13:56:54 redhat7 postfix/smtp[5335]: < smtp.gmail.com[74.125.203.109]:587: 250-CHUNKING 
May  3 13:56:54 redhat7 postfix/smtp[5335]: < smtp.gmail.com[74.125.203.109]:587: 250 SMTPUTF8 
May  3 13:56:54 redhat7 postfix/smtp[5335]: server features: 0x101f size 35882577 
May  3 13:56:54 redhat7 postfix/smtp[5335]: Using ESMTP PIPELINING, TCP send buffer size is 46080, PIPELINING buffer size is 4096 
May  3 13:56:54 redhat7 postfix/smtp[5335]: smtp_stream_setup: maxtime=300 enable_deadline=0 
May  3 13:56:54 redhat7 postfix/smtp[5335]: > smtp.gmail.com[74.125.203.109]:587: STARTTLS 
May  3 13:56:54 redhat7 postfix/smtp[5335]: < smtp.gmail.com[74.125.203.109]:587: 220 2.0.0 Ready to start TLS 
May  3 13:56:54 redhat7 postfix/smtp[5335]: send attr request = seed 
May  3 13:56:54 redhat7 postfix/smtp[5335]: send attr size = 32 
May  3 13:56:54 redhat7 postfix/smtp[5335]: private/tlsmgr: wanted attribute: status 
May  3 13:56:54 redhat7 postfix/smtp[5335]: input attribute name: status 
May  3 13:56:54 redhat7 postfix/smtp[5335]: input attribute value: 0 
May  3 13:56:54 redhat7 postfix/smtp[5335]: private/tlsmgr: wanted attribute: seed 
May  3 13:56:54 redhat7 postfix/smtp[5335]: input attribute name: seed 
May  3 13:56:54 redhat7 postfix/smtp[5335]: input attribute value: FtlaRaTKw9U0dT+z4bezmRj4A5xVZyHypciHvCHGi5g= 
May  3 13:56:54 redhat7 postfix/smtp[5335]: private/tlsmgr: wanted attribute: (list terminator) 
May  3 13:56:54 redhat7 postfix/smtp[5335]: input attribute name: (end) 
May  3 13:56:54 redhat7 postfix/smtp[5335]: smtp_stream_setup: maxtime=300 enable_deadline=0 
May  3 13:56:54 redhat7 postfix/smtp[5335]: > smtp.gmail.com[74.125.203.109]:587: EHLO xxxxxxx.com 
May  3 13:56:54 redhat7 postfix/smtp[5335]: < smtp.gmail.com[74.125.203.109]:587: 250-smtp.gmail.com at your service, [54.xxx.xxx.xxx] 
May  3 13:56:54 redhat7 postfix/smtp[5335]: < smtp.gmail.com[74.125.203.109]:587: 250-SIZE 35882577 
May  3 13:56:54 redhat7 postfix/smtp[5335]: < smtp.gmail.com[74.125.203.109]:587: 250-8BITMIME 
May  3 13:56:54 redhat7 postfix/smtp[5335]: < smtp.gmail.com[74.125.203.109]:587: 250-AUTH LOGIN PLAIN XOAUTH2 PLAIN-CLIENTTOKEN OAUTHBEARER XOAUTH 
May  3 13:56:54 redhat7 postfix/smtp[5335]: < smtp.gmail.com[74.125.203.109]:587: 250-ENHANCEDSTATUSCODES 
May  3 13:56:54 redhat7 postfix/smtp[5335]: < smtp.gmail.com[74.125.203.109]:587: 250-PIPELINING 
May  3 13:56:54 redhat7 postfix/smtp[5335]: < smtp.gmail.com[74.125.203.109]:587: 250-CHUNKING 
May  3 13:56:54 redhat7 postfix/smtp[5335]: < smtp.gmail.com[74.125.203.109]:587: 250 SMTPUTF8 
May  3 13:56:54 redhat7 postfix/smtp[5335]: match_string: LOGIN ~? plain 
May  3 13:56:54 redhat7 postfix/smtp[5335]: match_list_match: LOGIN: no match 
May  3 13:56:54 redhat7 postfix/smtp[5335]: match_string: PLAIN ~? plain 
May  3 13:56:54 redhat7 postfix/smtp[5335]: match_string: XOAUTH2 ~? plain 
May  3 13:56:54 redhat7 postfix/smtp[5335]: match_list_match: XOAUTH2: no match 
May  3 13:56:54 redhat7 postfix/smtp[5335]: match_string: PLAIN-CLIENTTOKEN ~? plain 
May  3 13:56:54 redhat7 postfix/smtp[5335]: match_list_match: PLAIN-CLIENTTOKEN: no match 
May  3 13:56:54 redhat7 postfix/smtp[5335]: match_string: OAUTHBEARER ~? plain 
May  3 13:56:54 redhat7 postfix/smtp[5335]: match_list_match: OAUTHBEARER: no match 
May  3 13:56:54 redhat7 postfix/smtp[5335]: match_string: XOAUTH ~? plain 
May  3 13:56:54 redhat7 postfix/smtp[5335]: match_list_match: XOAUTH: no match 
May  3 13:56:54 redhat7 postfix/smtp[5335]: server features: 0x102f size 35882577 
May  3 13:56:54 redhat7 postfix/smtp[5335]: Using ESMTP PIPELINING, TCP send buffer size is 46080, PIPELINING buffer size is 4096 
May  3 13:56:54 redhat7 postfix/smtp[5335]: maps_find: smtp_sasl_passwd: smtp.gmail.com: not found 
May  3 13:56:54 redhat7 postfix/smtp[5335]: maps_find: smtp_sasl_passwd: hash:/etc/postfix/sasl_passwd(0,lock|fold_fix): [smtp.gmail.com]:587 = xxxxxxxx@gmail.com:Password01(パスワードが平文で表示されます) 
May  3 13:56:54 redhat7 postfix/smtp[5335]: smtp_sasl_passwd_lookup: host `smtp.gmail.com’ user `xxxxxxxx@gmail.com’ pass `Password01(パスワードが平文で表示されます)’ 
May  3 13:56:54 redhat7 postfix/smtp[5335]: starting new SASL client 
May  3 13:56:54 redhat7 postfix/smtp[5335]: name_mask: noanonymous 
May  3 13:56:54 redhat7 postfix/smtp[5335]: smtp_sasl_authenticate: smtp.gmail.com[74.125.203.109]:587: SASL mechanisms PLAIN 
May  3 13:56:54 redhat7 postfix/smtp[5335]: xsasl_cyrus_client_get_user: xxxxxxxx@gmail.com 
May  3 13:56:54 redhat7 postfix/smtp[5335]: xsasl_cyrus_client_get_passwd: Password01(パスワードが平文で表示されます) 
May  3 13:56:54 redhat7 postfix/smtp[5335]: xsasl_cyrus_client_first: uncoded initial reply: \0xxxxxxxx@gmail.com\000Password01(パスワードが平文で表示されます) 
May  3 13:56:54 redhat7 postfix/smtp[5335]: > smtp.gmail.com[74.125.203.109]:587: AUTH PLAIN AGFjdGl2ZXZpc0BnbWFpbC5jb20AMTE5MnNhc2FnYXdh 
May  3 13:56:55 redhat7 postfix/smtp[5335]: < smtp.gmail.com[74.125.203.109]:587: 235 2.7.0 Accepted 
May  3 13:56:55 redhat7 postfix/smtp[5335]: smtp_stream_setup: maxtime=300 enable_deadline=0 
May  3 13:56:55 redhat7 postfix/smtp[5335]: > smtp.gmail.com[74.125.203.109]:587: MAIL FROM:<ec2-user@xxxxxxx.com> SIZE=579 BODY=8BITMIME 
May  3 13:56:55 redhat7 postfix/smtp[5335]: > smtp.gmail.com[74.125.203.109]:587: RCPT TO:<xxxxxxxx@gmail.com> 
May  3 13:56:55 redhat7 postfix/smtp[5335]: > smtp.gmail.com[74.125.203.109]:587: DATA 
May  3 13:56:55 redhat7 postfix/smtp[5335]: smtp_stream_setup: maxtime=300 enable_deadline=0 
May  3 13:56:55 redhat7 postfix/smtp[5335]: < smtp.gmail.com[74.125.203.109]:587: 250 2.1.0 OK a80sm6640966pfj.61 – gsmtp 
May  3 13:56:55 redhat7 postfix/smtp[5335]: smtp_stream_setup: maxtime=300 enable_deadline=0 
May  3 13:56:55 redhat7 postfix/smtp[5335]: < smtp.gmail.com[74.125.203.109]:587: 250 2.1.5 OK a80sm6640966pfj.61 – gsmtp 
May  3 13:56:55 redhat7 postfix/smtp[5335]: smtp_stream_setup: maxtime=120 enable_deadline=0 
May  3 13:56:55 redhat7 postfix/smtp[5335]: < smtp.gmail.com[74.125.203.109]:587: 354  Go ahead a80sm6640966pfj.61 – gsmtp 
May  3 13:56:55 redhat7 postfix/smtp[5335]: smtp_stream_setup: maxtime=180 enable_deadline=0 
May  3 13:56:55 redhat7 postfix/smtp[5335]: > smtp.gmail.com[74.125.203.109]:587: . 
May  3 13:56:55 redhat7 postfix/smtp[5335]: > smtp.gmail.com[74.125.203.109]:587: QUIT 
May  3 13:56:55 redhat7 postfix/smtp[5335]: smtp_stream_setup: maxtime=600 enable_deadline=0 
May  3 13:56:56 redhat7 postfix/smtp[5335]: < smtp.gmail.com[74.125.203.109]:587: 250 2.0.0 OK  1556891816 a80sm6640966pfj.61 – gsmtp 
May  3 13:56:56 redhat7 postfix/smtp[5335]: 953A2C02436: to=<xxxxxxxx@gmail.com>, relay=smtp.gmail.com[74.125.203.109]:587, delay=3, delays=0.06/0.01/1.5/1.4, dsn=2.0.0, status=sent (250 2.0.0 OK  1556891816 a80sm6640966pfj.61 – gsmtp) 
May  3 13:56:56 redhat7 postfix/smtp[5335]: name_mask: resource 
May  3 13:56:56 redhat7 postfix/smtp[5335]: name_mask: software 
May  3 13:56:56 redhat7 postfix/smtp[5335]: disposing SASL state information 
May  3 13:56:56 redhat7 postfix/qmgr[5209]: 953A2C02436: removed


受信したメールのソースを確認します。

Gmail にログインして対象のメールを選択して右上の丸印をクリックして「メッセージのソースを表示」をクリックします。

【メール】【DKIM】DomainKeys Identified Mail(ドメイン・キー・アイデンティファイド・メール)の設定方法


■メッセージのソース

【メール】【DKIM】DomainKeys Identified Mail(ドメイン・キー・アイデンティファイド・メール)の設定方法


■メッセージのソース

Return-Path: <xxxxxxxx@gmail.com> 
Received: from xxxxxxx.com (xxxxxxx.com. [54.xxx.xxx.xxx]) 
        by smtp.gmail.com with ESMTPSA id a80sm6640966pfj.61.2019.05.03.06.56.55 
        for <xxxxxxxx@gmail.com> 
        (version=TLS1_2 cipher=ECDHE-RSA-AES128-GCM-SHA256 bits=128/128); 
        Fri, 03 May 2019 06:56:55 -0700 (PDT) 
From: Cloud User <xxxxxxxx@gmail.com> 
X-Google-Original-From: ec2-user@xxxxxxx.com (Cloud User) 
Received: by xxxxxxx.com (Postfix, from userid 1000) id 953A2C02436; Fri, 
  3 May 2019 13:56:53 +0000 (UTC) 
DKIM-Filter: OpenDKIM Filter v2.11.0 xxxxxxx.com 953A2C02436 
DKIM-Signature: v=1; a=rsa-sha256; c=relaxed/relaxed; d=xxxxxxx.com; s=selector20190503; t=1556891813; bh=PFPSQZzf/l3dN+wlr0BS4BZ7L1z7l72dX8k3jwGIh1M=; h=Date:To:Subject:From:From; b=uaJIgXPUpmdGbPAayrZY+7jlM2Kc8mlY4wQOmR9plSOLXh2HjTctAq+eXMJGGu6y9 
 ++/ytcwGESMs9cl5Ag9qm4bOxGZII8lglxvuq+iHznalHh79pW6lmemm5HeOqoGz1U 
 PrVnoTCYpIPfxYCrEeR9lfzuWBp/Y2/BPRWzFZpE= 
Date: Fri, 03 May 2019 13:56:53 +0000 
To: xxxxxxxx@gmail.com 
Subject: タイトル:メール送信テスト 
User-Agent: Heirloom mailx 12.5 7/5/10 
MIME-Version: 1.0 
Content-Type: text/plain; charset=utf-8 
Content-Transfer-Encoding: 8bit 
Message-Id: <20190503135653.953A2C02436@xxxxxxx.com> 
 
インターネットへのメール送信テスト


参考にしたサイト

Postfix DKIM 認証 設定メモ(CentOS6.5+OpenDKIM)

https://blog.apar.jp/linux/856/


よかったらシェアしてね!
  • URLをコピーしました!
  • URLをコピーしました!

この記事を書いた人

コメント

コメントする

AlphaOmega Captcha Medica  –  What Do You See?


このサイトはスパムを低減するために Akismet を使っています。コメントデータの処理方法の詳細はこちらをご覧ください